 ES
ES EN
ENHow to create an Automation Campaign for special days of the Year
You will use this Campaign when you want your Email to be sent on special days of the year. An example would be to automate a birthday greeting for your Subscribers.
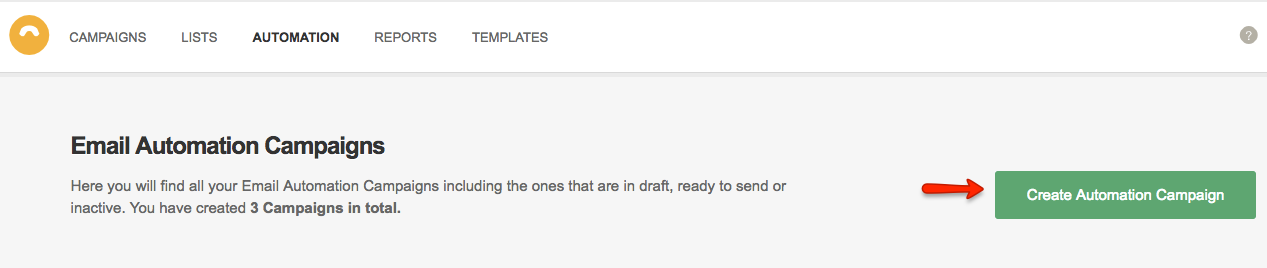
The first step to send this Campaign is to login to your Doppler account. If you don’t have one just sign up for free here. Then click on the “Automation” section.

Once you are there, select “Create Automation Campaign”.
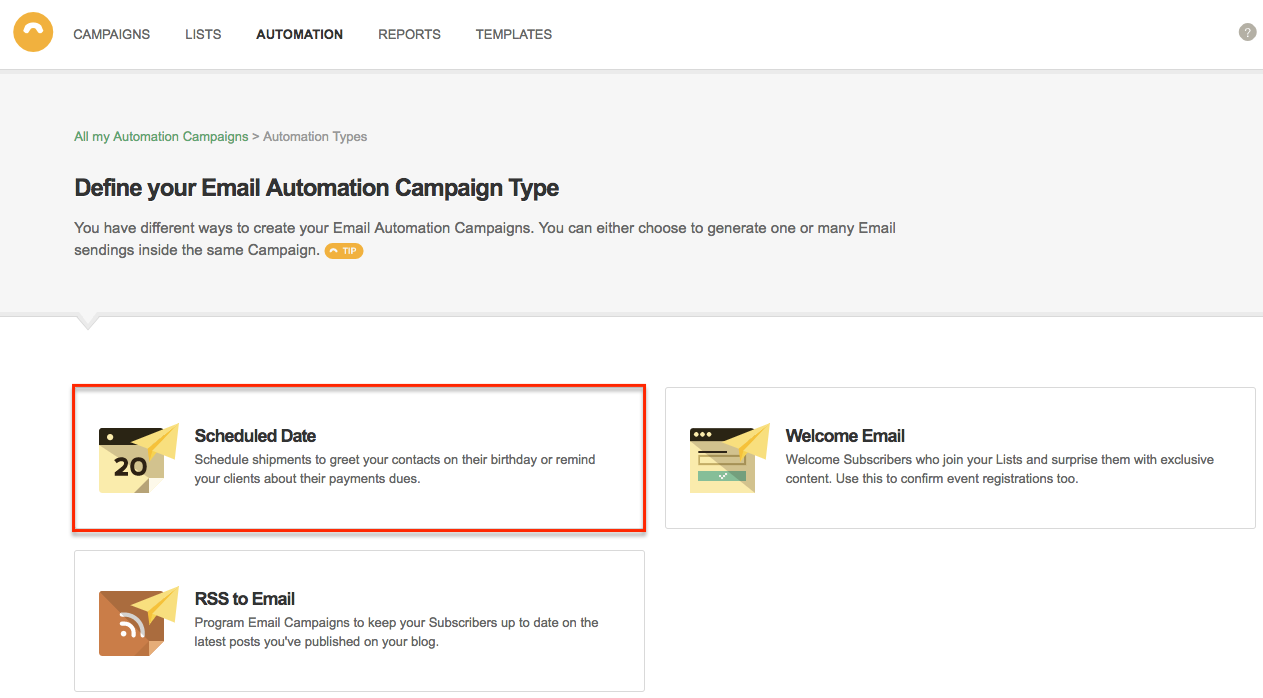
You will see 3 Email Automation Campaign types. Choose “Scheduled Date”.
Enter a name for your Campaign that will help you identify it afterwards.

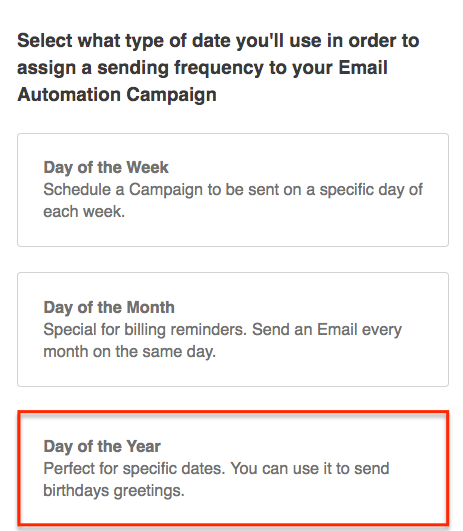
Then, you should choose what kind of Scheduled Day you need to be executed. In this case, you will choose “Day of the Year”.
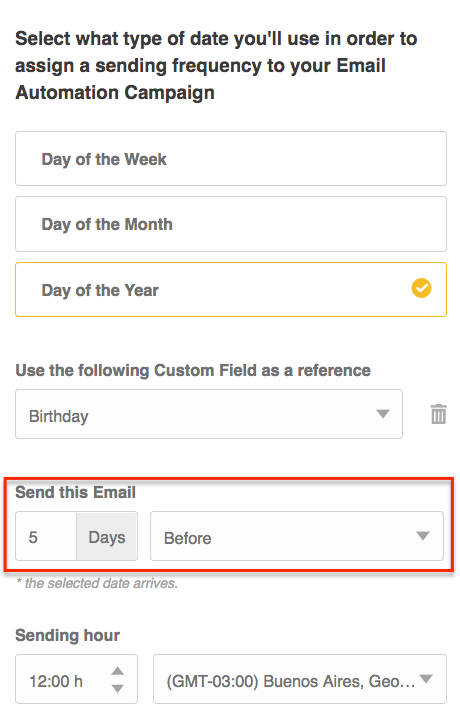
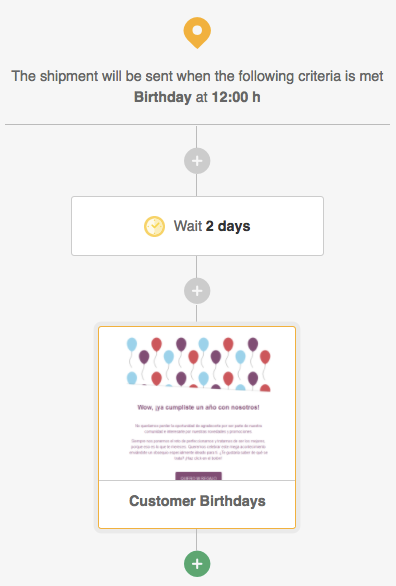
For this example we will use a Custom Field called “Birthday”. You also have the option to create a sequence of sendings. Remember that the day you choose here will be the baseline from which the next sendings will be executed. In this case, we will choose “5 days before” the selected date arrives.
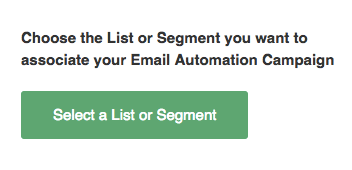
Now you should choose your Campaign’s recipients by clicking on the “Select a List or Segment” button.
You can select the amount of Lists you want or even select the option “Send to all my contacts”, this will include the ones that are not part of any of your Lists.
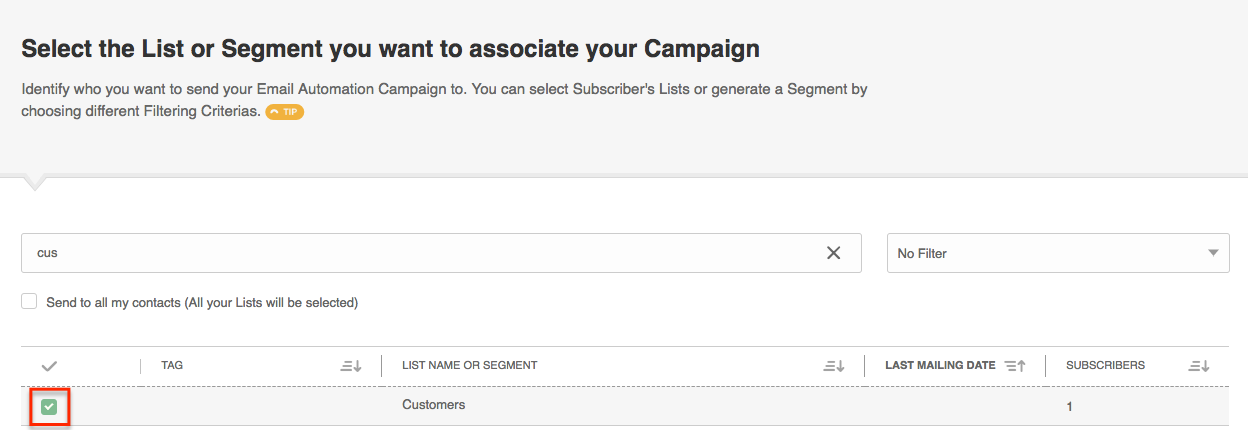
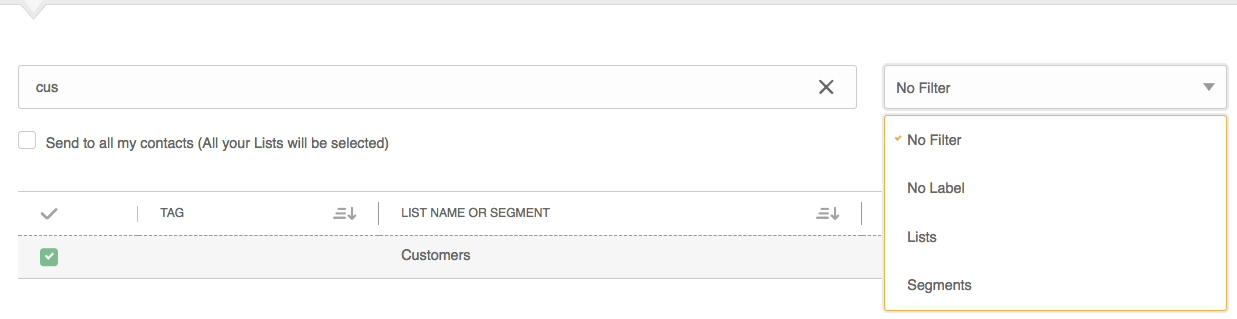
You can also choose a “Filter” if you want, for example, by selecting a Segment you have created or a List with a specific Label. Once you finish, click “Confirm selection”.
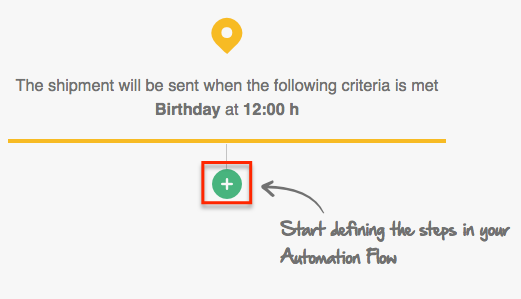
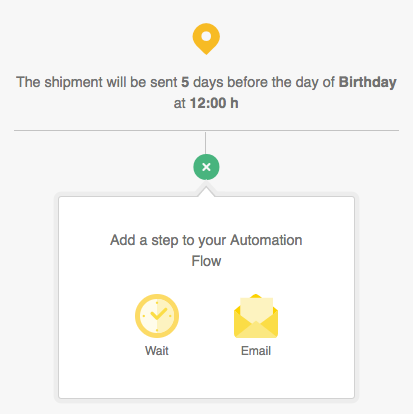
Then you will have to start defining the steps of your Automation Flow. To start press the + icon that appears on the canvas.
You will see two options: “Wait” and “Email”.
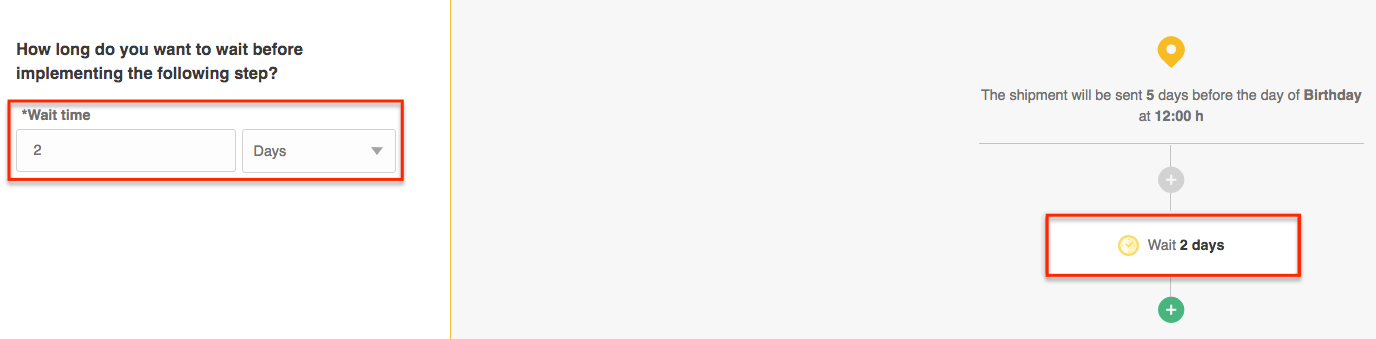
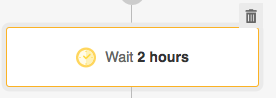
Choose “Wait” if you want certain time to make the second shipment. For example, you can set two days later to send another Email by typing the number 2 in the “Wait time” field and choosing the “Days” option. The data will automatically appear on the canvas on the right.
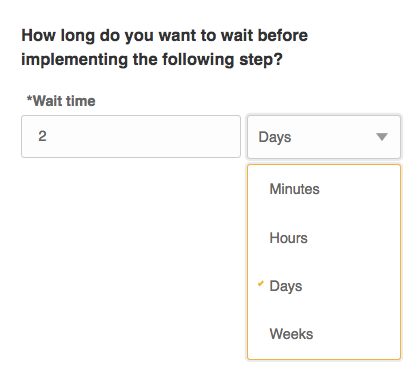
You can also set a “Wait time” of minutes, hours and even weeks.
When you choose the “Email” option, you must configure the Basic Information of your shipment just as you do with the rest of your Doppler Email Campaigns.

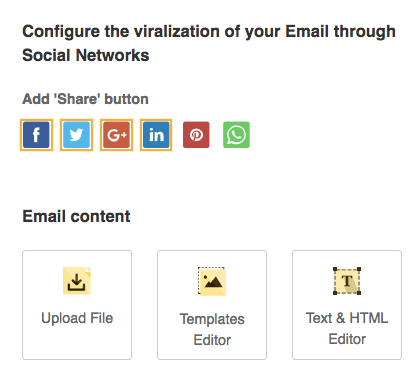
Then you will have to configure the viralization of your Campaign, if you want it to be shared in Social Networks, and define the Email Content. You can choose to Import an HTML file, edit one of our Templates or create a Plain-Text Campaign.
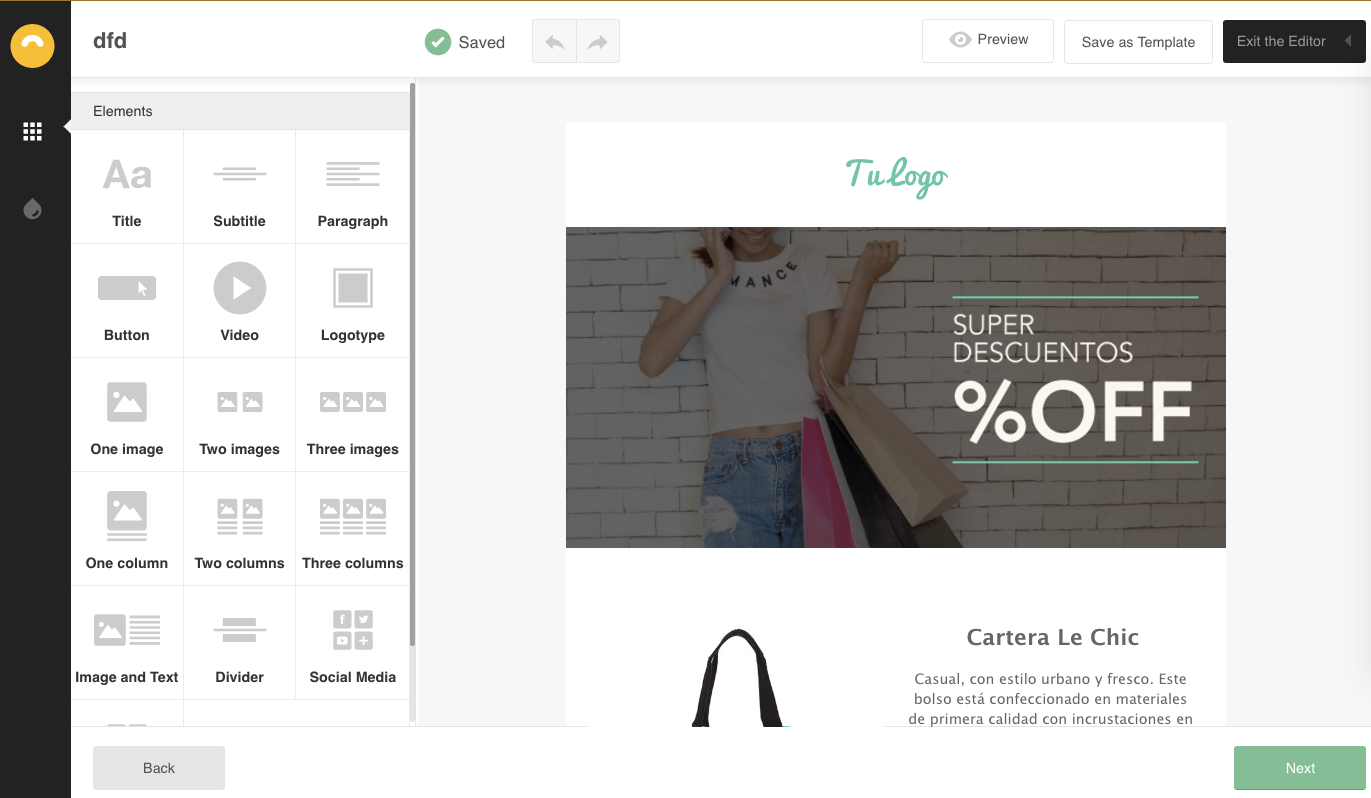
The Template Editor option is ideal for those who do not have HTML knowledge and want to create Email Campaigns in minutes. If you have your own Templates you can choose one from the “My Templates“ section, otherwise you can select one of the available in the different categories.
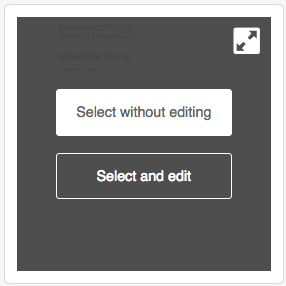
Clicking on one will display two options: “Select without editing” if you want to leave it as it is or “Select and edit” in case you want to modify it from our Editor.
If you choose the option to edit a Template, you will be directed to our Editor. Remember that you can change everything you want: images, text, colors and add links with just drag and drop elements. Once you have your Email ready, click “Next”.
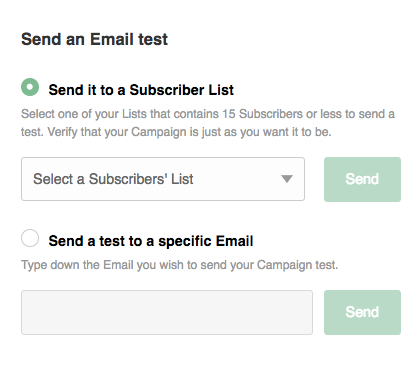
Once you have created the Content of the Email you will be able to make a Campaign test, just as you do with the other Campaigns that you create in Doppler, in order to verify that there is no error.
Good job! You already have your Automation Flow configured for a Day of the Year. On the canvas you will see all the detailed steps and also you can continue adding. If you want to modify some, just click on it and on the left the panel will be displayed from where you can make the changes you want.
If you want to delete some of the steps, just by placing the cursor on it you will see the “Delete” icon appear.
All the steps that you create and configure will be saved automatically, although you also have the option “Save” in the upper margin of the screen.
To go back or go forward, you always have the buttons “Undo” and “Redo”.
Finally, you will see in the upper part a rectangle that will indicate the steps that you are completing and if there are some that has been incomplete.

Now you complete the same steps as you did with your previous sending and, once you’ve finished, with a click on “Start Automation”, your Automation Campaign will start running!
Did you know that you can also schedule your Email Automation Campaigns for a “Day of the Week” or “Day of the Month”? Access to our Tutorials!
Have a great Campaign!


Doppler informs you that the personal data that you provide to us when completing this form will be treated by Doppler LLC as responsible for this web.
Purpose: To allow you to make comments in our help center.
Legitimation: Consent of the applicant.
Recipients: Your data will be saved by Doppler and Digital Ocean as hosting company.
Additional information: In the Doppler Privacy Policy you’ll find additional information about the collection and use of your personal information by Doppler, including information on access, conservation, rectification, deletion, security, cross-border data transfers and other issues.