 ES
ES EN
ENHow to integrate Typeform with Doppler
One of the greatest virtues that Digital Marketing offers us is the possibility of making quick decisions based on the opinions of our Subscribers and clients. We value it a lot, that’s why we have worked on an integration of Doppler with Typeform so that you can take advantage of that type of information you obtain.
If you are already carrying out surveys and polls in Typeform, we are going to show you how to synchronize your account with Doppler and send Email Marketing or SMS Campaigns to your contacts.
What will you be able to do thanks to this integration?
Automatically import the responses you get from Typeform surveys and polls into your Doppler Lists. That way, you can activate responses for each of those Lists. That is, automatically send both Emails and specific text messages to people who have chosen a certain option in your survey.
You will be able to activate Emails with content of interest to your users, automatically.
This integration helps you automate your messages, in a personalized and segmented way according to the information your respondents provide. Dare to try it!
Step by step to integrate Typeform with Doppler
Before you begin, keep in mind that this integration requires you to take actions on both platforms.
Actions to perform from your Doppler account
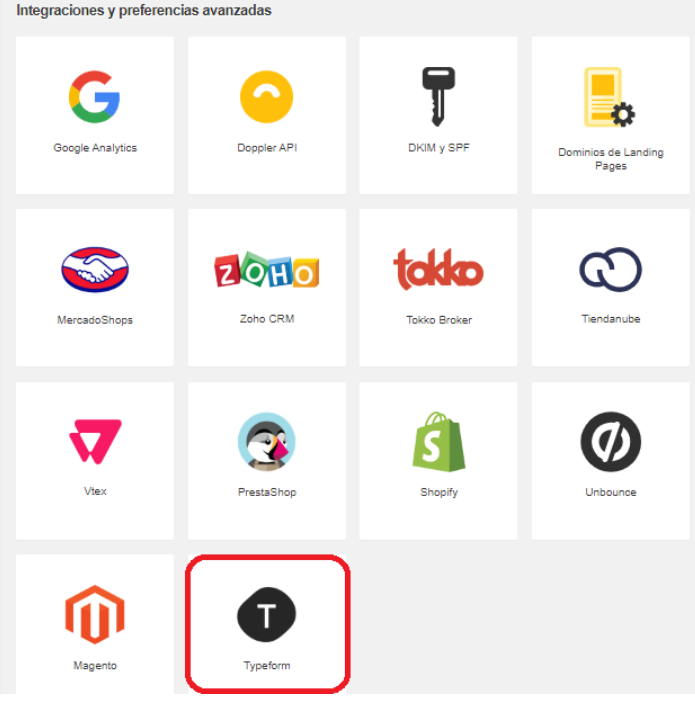
Log in to your Doppler account and go to the Integrations section. Once you have logged in, there you will find the Typeform logo.
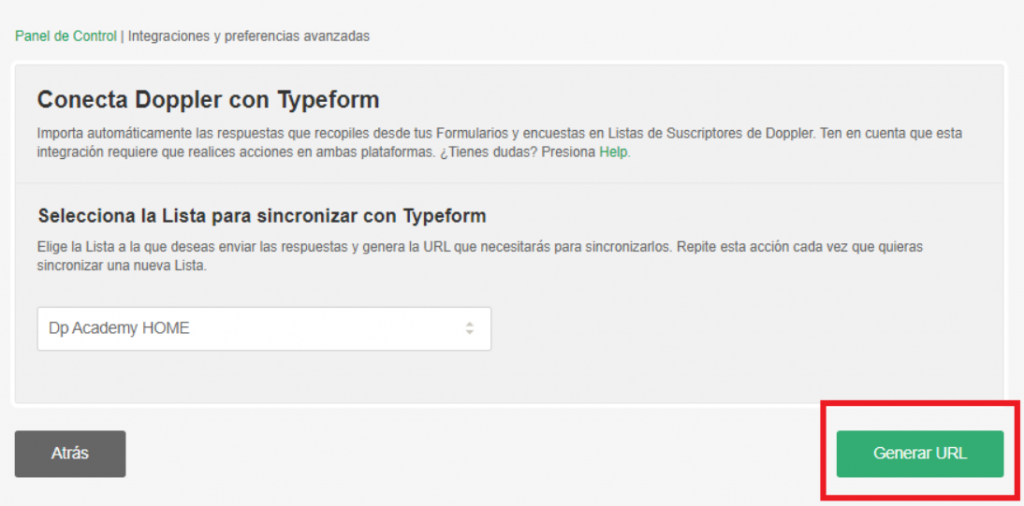
After clicking on the logo, you will have to select the Doppler List where you want to send your responses. Once you do this, the Generate URL button will be enabled. You need to create a URL for each List you want to sync.
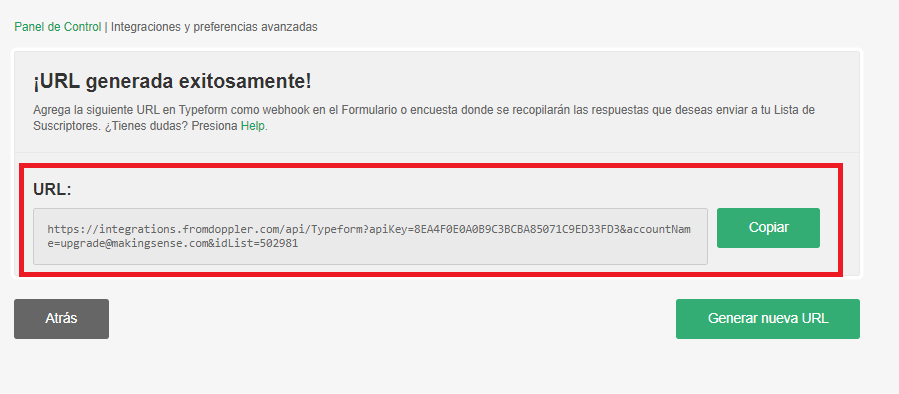
The URL will be generated automatically. What should you do with it? You must place it in the survey or Typeform Form so that the synchronization of that List is done. There we leave you a Copy button to make it easier for you.
Actions to perform from your Typeform account
First log into your Typeform account. There you can create a new project. That project will be the one you integrate with your Doppler Lists.
How do you do it? Through a Webhook. The Typeform team tells you well what a Webhook is. And here we show you, step by step, how to make the connection.
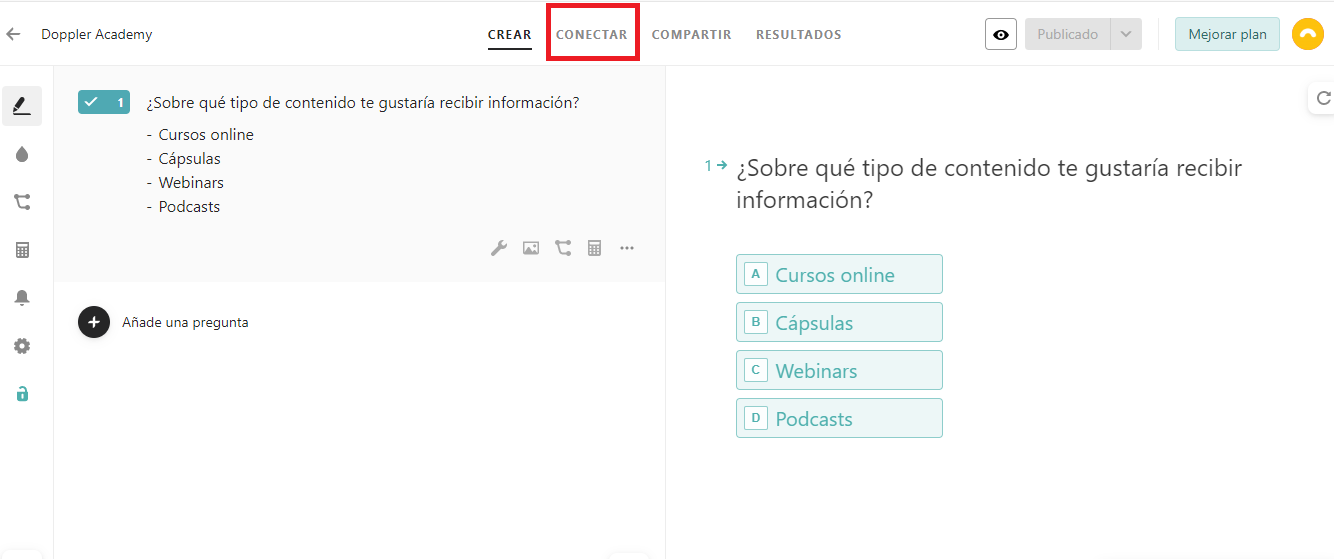
First you create a project with the name you choose. Then, you add one of the questions from your survey with its response options and finally, on the same screen you go to Connect.
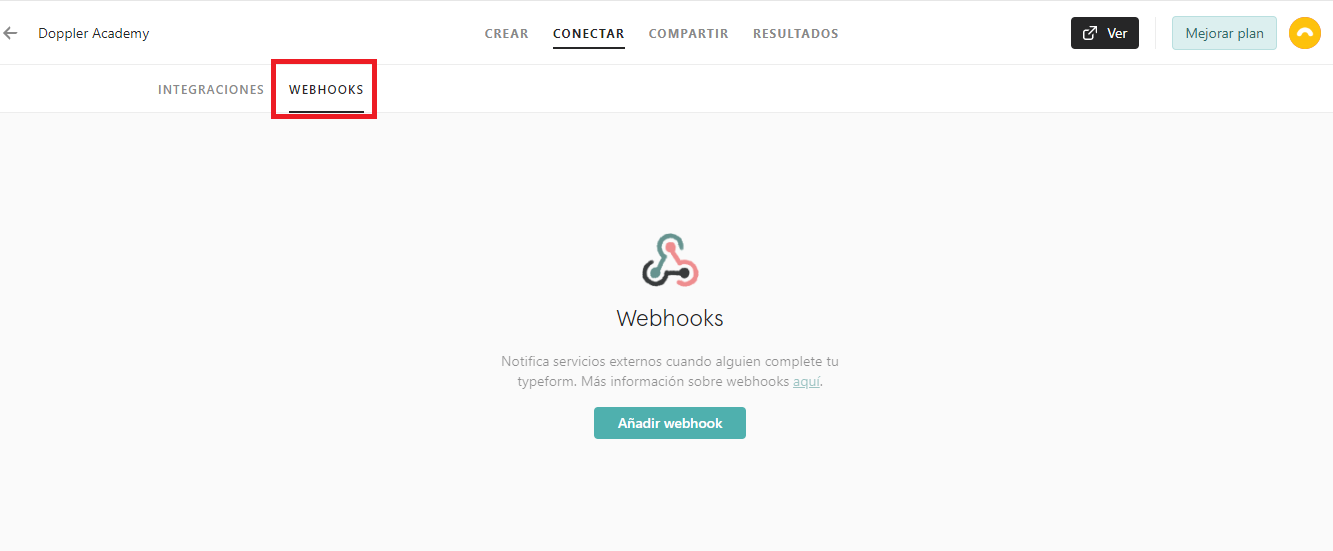
Next, go to the Webhook option, available in the bar. You will have the possibility to Add Webhook, directly there on the button. Click to advance.
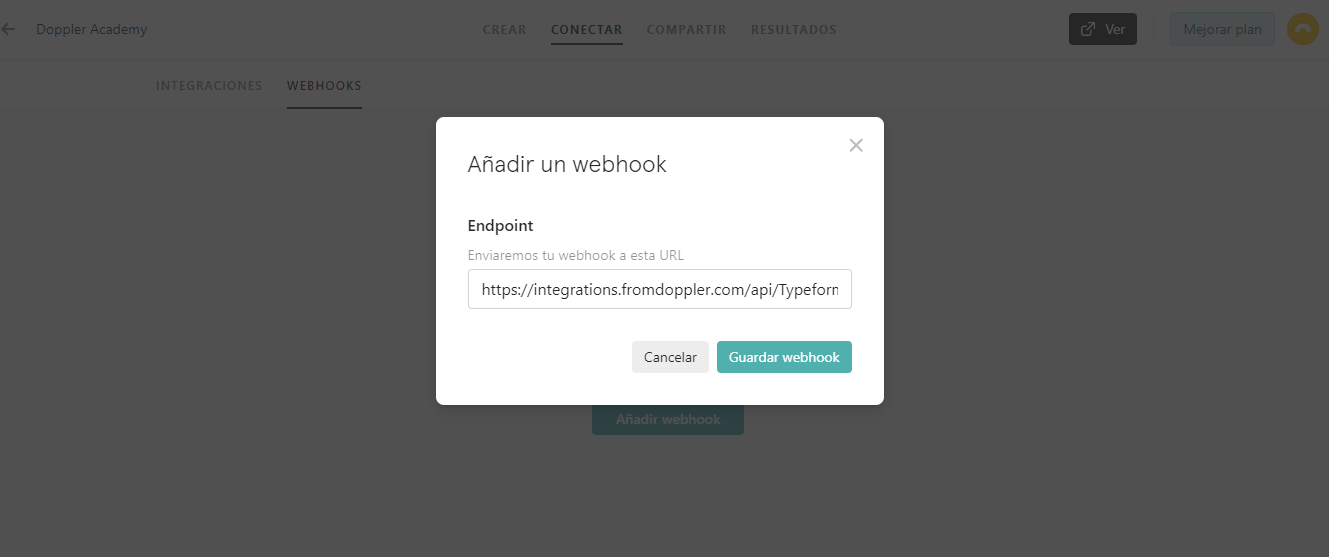
When you click, a box will be displayed where you must paste the URL that you had previously generated in Doppler. That URL will allow you to synchronize the responses of that Typeform project with the Doppler List that is associated with it.
After pasting the URL, save the Webhook to complete the sync.
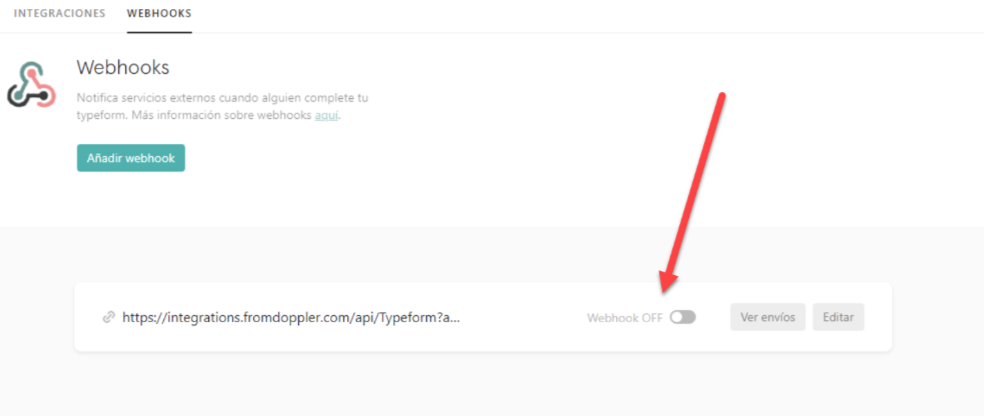
You have the option to View shipments and Edit the synchronization you just made. Now the responses you get in Typeform will be automatically imported into the Doppler List you previously selected.
Remember that the webhook that must be created to track subscribers who fill out a form from that app to Doppler must remain in the “ON” state. That is, you must modify the status of the button (which by default is OFF) so that synchronization is actually active.
Important: remember that once the integration is done and the list is synchronized, it will bring the data of the contacts who from that moment complete the associated form/survey, not those who have completed before (for those a manual import would have to be done)
How to automate Email Marketing Campaigns from this integration
Now that you know how to integrate, we’d like to dive deeper into how you can send your Emails after getting information about your respondents in Typeform.
Let’s look at a practical example from Doppler Academy:
We have integrated Typeform and Doppler accounts. On the first platform, we conduct a Survey and ask our Subscribers what they would like to learn at Doppler Academy. The response options are:
- Online courses
- Capsules
- Webinars
- Podcasts
In Doppler, we have already created a specific List for this survey and have added the Webhook, as we saw in the steps above. Then, the people who respond will be automatically imported into that List.
What you need to do is assign a reference to the question, so that Doppler can identify the people and their answers. You do this after clicking on the tool 🔧: Question configuration.
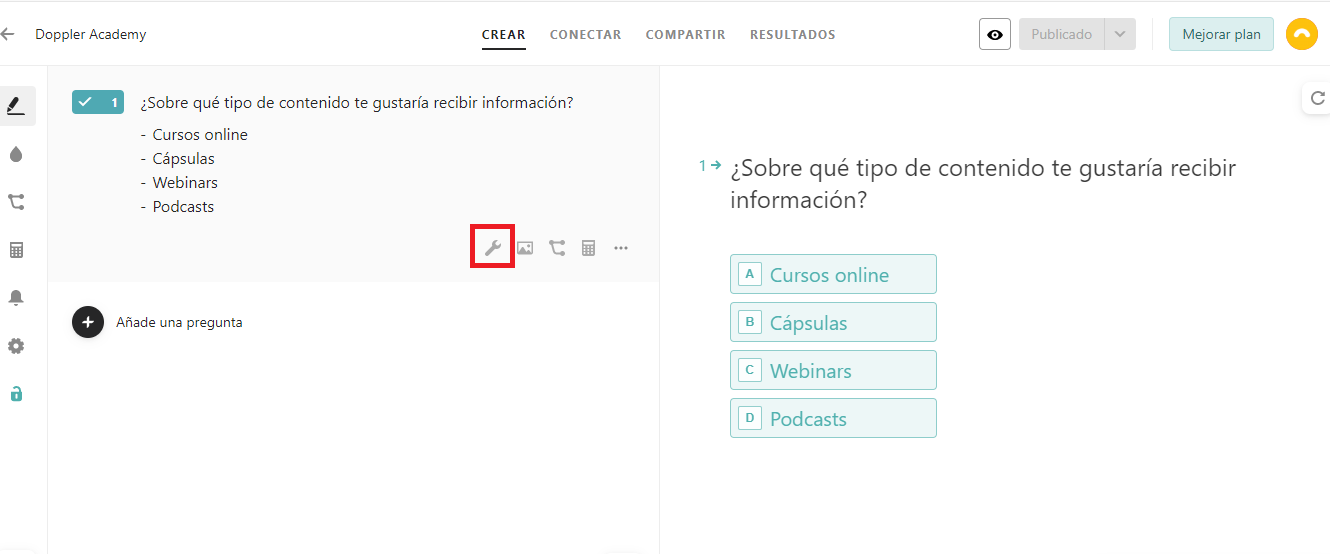
To your left, a Menu will be displayed with options for configuring that question you selected. At the end of that list, you can name the question with a reference. This will not be visible to your interviewers, and it will help you so that Doppler recognizes it.
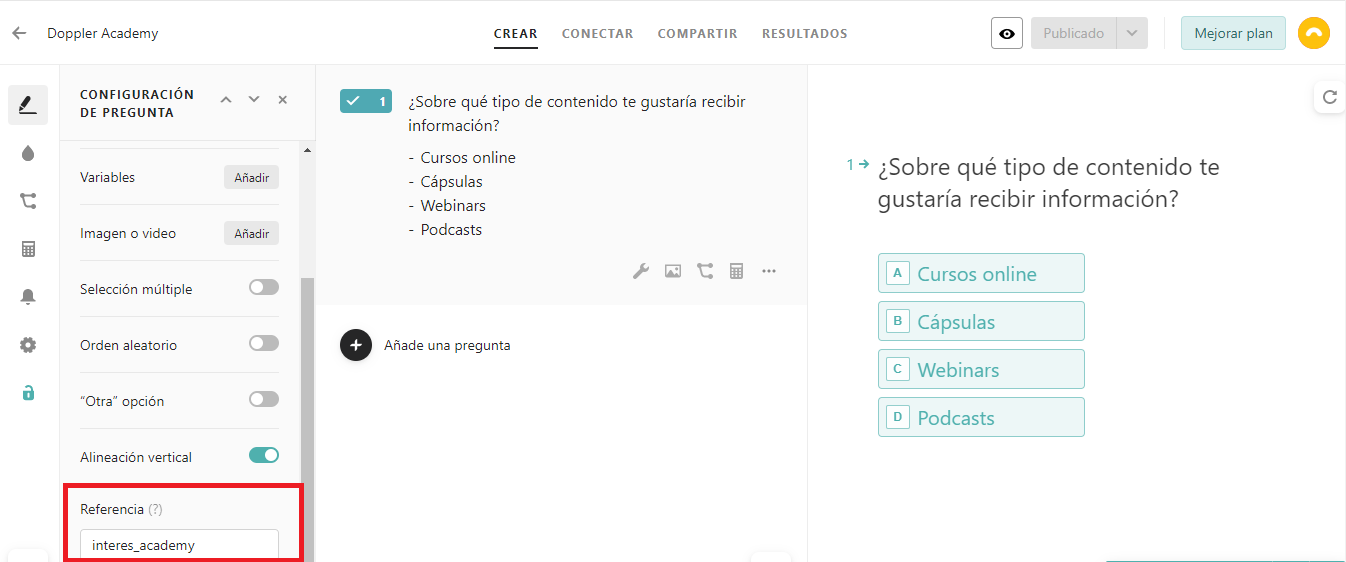
This time, we named it interes_academy.
What you should do next is create in Doppler, custom text-type fields with the names of the possible answers: Courses, Capsules, Webinars and Podcast. Remember not to use spaces or accents in your text fields.
Once you do this, you can divide the people who enter your List based on their response. As a List Subscription Automation, you can set the condition of the type of response chosen by the respondent.
That is, associate each custom Field with a new List:
- Interested in Courses
- Interested in Capsules
- Interested in Webinars
- Interested in Podcasts
And so, for each of those Lists, you can schedule a specific Email to be triggered, automatically, some time later. In that email you will show the content that the person has indicated that they would like to receive.
We assure you that you will be more effective in your communications. You will be able to arrive at the right time, with the right message.
How to use the field mapping function
1- First of all, you must create and publish a form. The minimum components you must have are: “Email” or “Contact Information” component.
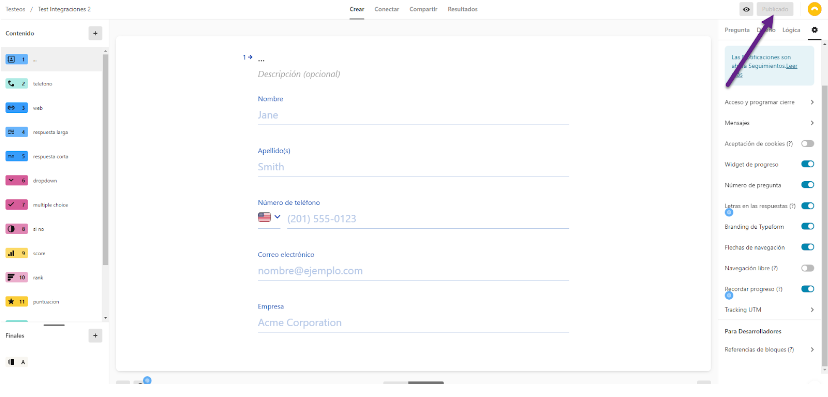
Next, this pop-up will appear where you have to add the name of the Doppler custom field in the corresponding field.
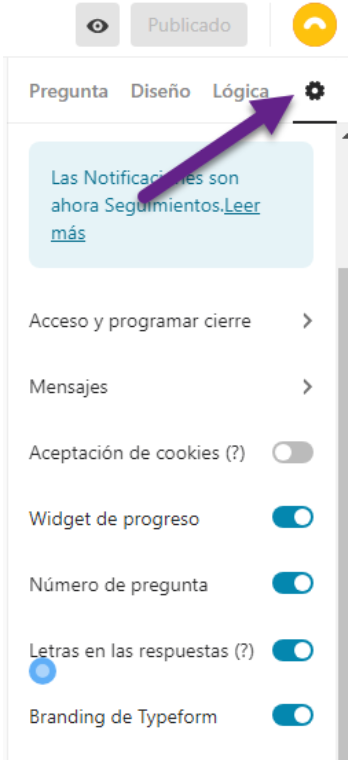
2- Once published, the “Block References” option is enabled within the configuration (you can see it in the marked gear icon).
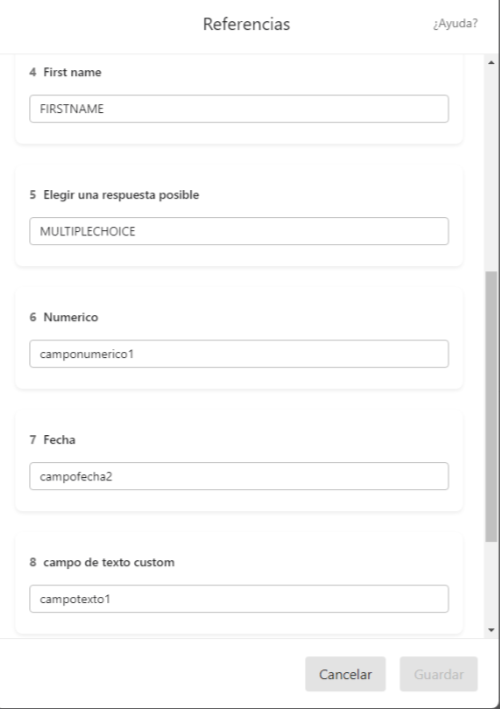
3- Next, you can add references to each field. The reference is the exact name of the custom field in Doppler. Once the form is completed, the assigned custom fields will be synchronized.
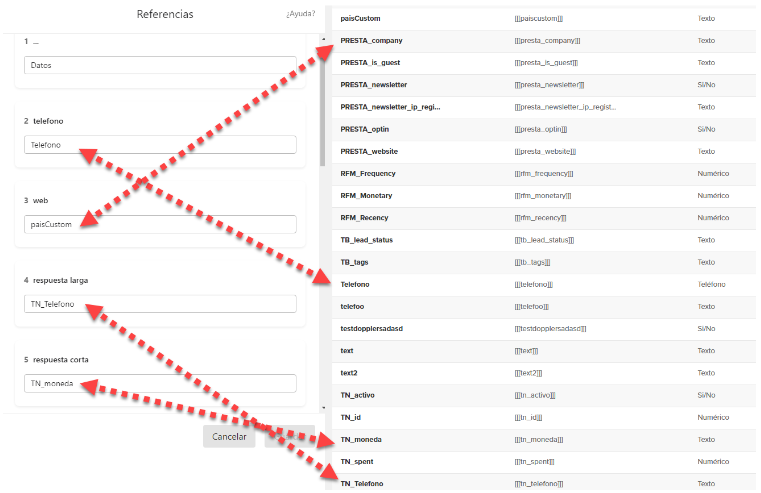
As a consideration, we add that it is possible to map the following fields:
What do you think? Do you dare to take advantage of the information you obtain from Typeform to make more effective Email Marketing Campaigns?
We are here to help you with any questions.
-
Aplica lo que aprendiste
-
Potencia tu negocio con los beneficios del Email, Automation & Data Marketing creando una cuenta gratis en Doppler. ¡Sin límite de envíos!
REGÍSTRATE GRATIS Sin contratos
ni tarjetas de crédito


Doppler informs you that the personal data that you provide to us when completing this form will be treated by Doppler LLC as responsible for this web.
Purpose: To allow you to make comments in our help center.
Legitimation: Consent of the applicant.
Recipients: Your data will be saved by Doppler and Digital Ocean as hosting company.
Additional information: In the Doppler Privacy Policy you’ll find additional information about the collection and use of your personal information by Doppler, including information on access, conservation, rectification, deletion, security, cross-border data transfers and other issues.