How to Integrate Google Analytics to Doppler
Would you like to know which’s their behavior of your Subscribers on your site or landing page after they’ve left your piece? Google Analytics is the answer! By integrating Doppler with this tool you can widen your horizons and get information about your subscribers that will help you to improve your conversions.
Integration is really easy, but there are two ways to do it.
1. Predetermined Tracking
This will be the kind of tracking you’ll get by integrating Google Analytics to Doppler by default.
The first thing you’ll have to do will be creating a Google Analytics account (keep in mind that you’ll need a Gmail adress for that). To do so, go to Google Analytics’ site, hit create an account and follow the instructions.

Once logged in it will be time for you to load the urls you want to track to the app. When doing so, you’ll see Google will give you a tracking code that you’ll have to add to each loaded url. To do so, you must have some basic knowledge about HTML language but, if you don’t know a thing about it, you can always ask someone to do it for you (we’ve all asked for a little help sometimes).
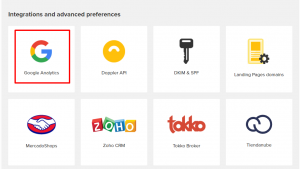
Now that all of your destination sites have the Analytics tracking code, it’s time to do the integration with Doppler. To do so, access to your Doppler account and go to the Integrations section. Now click on Google Analytics.

There you’ll see a button that will let you activate or deactivate the integration to Google Analytics as you wish. If what you want is to activate it, the button must be near the word Activate, as shown on the image below:

The minute you activate the integration, you’ll see the app will show you some new options. The first will be to add the domains you’d like to track (same as you did on Google Analytics). After writing each url, click add.

The second option will ask you to identify the traffic source to Google Analytics. What does this mean? That when you see the reports from your Analytics account you’ll know where the visitors came from by looking at the traffic source. In this case, the traffic source would be “Doppler Campaigns”. We recommend you to use short and relatable names so you can easily identify it.

There you go! See? It wasn’t that hard. Since you have chosen to integrate both apps by default, when analyzing Analytics reports you’ll see that:
- First you must go to Reports and select the “Acquisition” option and then “Acquisition traffic” from where you will see the list of all the options that you can consult.

2. Then, you will be able to see the sessions of the different sources that you can consult. Let’s see each of them in detail.

-
utm_source will always be the traffic source you’ve setted. In this case “Doppler Campaigns”.

-
utm_medium will be “email”, because that’s the medium through which we’ve reached our subscribers.

-
utm_campaign will be your campaign’s name in Doppler.

2. Manual Tracking
Unlike tracking by default, manual tracking allows you to manually identify source, medium and campaigns, so you can identify where the visitors came from more accurately.
In this case, tracking will take place outside our app, so we must deactivate Doppler’s integration to Analytics the same way we activated it earlier before.
Have an awesome Campaign!

 ES
ES EN
EN


Hola. Integré mis campañas con Google Analytics, pero no logro encontrar el nombre de las campañas que hago en Google Analytics. Dónde debería verlo?
Gracias.
Muy buenos días Muna, ¡espero que te encuentres muy bien! Si efectivamente has integrado Analytics con tu Campaña, deberías ir a la aplicación de Google y dirigirte allí a la pestaña Reporting: Campaign. Allí seleccionas la Campaña que has integrado y podrás ver todos las métricas de análisis. Tal vez esta imagen te sirva como referencia: http://blog.fromdoppler.com/wp-content/uploads/IMG_28072014_170130.png Cualquier otra inquietud, puedes escribirnos a [email protected]. ¡Saludos!