 ES
ES EN
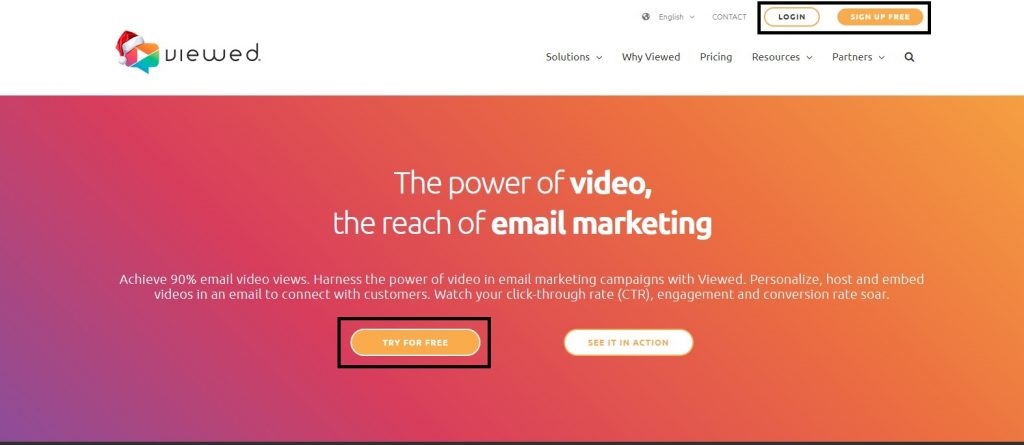
ENVideos in your emails with Viewed
Viewed and Doppler make it possible to send videos in your campaigns and to be played directly from the emails. In this tutorial you will have a step-by-step guide on how to include videos in your emails with Viewed, both the process to upload the videos and to insert them from Doppler.
If you want to increase your conversions with attractive audiovisual content, discover how to embed videos in the easiest and most effective way.
What is Viewed
Viewed is a platform that allows you to insert videos in your email marketing campaigns, with the possibility of viewing them directly from the piece and even with autoplay.
In addition, it is easy to use, adapts to mobile devices and will help you increase your CTR extraordinary.
On the other hand, it has a private access to measure the performance of your videos and your campaigns in order to optimize your strategy.
Viewed: videos in your emails
When you upload your video on Viewed, more than 20 different formats and resolutions, several GIF versions and an alternative image are automatically generated and stored on their high-speed servers. This allows your subscribers to access the video despite viewing your emails from different devices. Viewed’s versatility is one of its main virtues.
However, sometimes it is not possible to play the videos from the piece because some email providers do not have this capability. It is for those cases that Viewed generates GIFs of the video and static images.
The good news is that you don’t have to worry about anything. When the email arrives to each recipient, Viewed detects in real time the user’s technology and displays the video in the appropriate format and resolution.
In case their device does not support video, they will see a preview of the video in GIF format or an alternative image so that, when they click on it, they can access the video.
Viewed: step-by-step to insert videos
1 – First you need to log in to your Viewed account. If you don’t have one yet, create it here.
By default, you will be in the free plan with 30 days to do all the necessary tests.
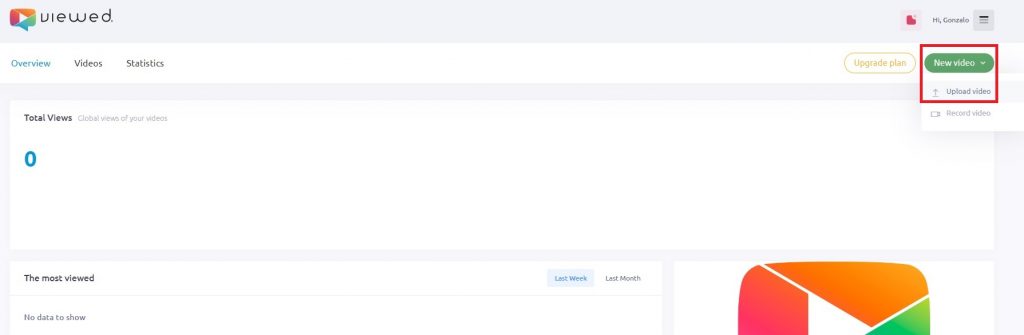
2 – When you log in to your account, select the green button that says “New video”. Two options will be displayed and there choose “Upload video”.
3 – Now it’s time to upload your video to Viewed. You will see the screen to upload your “Video eMail”, as indicated in the tab on the top left.
Then complete the “Video Info” section.

- Under “Video Name” type a name for your project.
- The video can be added as a file in the space to the right of “Select video file”. There you should drop a file into the designated space or attach it by searching for it on your device. Supported formats are listed, as shown in the image.
- To add a video already uploaded on YouTube, you have the option “Or Video URL”. Here you have to paste your link to the video you have uploaded on that platform in the space available on the right.
- Under “Video setup” set the width in pixels you want your video to be displayed.
- Finally, select “Upload video” to start the process.
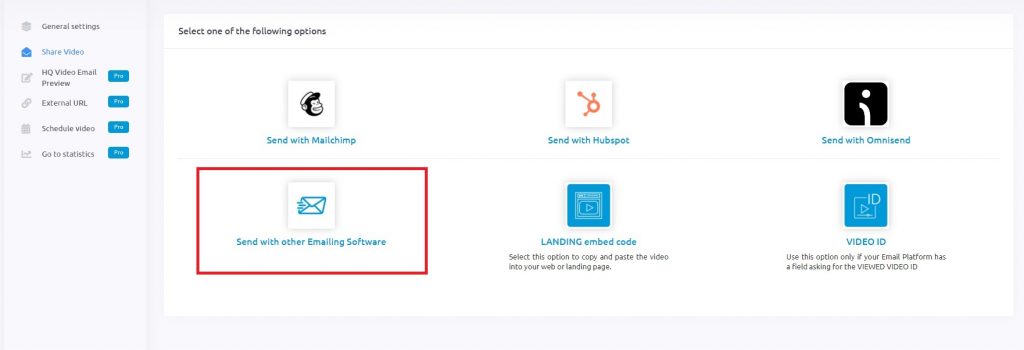
4 – In the next screen, select the option “Send with other Emailing Software” to be able to use the video in your Doppler campaigns.
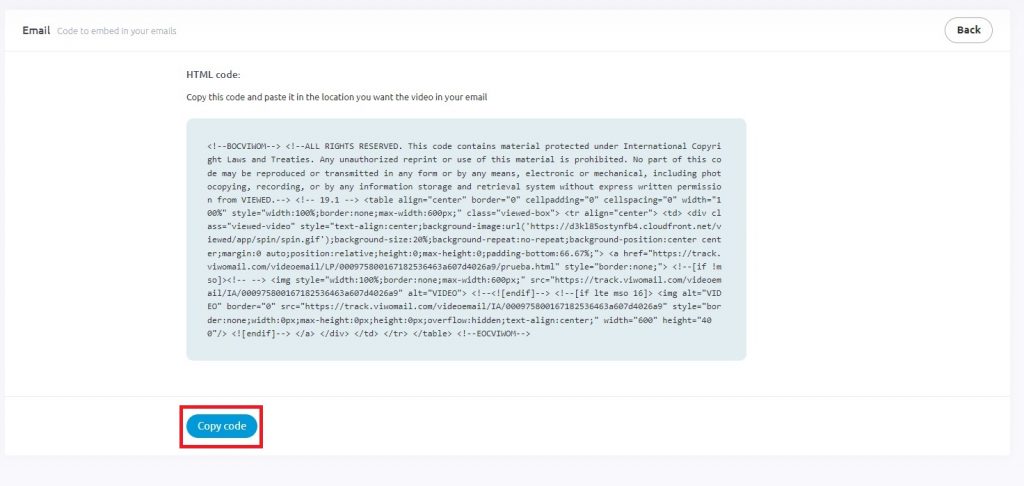
5 – You will access the following screen, where you will get the code that you will use in Doppler. Select the “Copy code” button to save the code and then use it in Doppler.
- If your video has loaded correctly, you will see it in “Videos”. You will find other advanced options for your video in that screen.
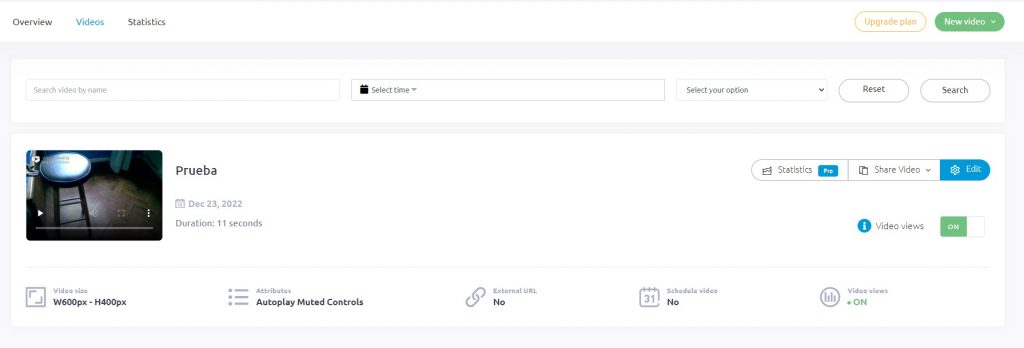
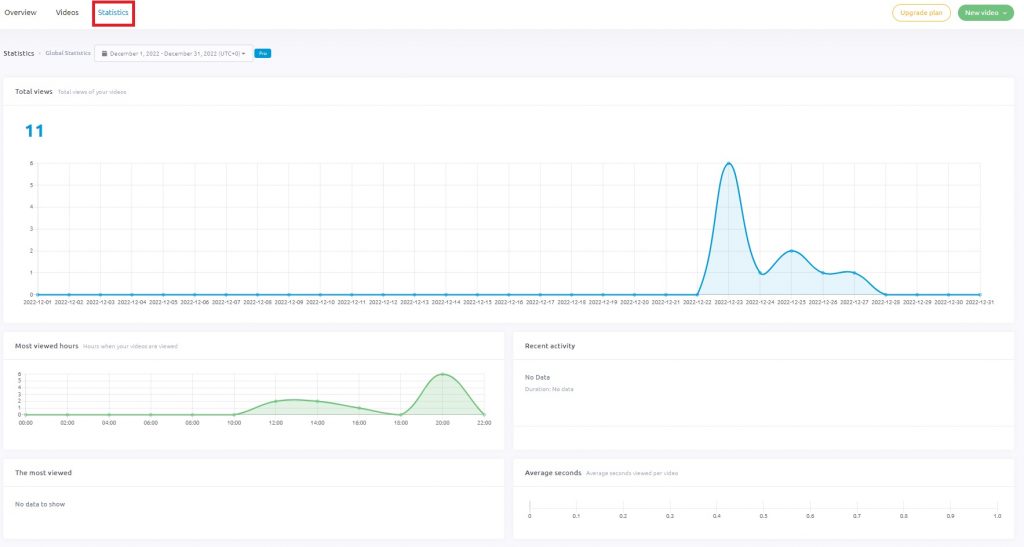
- Next to the video tab is the “Statistics” tab. Enter there to know the global data of your video’s performance.
How to upload your video in Doppler
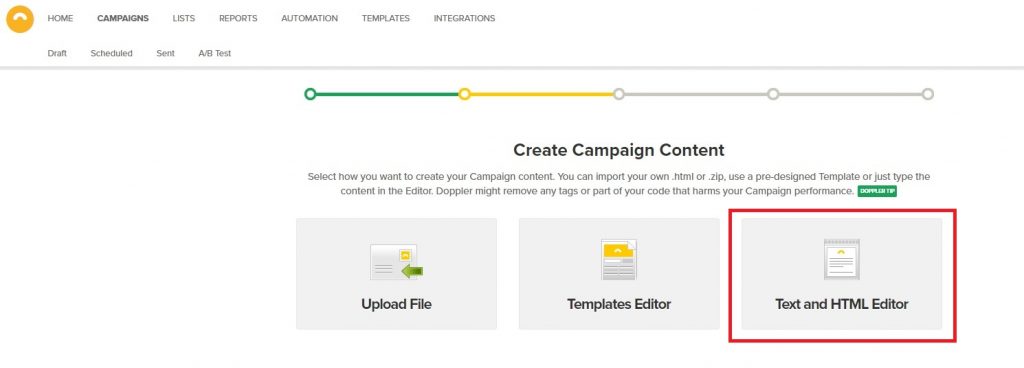
1 – Go to “Campaigns” and create a new one or edit a previous one. Then in the next screen, choose “Text and HTML Editor”.
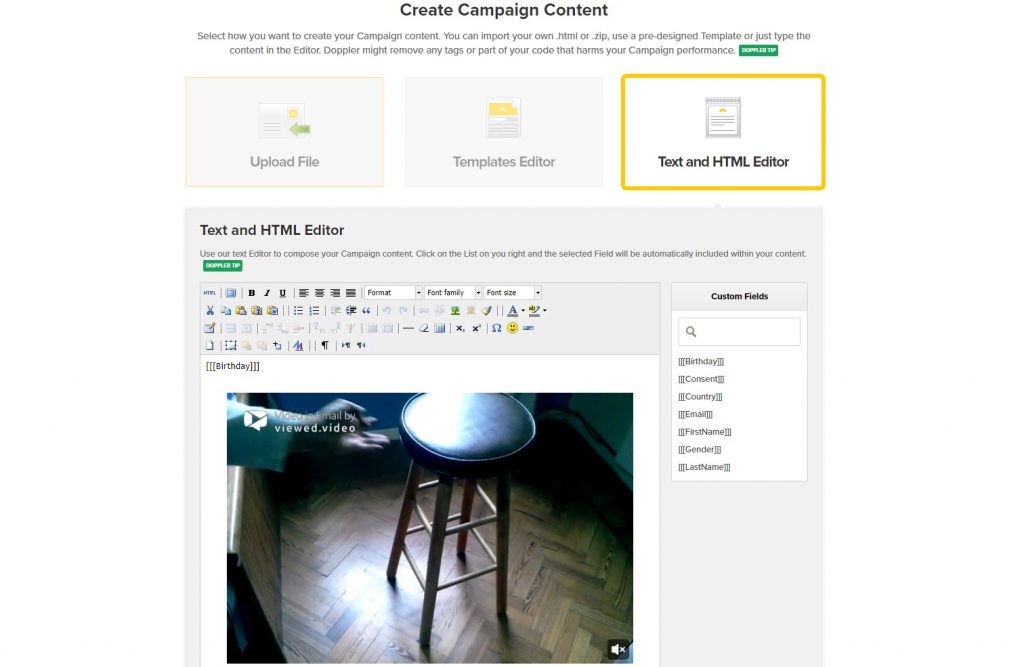
2 – Now you only have to paste the code you copied in step 5 into the “Text and HTML Editor” editor to integrate it into the body of the email you will send with your campaign. If the code is correct, you will see that the video will play inside the editor.
3 – Select the “Save” button at the bottom right and proceed to the next screen, where you have the summary of the campaign ready to send. When you finish configuring the recipients of your emails and other details, you will be ready to send your video campaign. Finally, this post will help you to complete all the steps very easily.
How to incorporate a video in your Email with the New Editor?
Have you already used the New Editor to create your Campaigns? Now you can also use this Doppler tool to integrate a video into an Email. How to do it? In the following way:
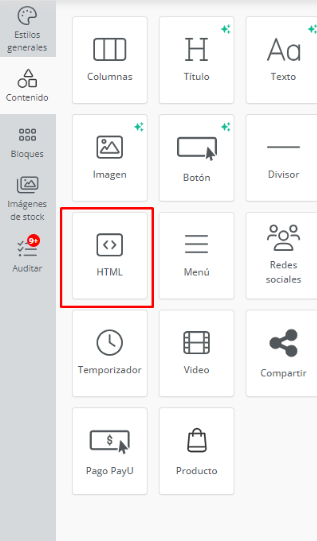
- First, you must log in to your account, then go to the left menu and drag the HTML element into the body of the Editor.
- The next step is that within the HTML field you will copy the code that Viewed provides from its website. which is explained in the previous steps within this article.
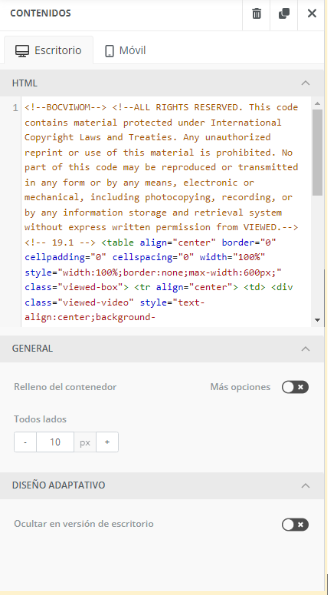
- Next, once the code has been copied to the element, you will be able to view a looped introduction of the video. As seen in the image:

First, you must log in to your account, then go to the left menu and drag the HTML element into the body of the Editor.
Now you have all the keys to send your campaigns with embedded autoplay videos.
Any questions? You can contact our Customer Service team by WhatsApp. We are here to help you.


Doppler informs you that the personal data that you provide to us when completing this form will be treated by Doppler LLC as responsible for this web.
Purpose: To allow you to make comments in our help center.
Legitimation: Consent of the applicant.
Recipients: Your data will be saved by Doppler and Digital Ocean as hosting company.
Additional information: In the Doppler Privacy Policy you’ll find additional information about the collection and use of your personal information by Doppler, including information on access, conservation, rectification, deletion, security, cross-border data transfers and other issues.