 ES
ES EN
ENHow to create a Decision Tree?
With your Doppler account, you can use this new solution that allows you to Automate your Chatbot in order to design the communication path with the user, guide them to give them instant answers and not lose contact or sales opportunities.
What can you do when setting up your Decision Tree?
- Visually design a conversation flow for your Chatbot.
- Refer to human attention or different response options.
- Request contact information if it is through your Website.
- Control the interactive messages that the user will receive.
Let’s see how you can set it up step by step:
1. Log in to your Doppler account and select the ‘Conversations’ menu.
Click on Settings in the left-hand menu, select Conversation Flows and click on +New Flow.
#DopplerTip: You can try Doppler Conversations on your free account for 3 months or purchase it as part of your plan if you already have an account.

2. Once you click on +New Flow, you will see that Doppler offers you a preconfigured Flow by default.
You can use this flow as a basis and customize it, or create one from scratch by selecting the Clear option.
3. Now you can start creating your Flow.
As you will notice, the first three components appear by default and cannot be removed, as they are essential for the Chatbot to function.
The Required Data component will automatically be displayed in Web Chat, although you can also enable it in WhatsApp, Facebook, or Instagram from this section.
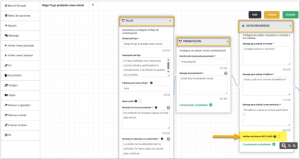
At this stage, you will begin to visualize the first components of the Flow:
- Required Data: here you can define the fields that will be requested from the user to register their information in your Doppler account (for example, name, email, or phone number).
- Flow: in this component, you can assign an internal name to easily identify it and a description that details the purpose or function of that Flow within your automation.
4. The next mandatory step is to define the keywords that will start your Flow.
These are the terms or phrases that people must type in order to activate your Chatbot’s journey.
#DopplerTip: Enter simple and common words, separated by commas, such as: hello, good morning, good afternoon, good evening, good night.
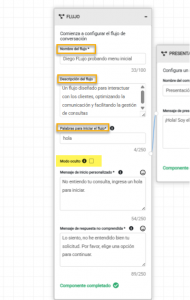
If you enable the Hidden Mode option, your Flow will not be visible to everyone. It will only be activated when someone types one of the words you configured in this step. 🔑
5. You can then configure two important messages for your Flow:
Custom start message: this is the text that will be displayed when the conversation begins. We suggest including some of the keywords you defined in the previous step to guide your contacts.
👉 Example: “Hello! To continue, type the word hello and we will show you the available options.”
Unrecognized response message: this is used when the bot does not recognize the user’s query. In this case, you can guide them to resume the interaction.
👉 Example: “Sorry, I didn’t understand your message. Choose one of the following options to continue 🙂.”
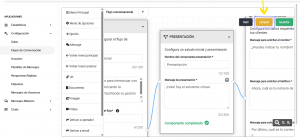
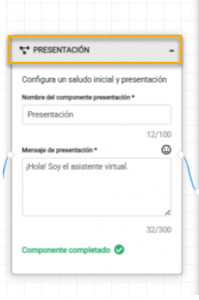
6. Once you complete this initial step, you will find the Introduction component.
Here you can configure your Chatbot’s welcome message, indicating its name and a brief introduction for your contacts.
👉 Example: “Hello! I’m Doppibot 🤖 and I’m here to help you with your questions about Doppler. Ready to get started?”
This message will be your Chatbot’s first impression, so we recommend that it be clear, friendly, and consistent with your brand identity.
7. Now let’s review the options you have for configuring your decision tree.
Now that you understand the fundamentals, we will explore the additional components that can enhance your customers’ experience.
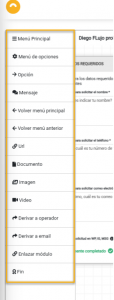
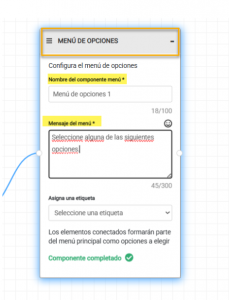
Main menu:
This is the first menu in the Flow. The options available to choose from will be the items connected here.
- The name of each component is for internal use only (your customers will not see it); it is an identifier.
The message will be visible to the user. Example: ‘Choose one of the following options’ or ‘How can I help you?’

Options menu
It works similarly to the main menu, but is used to add options within a branch of the Flow, allowing you to add more alternatives.
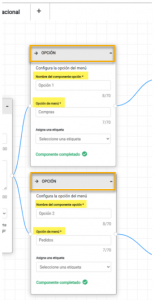
Options:
These are added at the beginning of branches with different options, after a main menu or options menu.
- Each option requires an internal name and a message for the customer.
- You can insert up to ten options per menu.
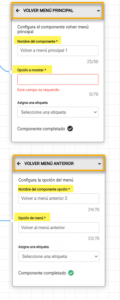
Return to main menu / Return to previous menu
Both options allow the customer to return to the options menu to choose another option if necessary. You must also configure a name for the component and the option to display.
Remember: the main menu will always be the first one you defined.
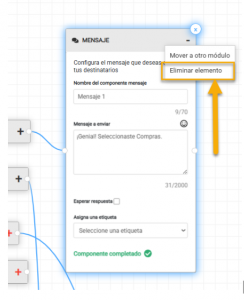
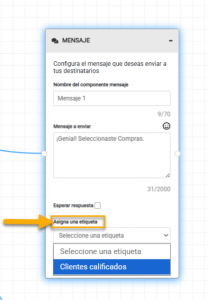
Message
Displays text to the customer. You can decide whether the bot should wait for a response by checking that option. Leaving that option unchecked will automatically advance to the next step in the flow.

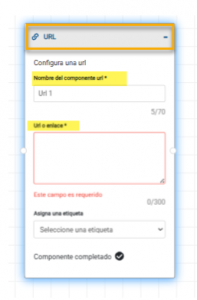
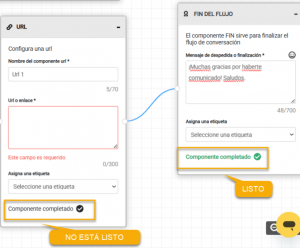
URL, Document, Image, and Video
These allow you to attach resources within the Flow:
URL: send a direct link.
Document: attach files (not available on Instagram).
Image: supports files up to 5MB.
Video: supports up to 5MB (not available on Instagram).
👉 Recommendation: always optimize files so that they weigh less than 5MB.
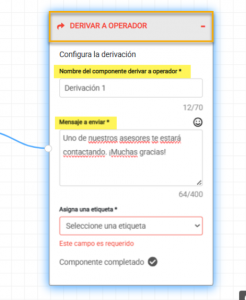
Forward to operator
This action pauses the bot; it is the end of a branch of the Flow. At the same time, the customer is put on hold while waiting for a human to respond.
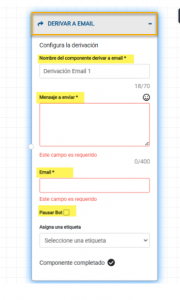
Forward to Email:
This component sends you an email with all the interactions the customer has had with the bot, so you can keep a record of them. This includes everything from the initial data requested until the customer reached this component.
As with the other components, you must define a message to show the customer. Remember that in the “Email” field, you must enter the address to which you want this information to be sent.
You will also see the option to pause the bot. This function works as follows:
- If you select pause bot, it works like the forward to operator component. The bot shuts down/pauses and the customer can interact with a human.
If you do not select pause bot, it works like the end of flow component. If the customer enters the keyword you defined, the flow starts again.
For this option, we suggest that the message to be sent mentions that if the user needs to make further inquiries, they can type the keyword to choose options again and move forward in the flow.
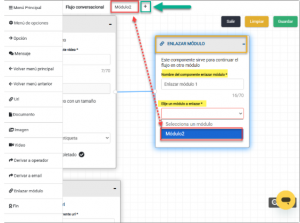
Link Module:
This allows you to continue a branch of the flow in another module, enabling you to work in a more organised manner.
- Create a new module by clicking on the green ‘+’ at the top of the builder.
The branch ‘jumps’ to that module to work only; the flow remains one.
Note: If you delete that module, everything worked on within it will be deleted.
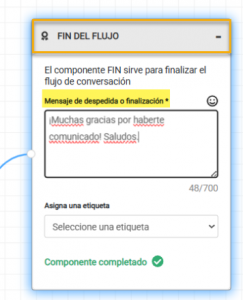
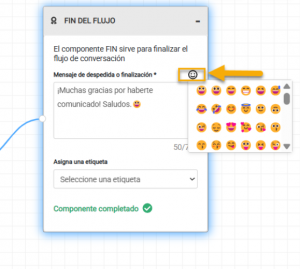
End:
Indicates the end of a branch or flow, without branching to an operator.
The bot automatically restarts for that contact.
You can include a closing message:
“Thank you for your inquiry. Feel free to write to me again anytime!”
General considerations for building the Flow
- Joining branches: drag the connectors between components to the exact point where they should be linked. (We suggest adding a screenshot or GIF here showing “How to join branches”).
- Inserting elements: drag and drop the component into the part of the Flow where you want to insert it. (We recommend a GIF of “How to insert elements”).
Component status (Component Completed):
✅ Green = ready.
⚫ Black = required fields are missing (marked with *)
Editable messages: All component texts can be edited. The ones you see loaded are suggestions from Doppler.
Delete a component: Right-click on the element and confirm the deletion.
Tags: some components allow you to assign tags. If the person advances through that branch, they will be assigned the configured tag, and you can tag chats to organize the team’s attention.
Emojis: you can insert them from the selector for a more human and friendly interaction. 🎉
8. Save, list, and assign your Flows
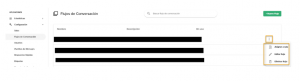
Save and list
When you click Save, your Flow will be created. You will see a list with:
Name, description (defined in Step 2), and whether it is in use or not.
In the three-dot menu, you can Edit, Assign to room, or Delete.
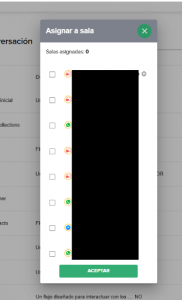
Assign to room
Click Assign to room and a pop-up window will open for you to choose which room(s) you will implement the Flow in.
That’s it! 🚀 Now you know how to create and configure a Decision Tree in Doppler. With this feature, you can guide your customers clearly, resolve queries instantly, and refer conversations to your team when necessary. This way, your brand will always be available to provide a more personalized, agile, and effective experience.

Doppler informs you that the personal data that you provide to us when completing this form will be treated by Doppler LLC as responsible for this web.
Purpose: To allow you to make comments in our help center.
Legitimation: Consent of the applicant.
Recipients: Your data will be saved by Doppler and Digital Ocean as hosting company.
Additional information: In the Doppler Privacy Policy you’ll find additional information about the collection and use of your personal information by Doppler, including information on access, conservation, rectification, deletion, security, cross-border data transfers and other issues.