 ES
ES EN
ENHow to integrate Doppler with Siigo
Keep your Contact base always up to date without lifting a finger. By integrating Doppler with Siigo, your customer data syncs automatically to your Lists, so you can launch segmented Campaigns from day one — all in a single platform.
How to get your credentials in Siigo (Previous step)
Before connecting both platforms, you need to generate your access credentials from your Siigo account.
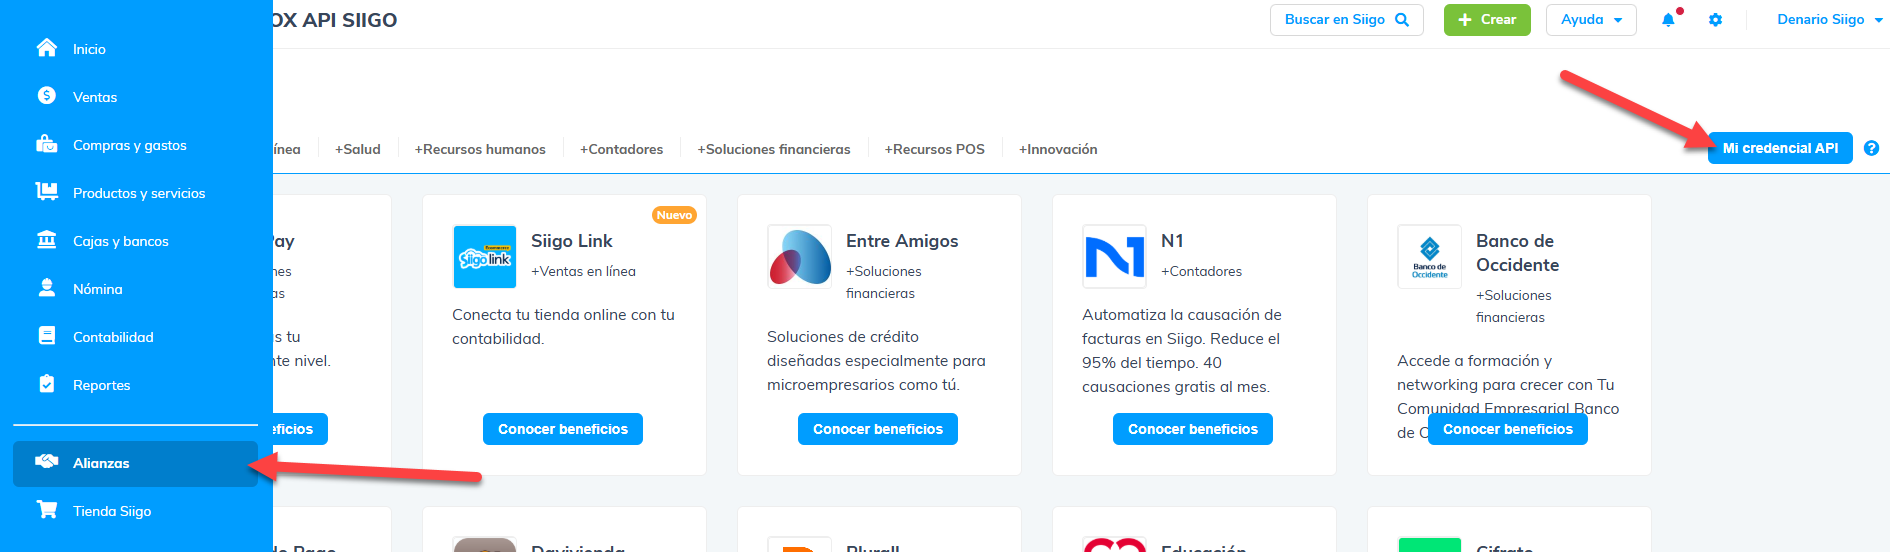
- Log in to your Siigo account and go to Alliances in the left sidebar menu.
- Click My API Credential, located in the top-right corner of the screen.
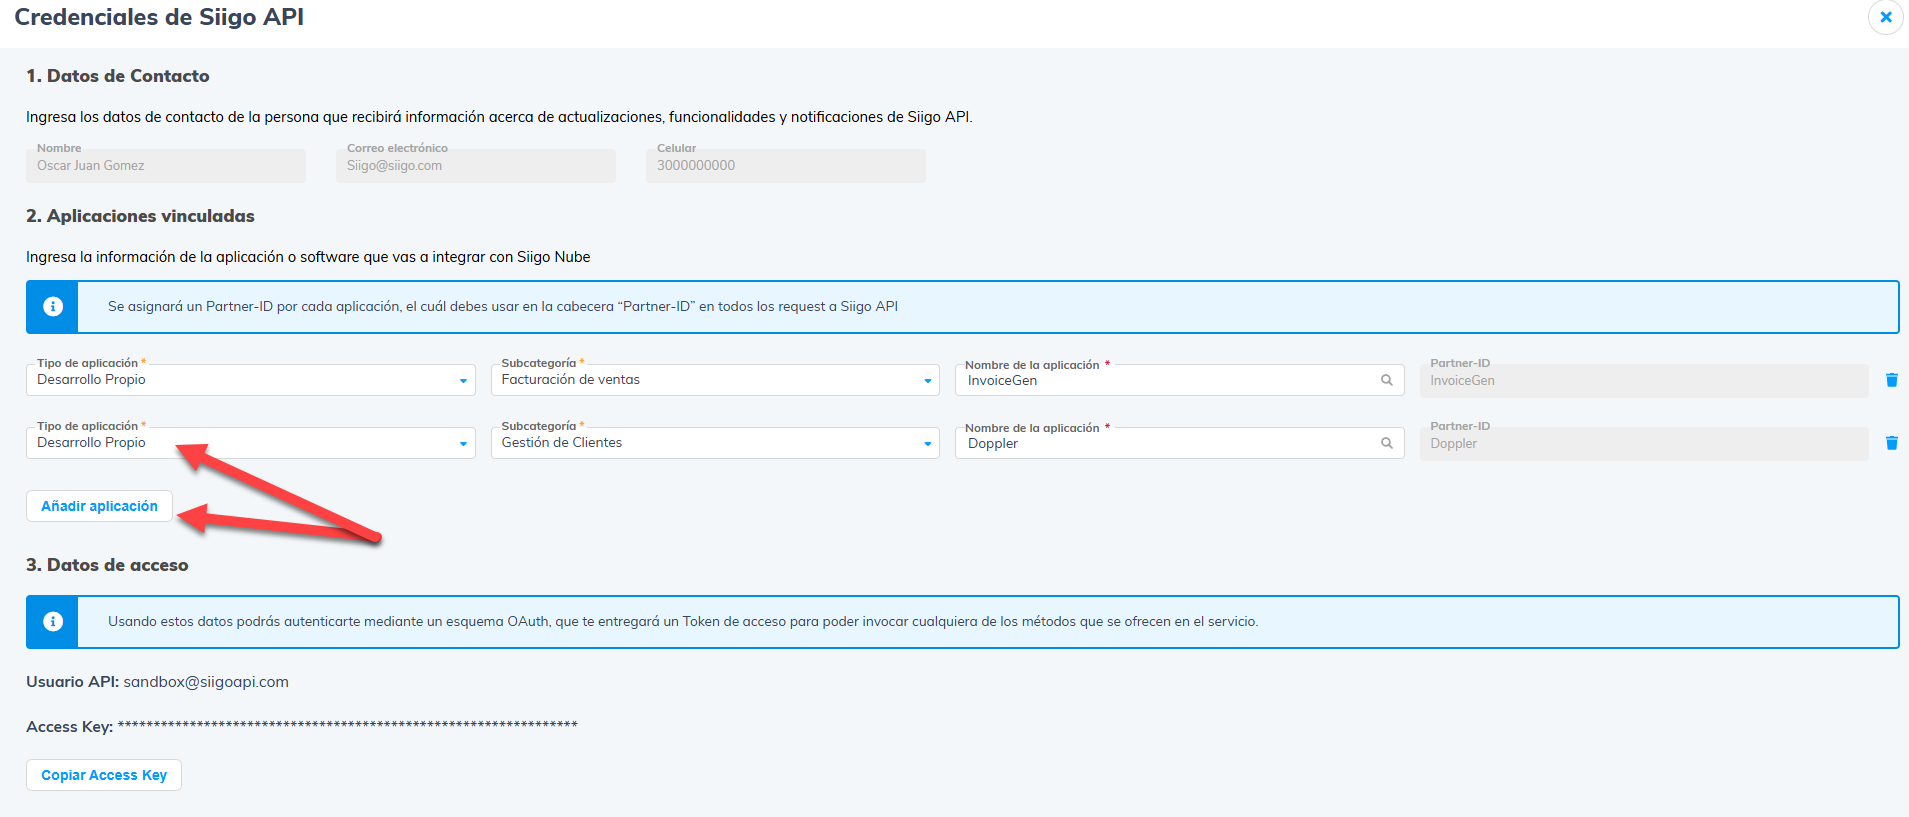
- On the Siigo API Credentials screen, fill in the three sections:
- Contact Details: enter your name, job title, and phone number.
- Linked Applications: click Add Application, select Own Development as the type, choose Customer Management as the subcategory, and enter Doppler as the application name.
- Access Data: once the configuration is saved, Siigo generates your API User and Access Key.
- Copy both credentials. You’ll need them in the next step.
💡 For more details on generating credentials, visit the Siigo Customer Portal.
Step 1: Connect Doppler with Siigo
With your credentials ready, it’s time to link both accounts from Doppler.
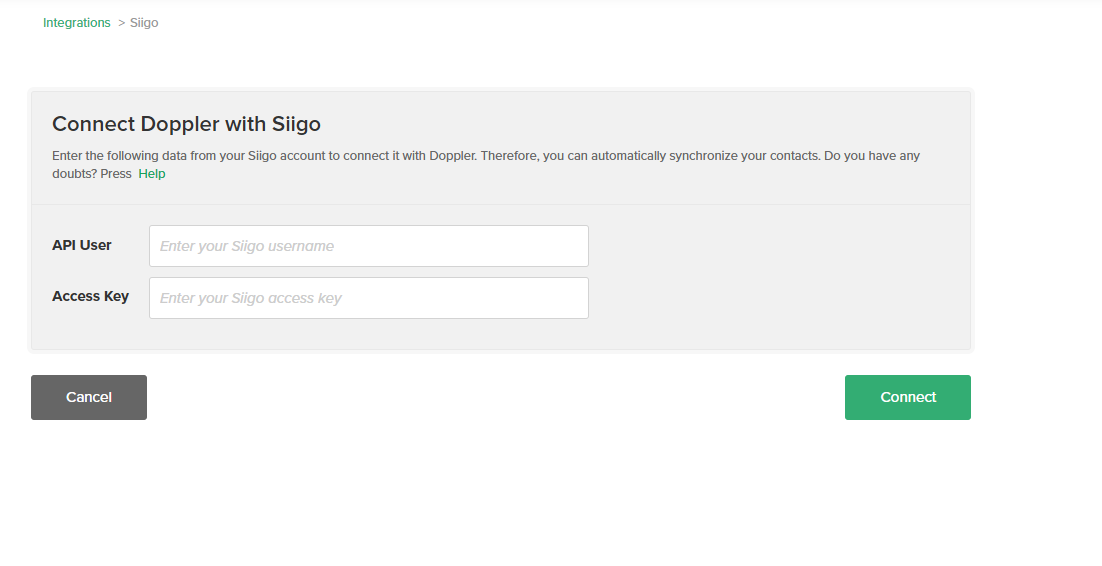
- Inside Doppler, go to Integrations in the main menu and select Siigo.
- In the Connect Doppler with Siigo form, enter:
- API User: the username generated in Siigo.
- Access Key: the access key generated in Siigo.
- Click CONNECT to validate the connection.
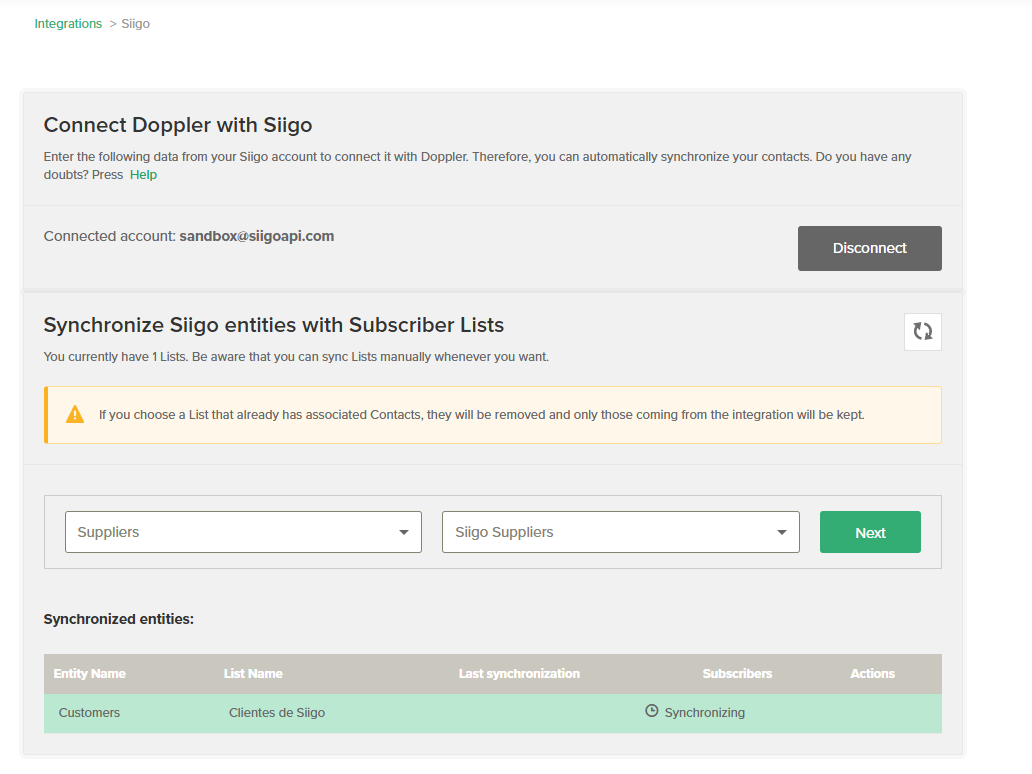
Step 2: Sync entities with Subscriber Lists
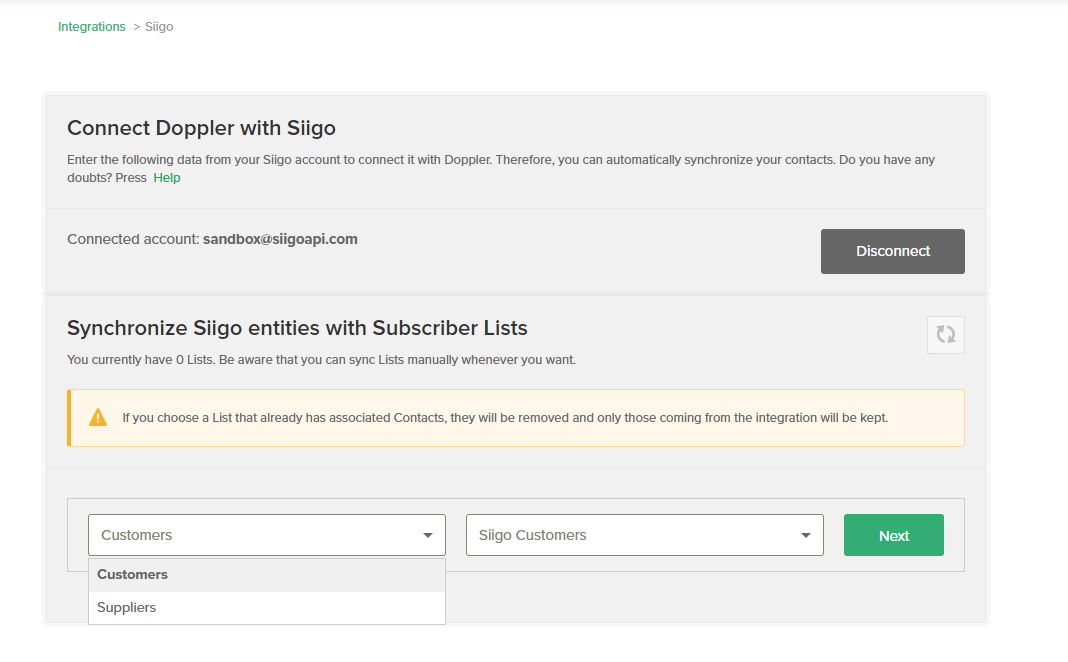
Once the account is connected, the screen will confirm: Connected account: [email protected]. Now you can link your Siigo entities to your Doppler Lists.
- In the Sync Siigo Entities with Subscriber Lists panel, use the first dropdown to select the Siigo entity you want to import (e.g., Customers).
- In the second dropdown, choose the destination Doppler List or create a new one (e.g., Siigo Customers).
- Click the green Next button to continue.
⚠️ Important: if you select a List that already has Contacts, they will be retained and only Contacts coming from the integration will be saved. Also, keep in mind that the initial sync may take a few minutes depending on the volume of Contacts in your account.
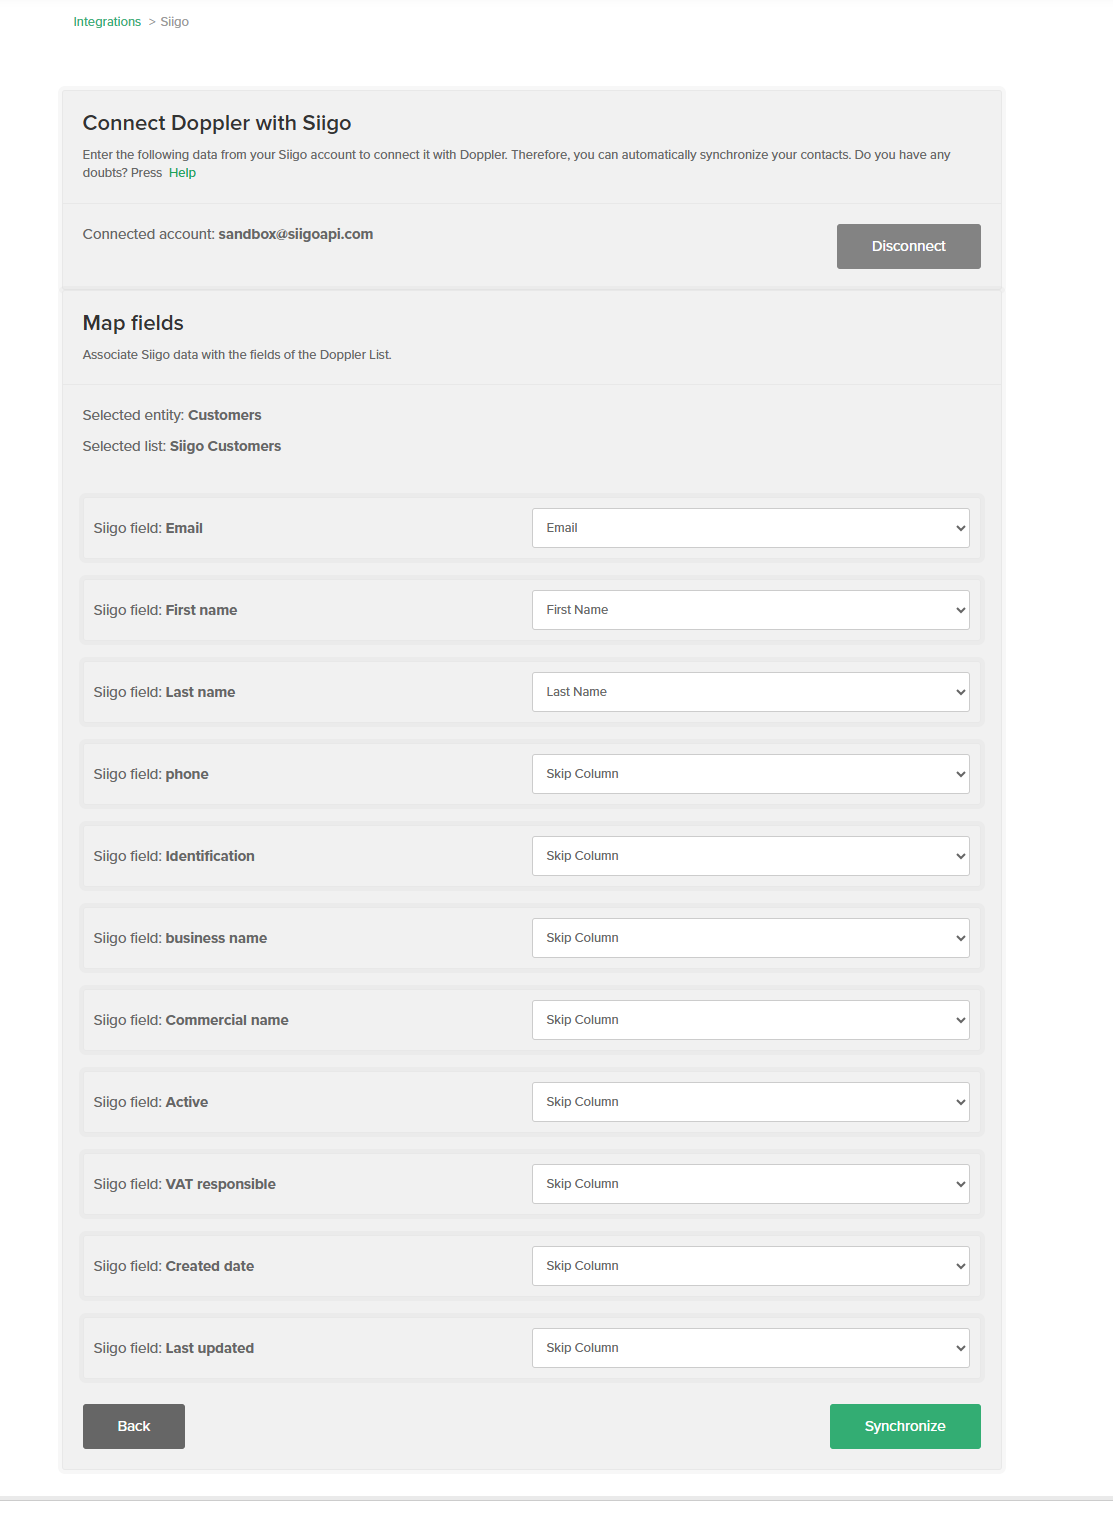
Step 3: Field mapping and integration status
Field mapping
On this screen, you match Siigo’s native data fields with the fields in your Doppler List.
- Confirm that the Selected Entity and Selected List are correct.
- The following fields are mapped automatically and require no action:
- First Name
- Last Name
- For the remaining Siigo fields (Phone, ID Number, Company Name, Trade Name, Active, VAT Responsible, Creation Date, Last Update), you have two options in each dropdown:
- Select a Custom Field from your Doppler List to import that data.
- Choose Skip Column if you don’t need that field.
- Once the mapping is set, click SYNC to start the process.
Integration status
When the process is complete, Doppler displays a control panel with all your synced entities. For each entity you’ll see:
- Entity Name
- List Name
- Last sync
- Subscribers
- Actions available: edit ✏️ or delete 🗑️ the sync
From this panel you can also add new entities or manually trigger a new sync whenever you need.
Do you have any questions? You can contact our customer support team via WhatsApp or email at [email protected]
We’re here to help 💛

Doppler informs you that the personal data that you provide to us when completing this form will be treated by Doppler LLC as responsible for this web.
Purpose: To allow you to make comments in our help center.
Legitimation: Consent of the applicant.
Recipients: Your data will be saved by Doppler and Digital Ocean as hosting company.
Additional information: In the Doppler Privacy Policy you’ll find additional information about the collection and use of your personal information by Doppler, including information on access, conservation, rectification, deletion, security, cross-border data transfers and other issues.