 ES
ES EN
ENHow to integrate Doppler with PrestaShop
Are you a PrestaShop user and want to boost your sales with the power of Email Marketing? You are in the right place then! In this post we will teach you how to integrate your eCommerce with the most used app among the Spanish-speaking world.
With this integration, you’ll get some interesting perks for your business:
- The chance to add Pop-Ups in your PrestaShop Store to get new Contacts and potential clients.
- Synchronization of these Contacts into your Doppler account, to be able to send them promotional Campaigns with your products.
- Remarketing and Abandoned Cart automated Emails, specially designed for your E-commerce.
- Automatic synchronization of your store items into your Campaigns, to save time when creating them.
All of these features require some configurations both in your PrestaShop store and in your Doppler account. Don’t worry! In this post we’ll guide you through them. You will learn:
- How to integrate your Doppler account with PrestaShop, through Doppler. (Recommended!)
- How to integrate your online store with Doppler, from PrestaShop.
- How to use an Abandoned Cart Automation and a Product Retargeting Automation for PrestaShop.
Wait! You still haven’t got your Doppler account? Create one for free and take full advantage of this integration with PrestaShop.
Step by step to integrate Doppler with PrestaShop through Doppler
Need to synchronize new Contacts from your store? Want to boost your E-commerce with Email Automation? Take a few steps and integrate your Doppler account!
First, log in to your Doppler account and go to the Integrations section.
If you click there, you’ll need to add some data to perform the integration:
- The URL of your store (please use www.),
- The App Key of your PrestaShop store,
- The Doppler List you want to sync your store with. Just open the dropdown and select it (be careful, this List must have been created before).
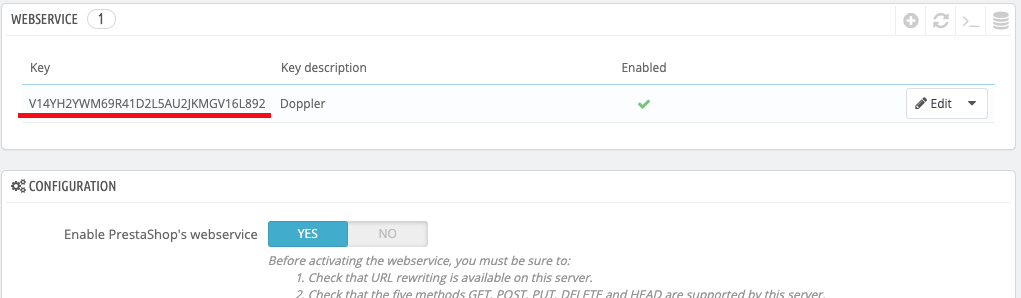
To get the App Key of your PrestaShop store you must be logged in the Admin of the store, and:
- Go to “Advanced Parameters”, “Webservice”.
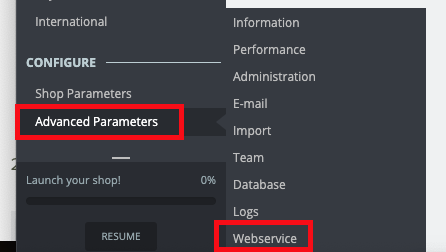
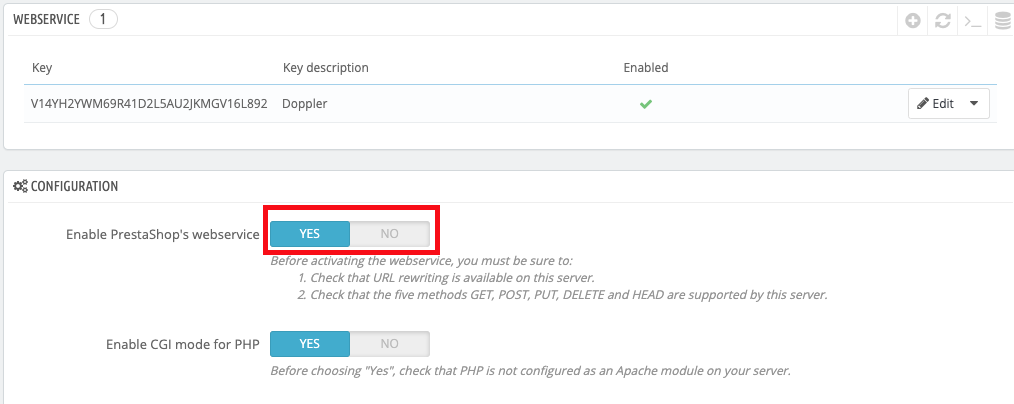
- Click on “Configuration” and then choose “Activate Web service”.
- By clicking on the Key, a chart will open with several checks. Make sure that the hole “GET” column is checked.
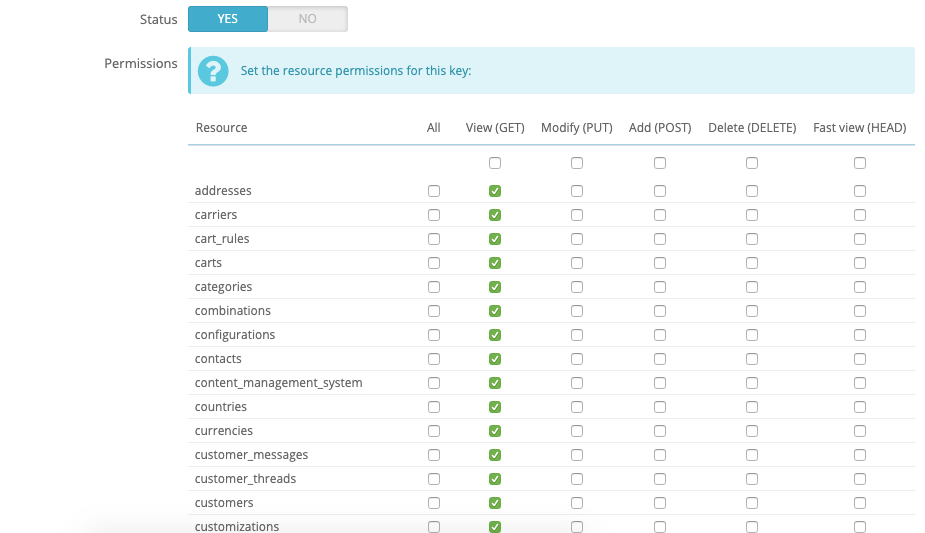
- Then copy the alphanumeric Key at the beginning of this page: that’s your App Key.
That’s it! Once you’ve done it go back to Doppler, paste the Key you copied from your store Admin, select the Doppler List and click “Connect”. The integration will be completed just a few minutes later!
From now on, you can take all the Contacts from your store and send them straight forward to your Doppler account. Also, if you wish, use Abandoned Cart and Remarketing Automation to bring back those users who saw or chose any of your products from your E-commerce and didn´t get to buy them. Sounds great, right? There’s more, keep reading to know some more about this great feature.
Step by step to integrate your E-commerce with Doppler, from your PrestaShop account
First, you need to download the addon and install it on your PrestaShop account. Download it here. Did you know there is a new plugin version? So if you are using the older, download it again and take advantage of the new one (last update on 2019).
Once you have the addon on your computer, you can proceed with the installation. Access your PrestaShop dashboard and select the option “Modules & Services”.

Click the “Upload a Module” button.

A popup will ask you to drag the file into it. Also you can navigate your hard drive and select the file manually.

The installation will begin automatically and you will receive a confirmation message once the process is over. Click the “Configure” button and proceed to setup the addon.

You will need to access your Doppler account in order to gather your API Key and List ID. Navigate to the “Lists” menu and select the List you will sync with your PrestaShop eCommerce.

Keep in mind that you can create a new List or select an existing one. It will receive all your PrestaShop clients and also the Leads generated by the popup feature.
Now you need to click on the List name in order to access the “API Key” link where the needed information is located.


Copy your “API Key” and the “List ID” in order to paste it into your PrestaShop module.

Then you simply need to include your Doppler Username and configure the popup options.

Once you are done with the configuration hit the “Save” button.
Important: if you were already working with PrestaShop you will need to sync all the previous clients and Leads gathered in the past. To do this just click the link located in point #4 as you can see in the image below:

That’s it! Finally you have integrated Doppler with your PrestaShop eCommerce. Getting in touch with your clients will be easier than ever!
How to use the Automations of Abandoned Cart and Product Retargeting on your PrestaShop E-commerce
There are two must-have automations to attract to your store those visitors who abandoned their product cart, or who saw one or more specific items but did not initiate the purchase.
While the Automation of Abandoned Cart is 100% FREE for all PrestaShop users, Product Retargeting Automation requires that you have a paid account on Doppler.
Do you wonder why? The reason has to do with the complexity of this feature. The information needed to generate and send these emails in a dynamic and automated way, is not obtained from a public API, but from on-site behavior script that Doppler provides 100% bonus for a limited time on all payment plans.
Do you want to enable the functionality of Site Behavior and Product Retargeting? Find out more in this post and discover the available Plans.
Clarified this, learn:
- How to activate Automation of Abandoned Cart.
- How to activate Product Retargeting Automation.
Have a great Campaign!


Doppler informs you that the personal data that you provide to us when completing this form will be treated by Doppler LLC as responsible for this web.
Purpose: To allow you to make comments in our help center.
Legitimation: Consent of the applicant.
Recipients: Your data will be saved by Doppler and Digital Ocean as hosting company.
Additional information: In the Doppler Privacy Policy you’ll find additional information about the collection and use of your personal information by Doppler, including information on access, conservation, rectification, deletion, security, cross-border data transfers and other issues.