
 ES
ES EN
ENConnect Empretienda with Doppler and boost your store’s sales
Connecting your Empretienda store with Doppler isn’t just a technical integration: it’s the starting point for turning visits into repeat customers and growing your business automatically.
Once both platforms are integrated, you’ll have access to a full ecosystem of Multichannel Marketing tools designed for your E-commerce:
- Sync your Lists of Customers and Buyers automatically.
- Capture more Leads from your store with custom Forms and Pop-ups.
- Boost your sales with Automations for Visited Products that trigger on their own.
- Welcome every new customer automatically with a Welcome Flow.
- Reach shoppers in real time with OnSite Marketing while they browse your store.
- Measure what matters with Assisted Sales Reports and RFM Segmentation.
Here’s your step-by-step guide to setting up the connection. Don’t have a Doppler account yet? Create one for free before you continue.
How do you complete the integration?
Now let’s walk through how to do it from your Doppler account:
1. Log in to your Doppler account, go to Integrations in the main menu, and select Empretienda.

2. Click Connect to move forward.
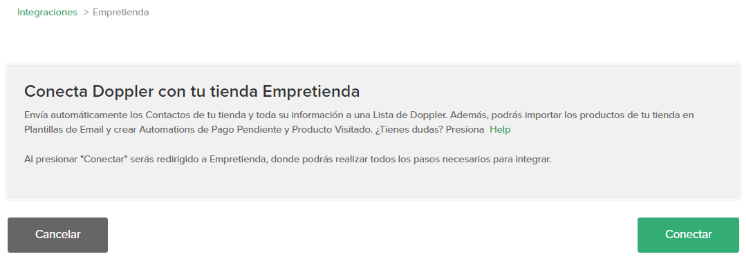
3. You’ll be redirected to the Empretienda site, to the settings section where you install the app.
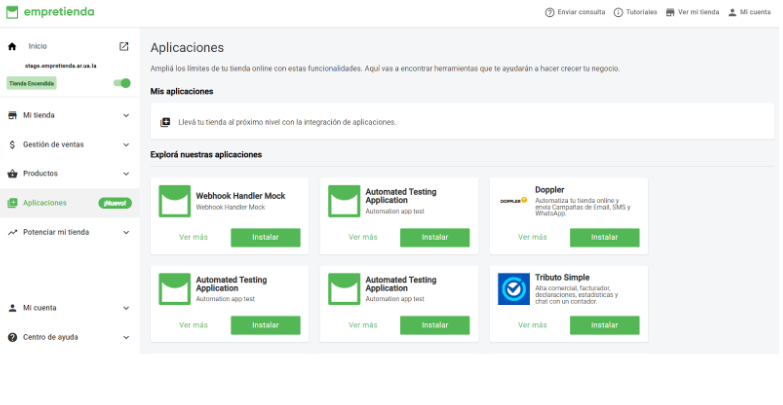
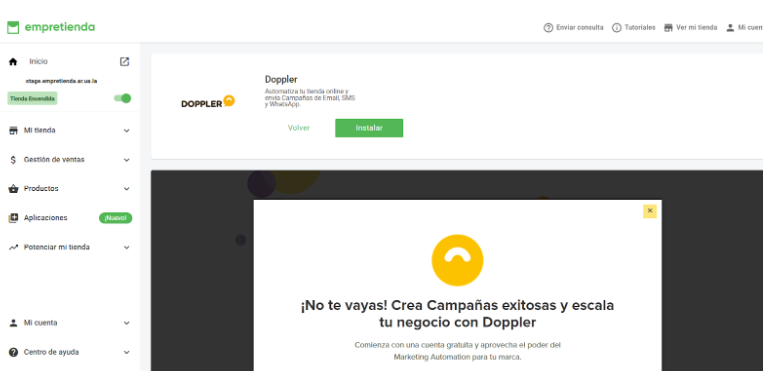
4. Authorize the connection between both apps. Once it’s set up correctly, you’ll see the confirmation on screen. You can only disconnect from Empretienda, in the Apps section. Synced data stays in place, but no new customers will come into Doppler.
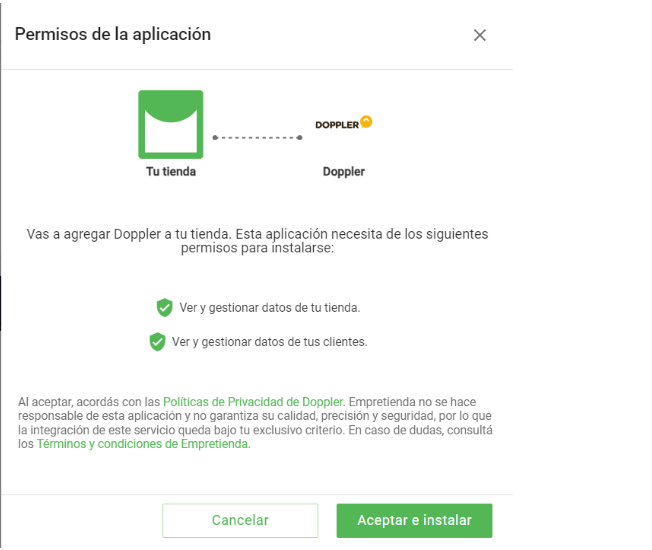
Once both platforms are connected, you can start linking data between them.
In Empretienda, you can sync the following entities to your Doppler Lists:
- Buyers: customers who’ve made purchases, with orders greater than $0.
- Customers: customers who signed up in your store or started checkout without completing it.
IMPORTANT! Make sure you’ve already created the Custom Fields you want to map. Not sure how to create them? Check out this article.
5. Select the entity and the List you want to send data to, then click Next.
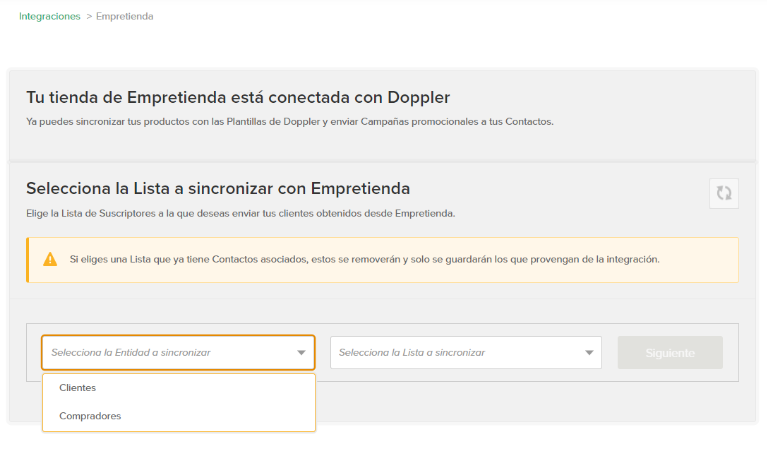
6. Map the fields to link Empretienda’s data with Doppler, along with any information you have on your customers, which gets stored in your account’s Basic and Custom Fields. On the left, you’ll see the fields from Empretienda; on the right, open the list of Doppler Fields and pick one, or keep the default Fields.

7. Once your mapping is set, click Sync at the bottom of the screen.
On the left, you’ll see the customer fields from Empretienda; on the right, open the list of Doppler Fields and pick one, or keep the default Fields. To finish, click Sync. That’s it! Your customer data now lives in Doppler. You can edit the mapped Fields anytime, or remove the mapping altogether.
8. Repeat the same process for the other entity. From now on, Doppler updates your Store’s entities automatically every five minutes. If you ever need to, click the Sync 🔄 button on the right to pull in your Store’s latest changes right away.
How do you add a Landing Page-type Form to your store?
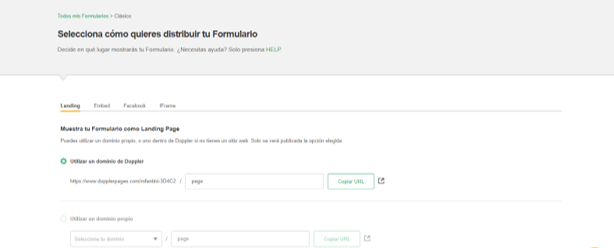
1. From your Doppler account, go to Lists, Form, and Create Classic Form. Once you’ve designed it the way you want and published it, choose the Landing Page option. Copy the URL that gets generated automatically.
Recommended article: How Do You Create a Subscription Form?
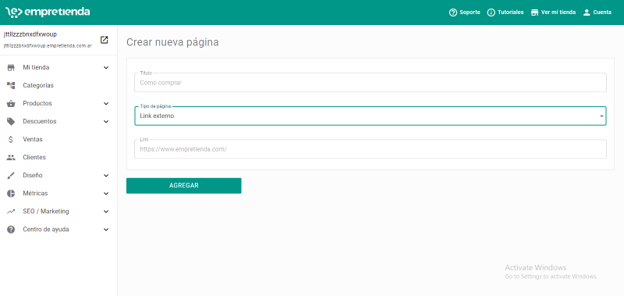
2. Continue the process from Empretienda. Go to My Store -> Pages -> Activate and click Add. Select External page type and paste the link you copied from Doppler.
If you’d like this Doppler Form to work as your Store’s Contact Form, make sure you turn off the default one in Empretienda from My Store -> Contact Form.
How do you add a Doppler Pop-up Form to your store?
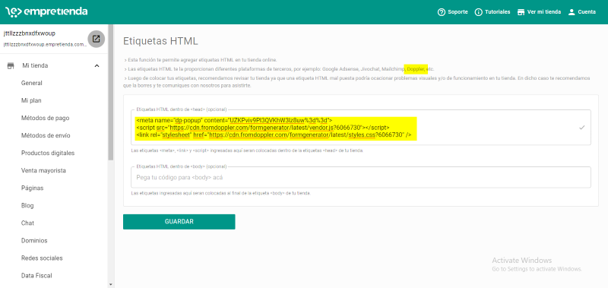
1. From your Doppler account, go to Forms -> Create Form and choose Pop-up. Once you’ve designed it and published it, copy the code.
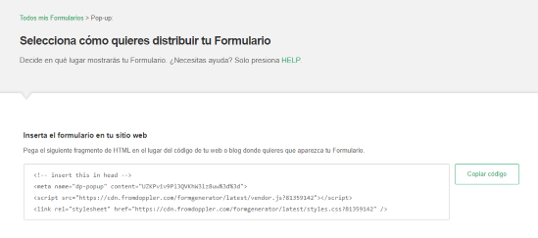
2. From Empretienda: go to My Store -> HTML Tags and paste the code you got from Doppler into the Head section.
IMPORTANT: Paste only the portion of code that comes after <!– insert this in head –>, removing that first part, since Empretienda won’t accept it.
How do you add Doppler’s Site Behavior script to your store?
1. Go to your Doppler account and copy the Site Tracking script. To access the script, you’ll need to follow a few steps first.
Recommended article: Site Behavior Automation: How Do You Set It Up and Use It?
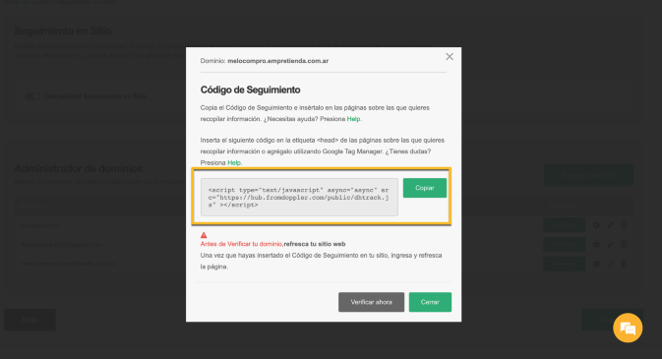
2. Paste the Doppler script into your Empretienda store from this section.

Don’t forget to save your changes!
3. To finish, go back to Doppler and verify your Empretienda domain by following the steps in this article.
Power up your E-commerce with Doppler’s best features for Empretienda and get the most out of both platforms.
Which Automations can you set up?
If you want to use the Automations built for E-commerce, add your store’s domain after you’ve connected Empretienda with Doppler and added the script to your store.
Visited Product Automation
To use this type of Automation, you need the Site Behavior script set up as explained above. Then follow the steps in How Do You Create a Visited Product Automation.
Site Tracking Automation
To use this type of Automation, follow the steps in How Do You Create a Site Behavior Automation.
Pending Payment Automation
To use this type of Automation, follow the steps in How Do You Create a Pending Payment Automation.
All set! You’ve learned how to integrate your Empretienda E-commerce store with your Doppler account. Start sending effective Campaigns to your Contacts now. 💛

 Loading...
Doppler informs you that the personal data that you provide to us when completing this form will be treated by Doppler LLC as responsible for this web.
Purpose: To allow you to make comments in our help center.
Legitimation: Consent of the applicant.
Recipients: Your data will be saved by Doppler and Digital Ocean as hosting company.
Additional information: In the Doppler Privacy Policy you’ll find additional information about the collection and use of your personal information by Doppler, including information on access, conservation, rectification, deletion, security, cross-border data transfers and other issues.