How to integrate your VTEX store
By integrating your VTEX e-commerce store with Doppler, you can synchronize both platforms and send messages automatically to all the contacts you generate in your store.
Building your database is just the first step to generating revenue in your online store. Once you gain those contacts that subscribe to your website, but don’t buy, the next thing is to feed them to end up becoming customers.
Then it only remains that you create Email Campaigns & Automation Marketing to reach each one with the right message at the right time. With the integration of VTEX and Doppler, you’ll create emails in minutes by automatically importing products into your store.
This is an index of everything you can find in this article:
- Download the Doppler plugin in VTEX
- How to integrate your VTEX store with Doppler step by step
- Insert application key and token on VTEX
- Integration of VTEX from Doppler
- How to add email field when integrating VTEX
- Don’t miss out on automation
Download the Doppler plugin in VTEX
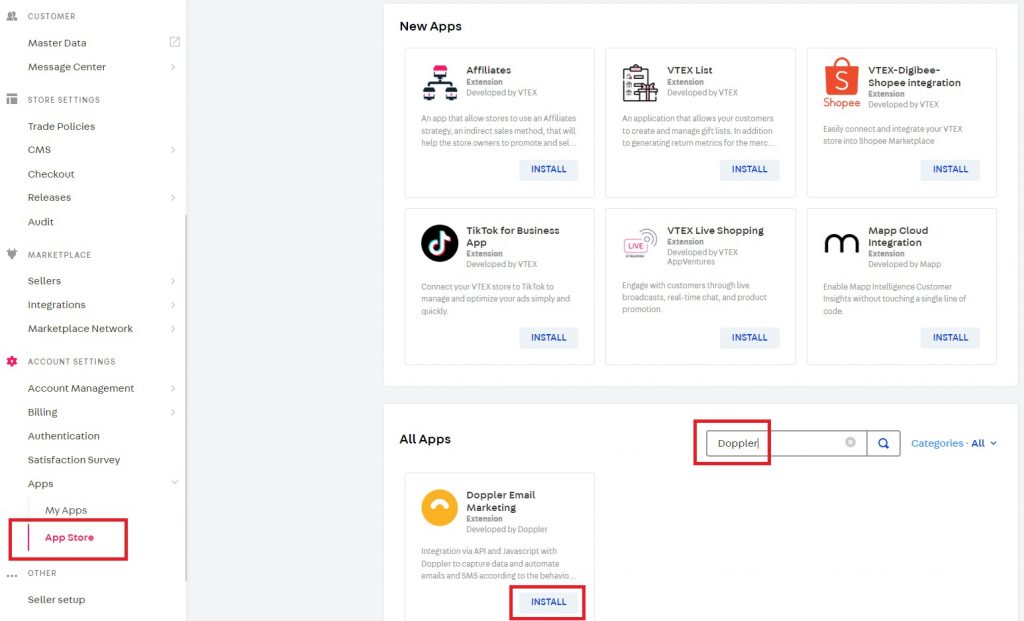
1 – Login with your user to the VTEX administrator and in the left menu go to “Account Settings” > “Apps” > “App Store”. When you click on “App store” the new apps will be displayed at the top and further down you will see a section where all the other apps are. Type “Doppler” in the search box to display the app and go forward by selecting “Install”.
2 – On this screen, the app features are presented. Advance with the button “Get app”.
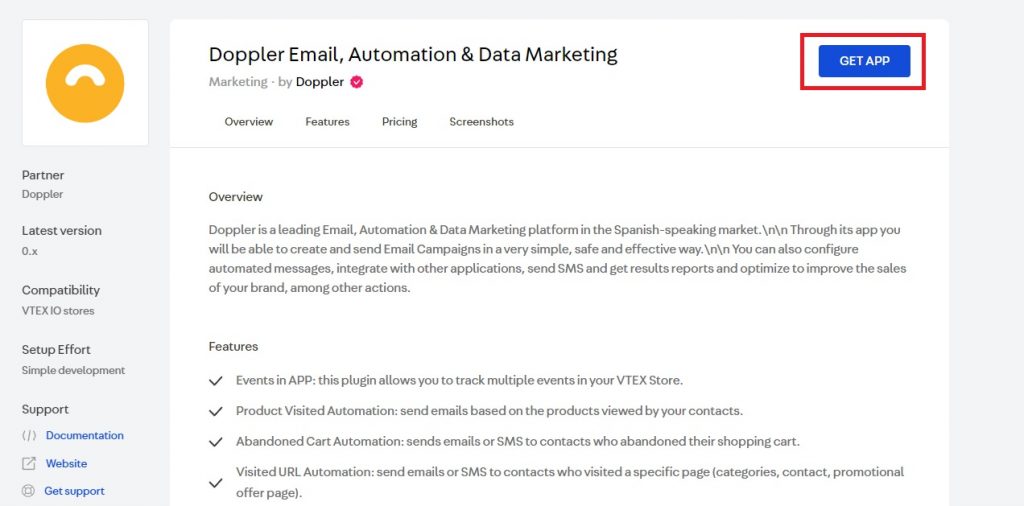
3 – Now another click on “Install”.

4 – Next you will have some very useful Doppler configuration options to apply pop-up forms and enable on-site tracking in your VTEX store. To know how to get the HTML code of your form, check this article to get it from Doppler.
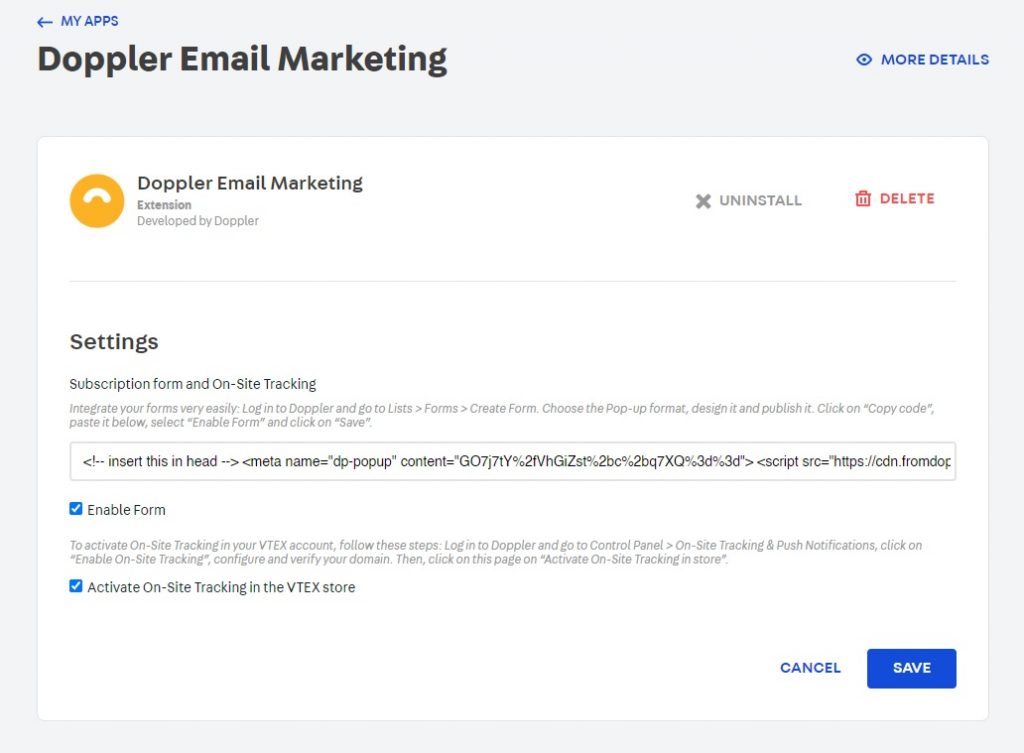
- The first field is the place where you should copy the code of your pop-up form created in Doppler so that it will appear to your VTEX store users according to the parameters you configure.
- Below is “Enable form” with the option to check and uncheck it, in case you want to disable it at some point without losing the form code.
- You can also activate on-site tracking with just one click from “Activate On-Site Tracking in the VTEX store” to be able to program customized automation.
- End with “Save”.
You’re all set! Your Doppler plugin in VTEX was successfully installed.
Read on to learn how to do the integration, locate application key and token, add the email field and other highlights of both platforms working together to empower your business.
How to integrate your VTEX store with Doppler step by step
Before you start, you need the application key and the token of your VTEX store. Here you will find the step by step how to obtain them. These credentials can only be generated by the Sponsor user, the one listed in the Contact section of your account on VTEX.
Insert application key and token on VTEX
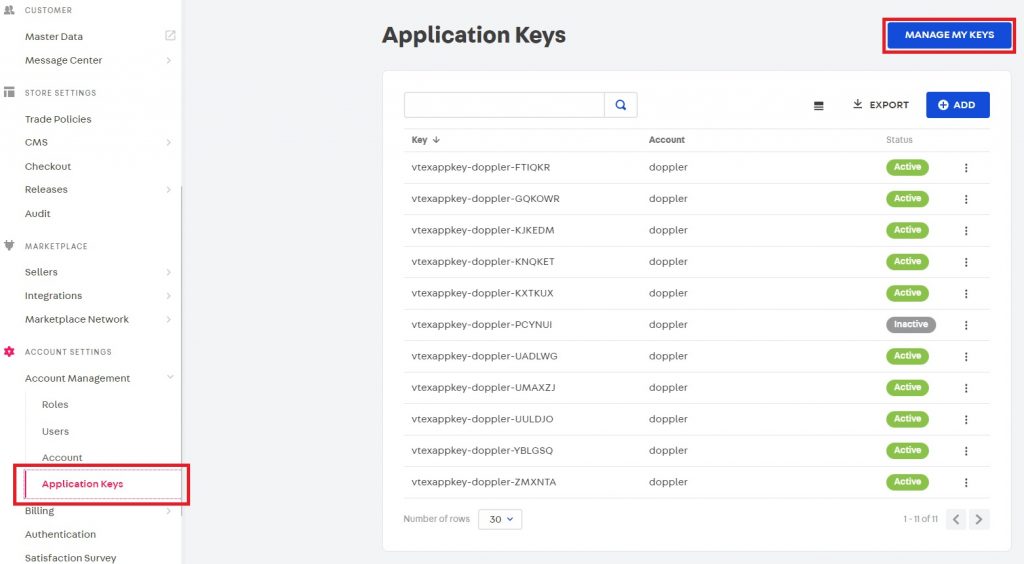
1 – In the left menu, go to the “Account Management” section and select “Application Keys”. In the screen that appears, you must click on the button “Manage my Keys”.
2 – In “My Keys” choose “Generate New”.

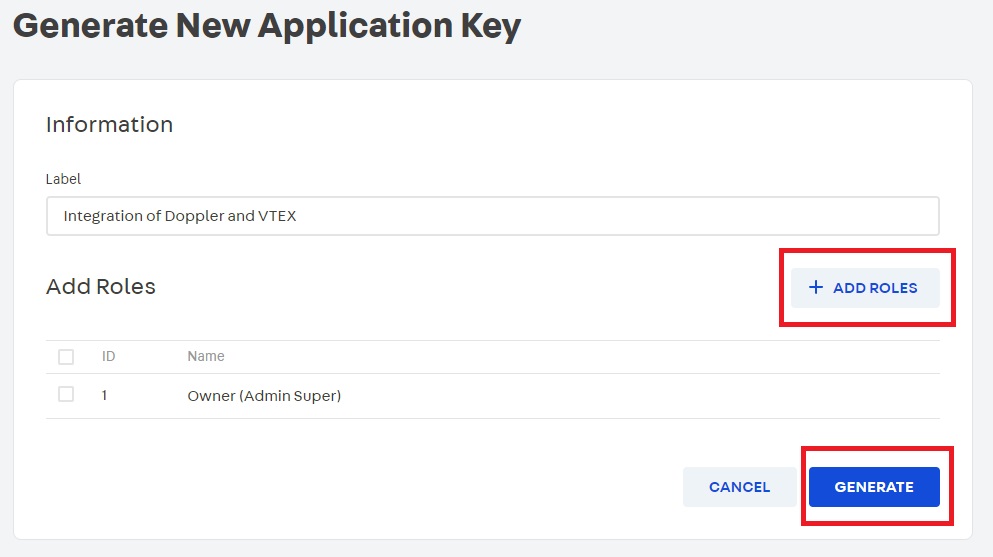
3 – In “Generate New Application Key” a space is displayed to enter a label to identify the use you will give the key. We call it “Integration of Doppler and VTEX”.
4 – Before continuing, you need to assign roles to define who will have permissions with this key. Go to “Add roles”.
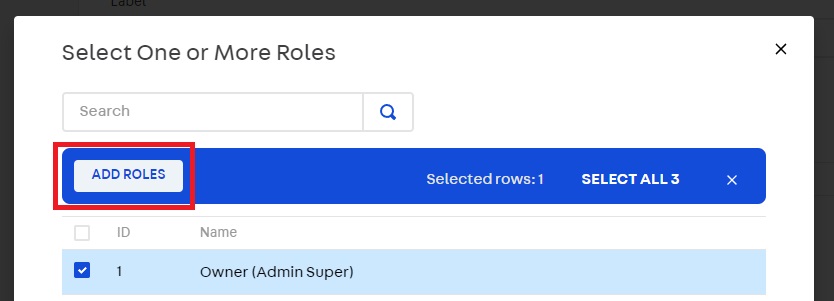
5 – A pop-up appears on the screen. Select the role or roles you want to authorize and select “Add roles”.
6 – You return to the screen in step 4, but this time select “Generate”.
7 – Ok! You have your application key and your token. For security reasons, the token is displayed only once, so we recommend that you copy it and save it in a safe place.
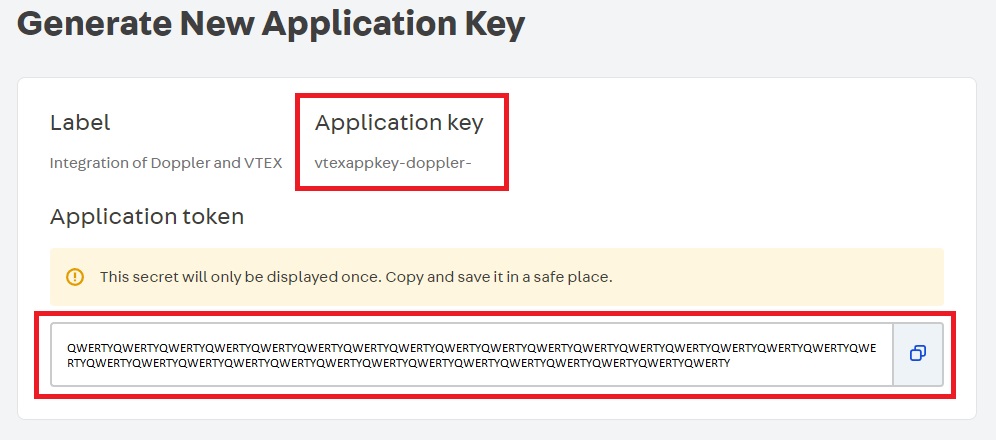
8 – You can check the Application Key from “Account Settings” > “Account” > “Security”.
For more details about Application Keys in VTEX see their specific help on the topic.
If you prefer to create a profile with restricted access to synchronize VTEX with your Doppler account, we suggest you contact our Customer Service team to verify the permissions you should have.
Integration of VTEX from Doppler
Once you have obtained the application key and token from your VTEX account, log in to your Doppler account to finish the process. If you don’t have it yet, you can create it for free.
1 – Enter the Integrations section.

2 – Go to the “Native Integrations” group. Select the VTEX logo.
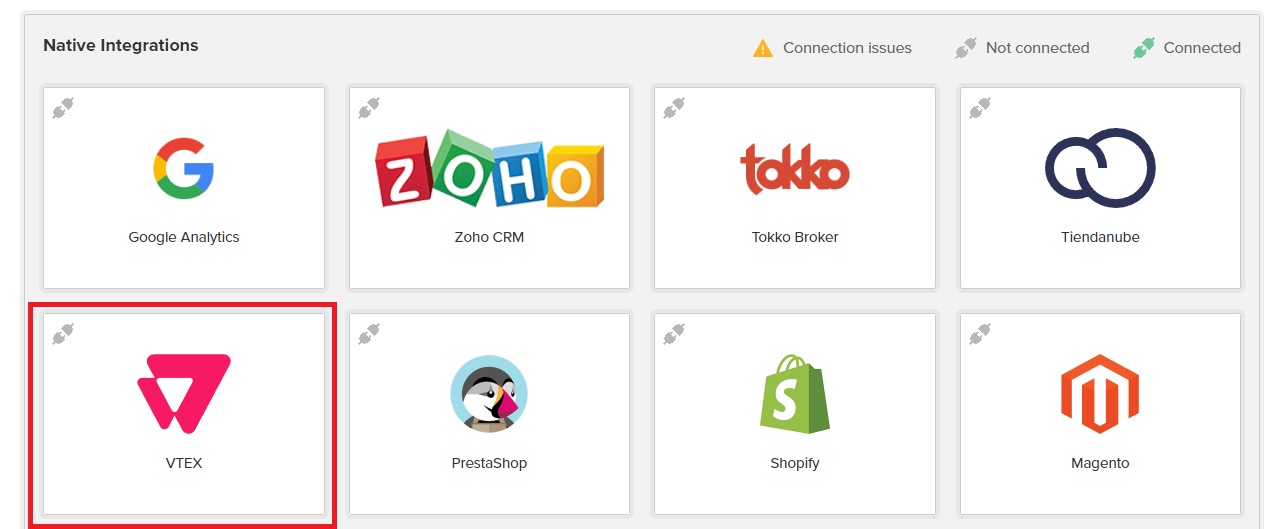
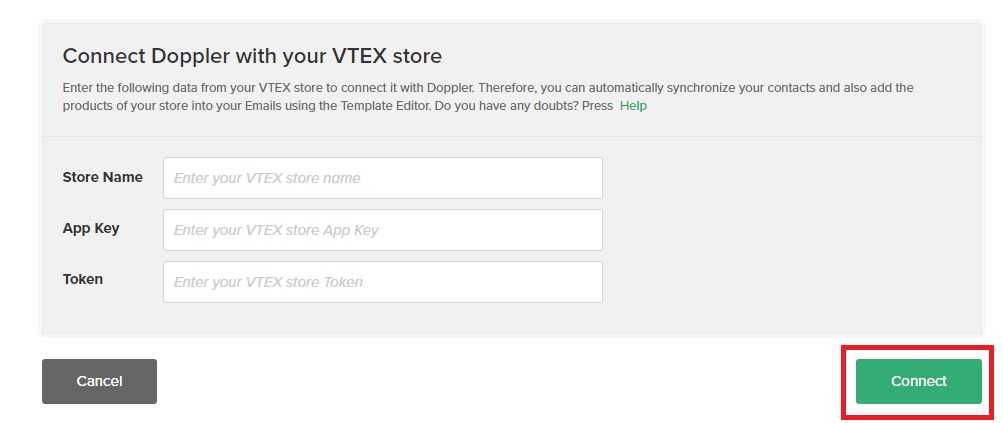
3 – On the screen below, fill in the empty fields with the data you obtained from your VTEX account and then select “Connect”.
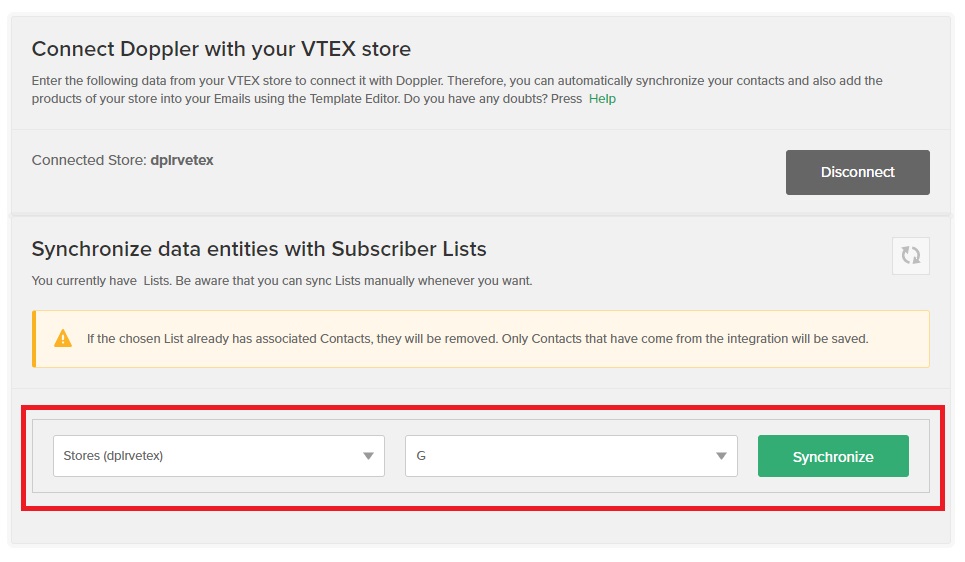
4 – Your accounts are already connected. The next step is to choose the VTEX entities you want to sync and the Doppler lists where you want to copy your contacts from your store.
If you haven’t created the list yet, in this article you will find the step-by-step video and text to make it very easy.
5 – When both fields are selected, proceed with “Synchronize”.
6 – Then you have to map the fields that will occupy the contact data of your account in VTEX when importing them to Doppler. Select “Next” at the bottom of the page to start importing.
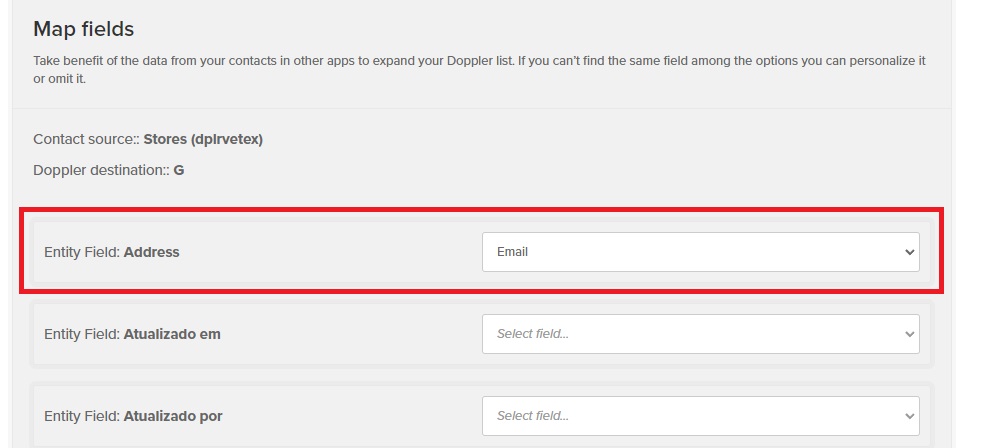
It is essential to create in Doppler the Custom Fields associated with the data you want to import. For example, if you want “Address” instead of “Email” to appear in the contact, create this field in your Doppler account.
You will see this when it is finished:

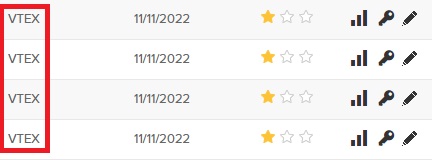
Once the synchronization is finished, you can check in “Lists” > “Contacts” that the imported contacts are identified by their origin.
How to add email field when integrating VTEX
One of the most important fields in an integration is the email field. In the Doppler integration with VTEX this field appears by default in the “Cliente” (customer) entity, but not in the others and then you need to create it by hand.
This tutorial will show you how to do it step by step. Although it is exemplified with the email, it is identical for any other field you want to add to your integration.
1 – The first step is to log into your VTEX account and from the administrator select “Master Data”.
2 – From “Aplicações”, where you are at startup, select “Advanced settings”.
3 – The next step is to select “Estrutura de dados”.
4 – Then a new tab opens. There you must click on “Data Entities”.
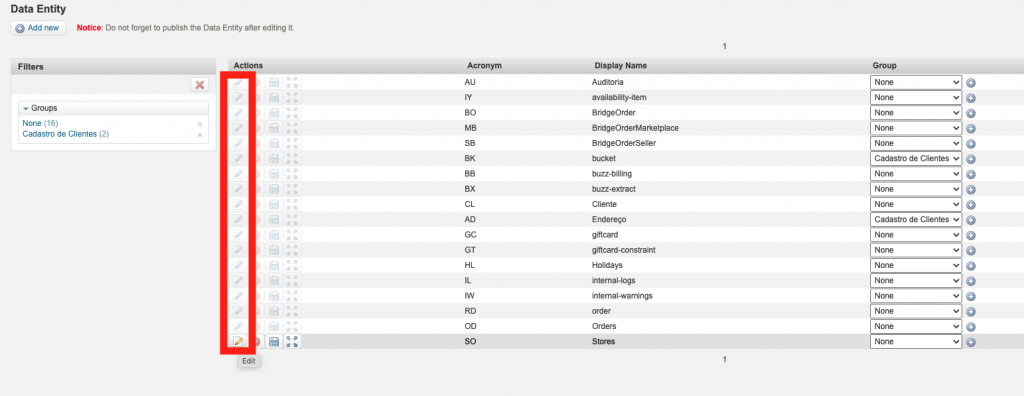
5 – From the current screen, you will see the list of entities. To add the email field, edit the entities you consider by selecting the “Edit” pencil icon.
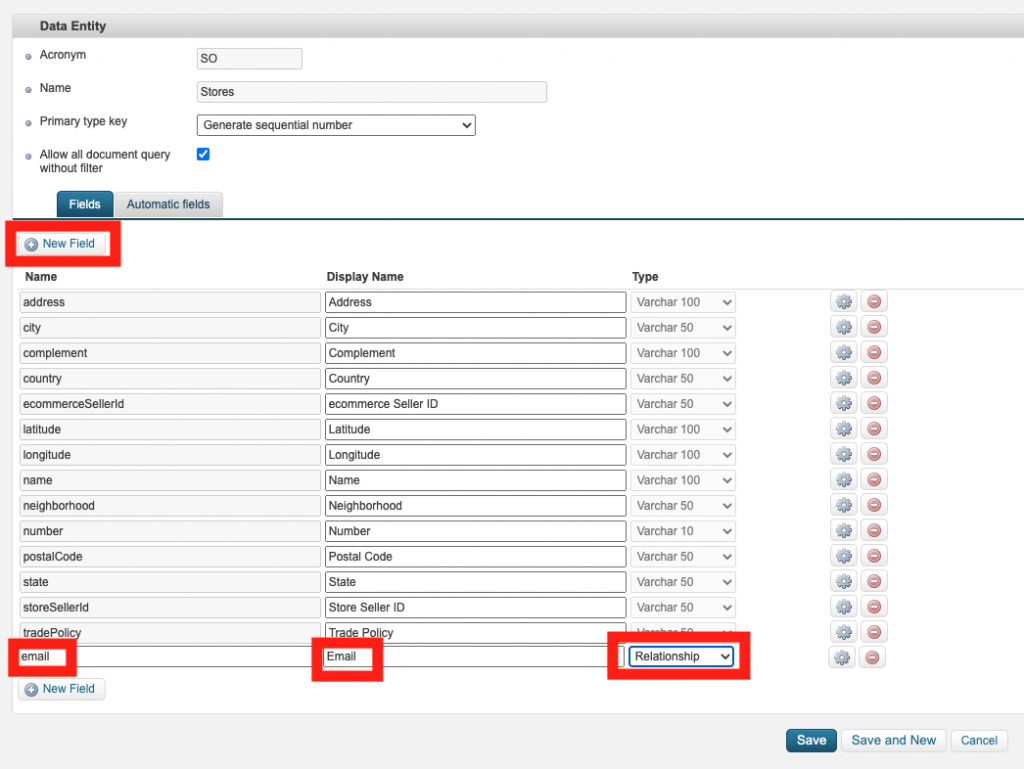
6 – Here is where the entity editing is done. In this screen, you will see all the fields that compose the entity.
Choose the “New field” button and fill in the fields as shown in the image: the “Name” column must have the value “email” and the “Type” column must have the value “Relationship”. The “Display Name” space is where you put the name you prefer.
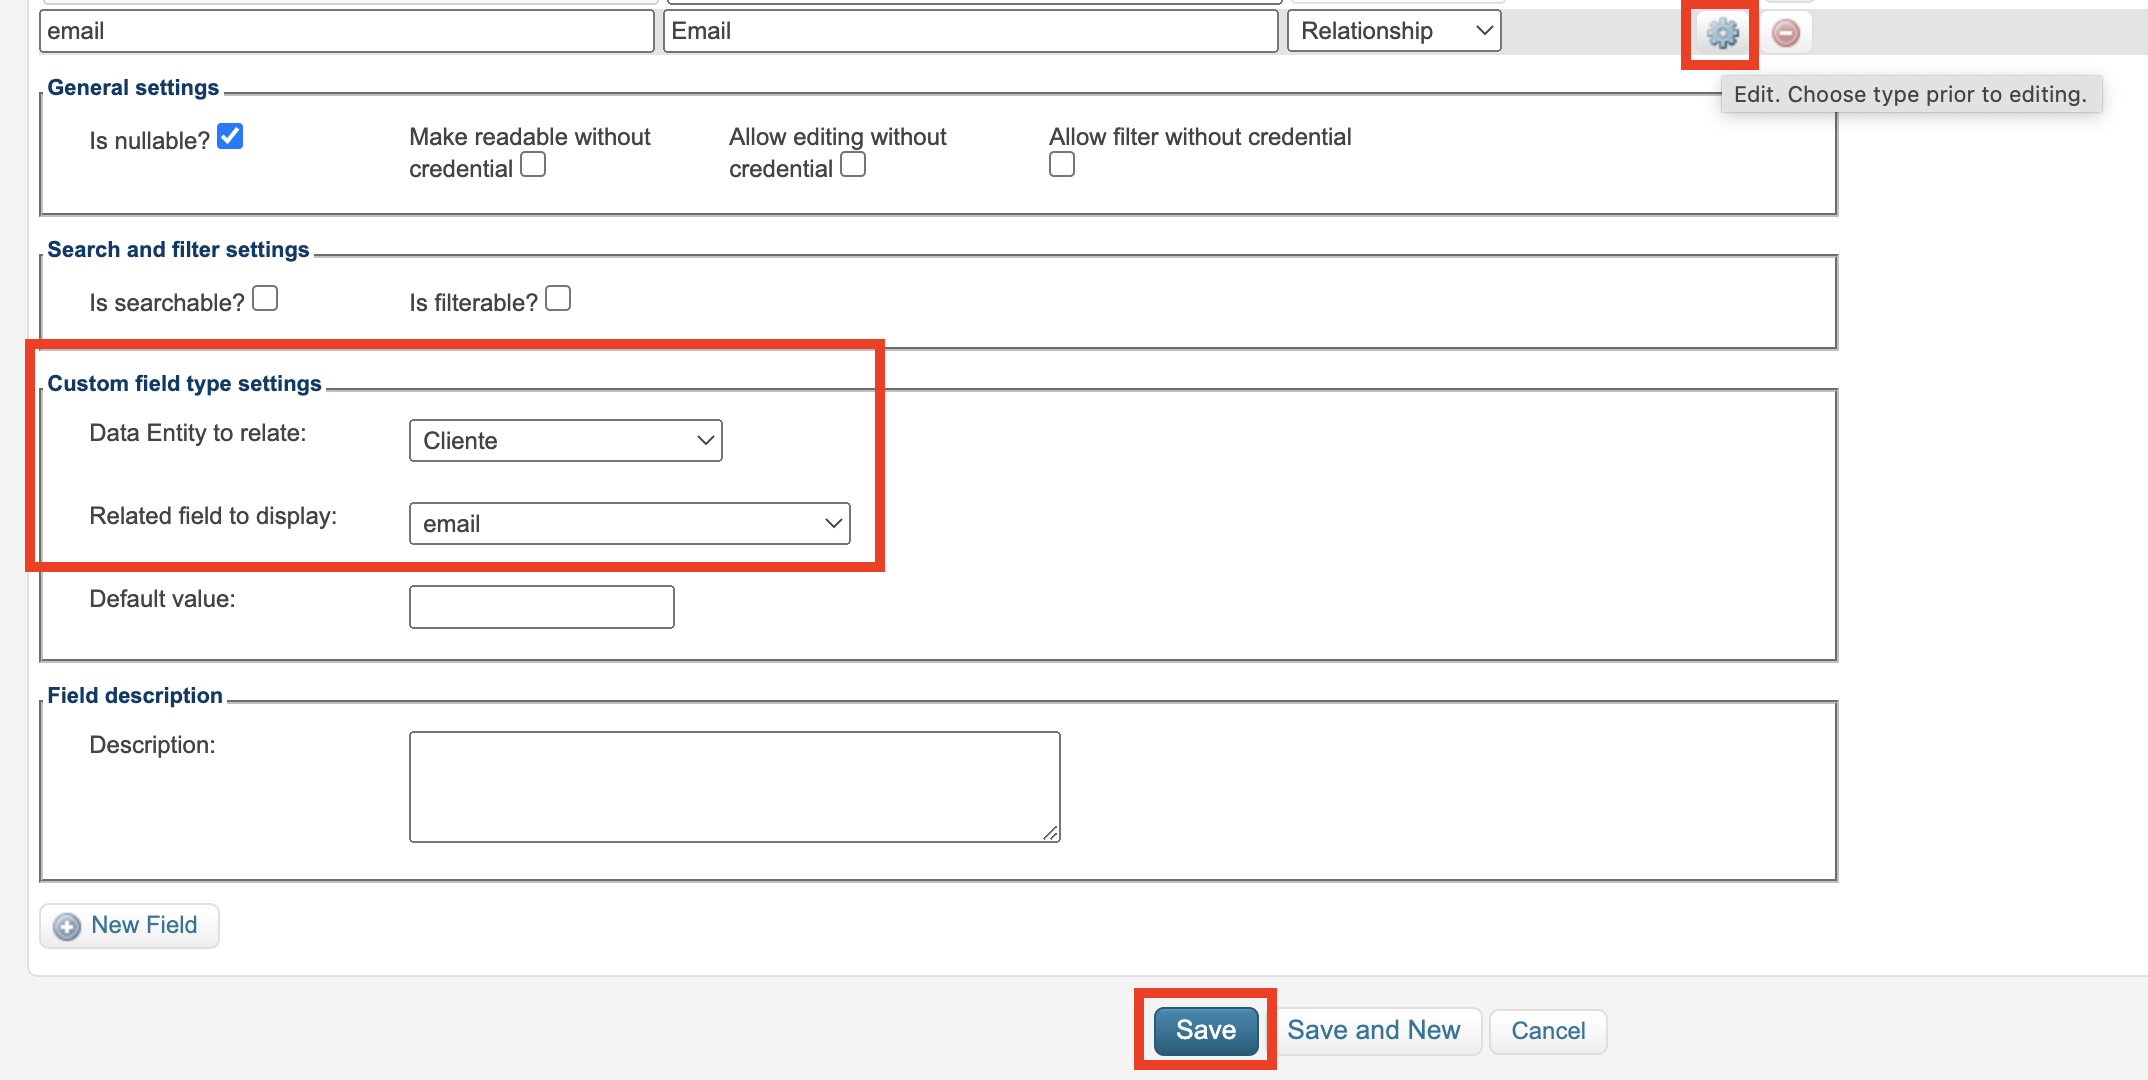
7 – Then select the configuration icon as shown in the image below.
A menu with several types of settings is displayed. In “Custom field type settings” you have to change two options: select “Cliente” in “Data Entity to relate” and select “email” in “Related field to display”.
8 – When you are done with all the data, select “Save” to save the changes.
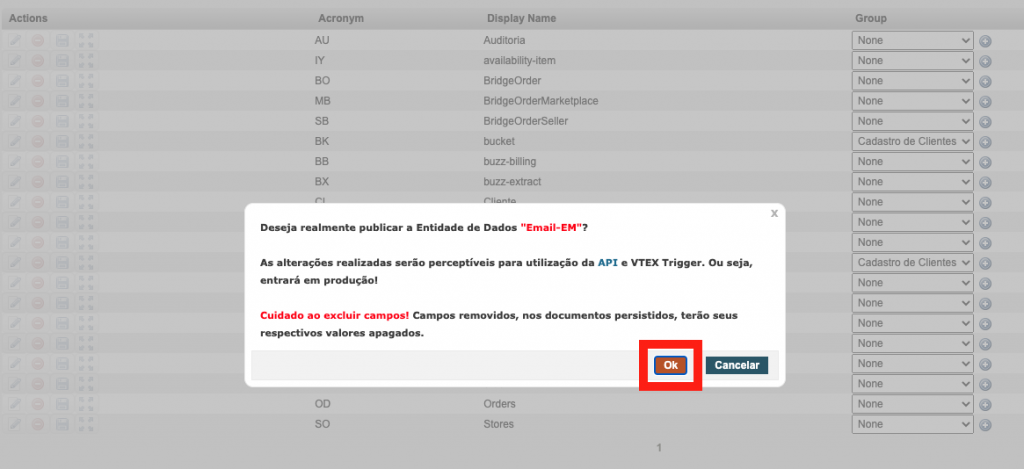
9 – Now the administrator returns to the previous screen, where you must click on the “Publish” button for the changes to take effect.

10 – All you have to do is confirm the action with “Ok”.
It’s done! You were able to add the email field in your entities and you learned the steps to include any other field you want.
Don’t miss out on automation
One more recommendation! There are two key automations to attract visitors to your store who have abandoned their product cart, or who have viewed one or more items, but have not initiated the purchase. Consult these help to enhance your strategy:
Have a great campaign!
Any questions? You can contact our Customer Service team by WhatsApp. We are here to help you.

 ES
ES EN
EN




Doppler informs you that the personal data that you provide to us when completing this form will be treated by Doppler LLC as responsible for this web.
Purpose: To allow you to make comments in our help center.
Legitimation: Consent of the applicant.
Recipients: Your data will be saved by Doppler and Digital Ocean as hosting company.
Additional information: In the Doppler Privacy Policy you’ll find additional information about the collection and use of your personal information by Doppler, including information on access, conservation, rectification, deletion, security, cross-border data transfers and other issues.