 ES
ES EN
ENHow to create a Signup-based Email Automation
You may use these Campaigns to program automatic Welcome Emails ready to be sent when a new Subscriber adds up to your List.
The first step to create an Email Automation Campaign is to login to your Doppler account and click on the Automation section. Don’t have an account yet? Sign up for free now!

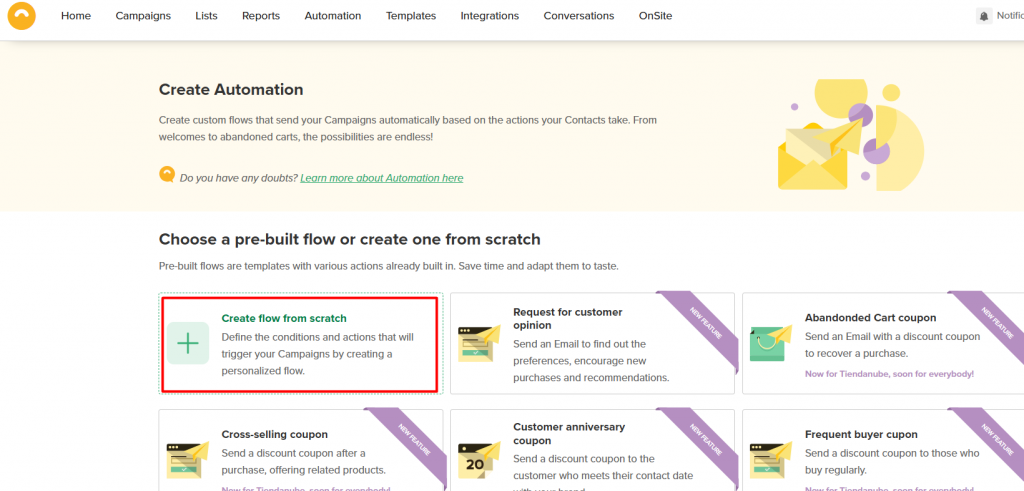
Once you access, select “Create Flow from scratch”
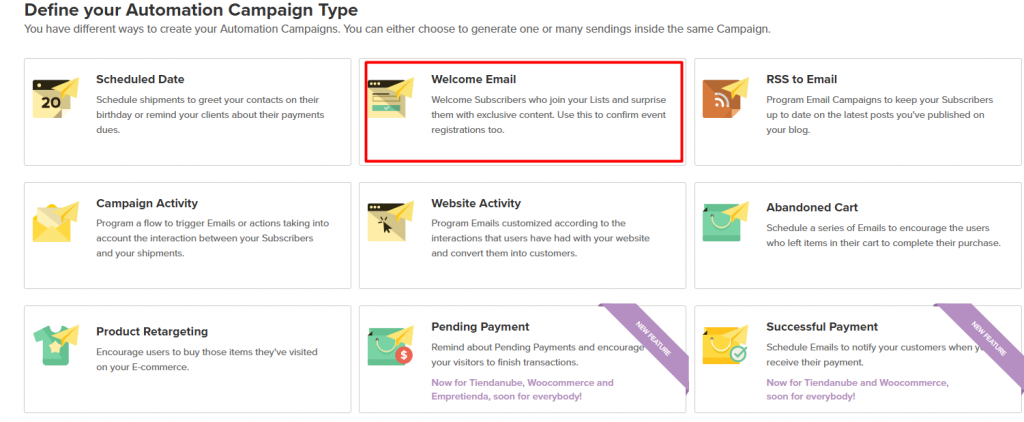
You will see the types of Automation Campaigns you can create. Choose “List Subscription”.
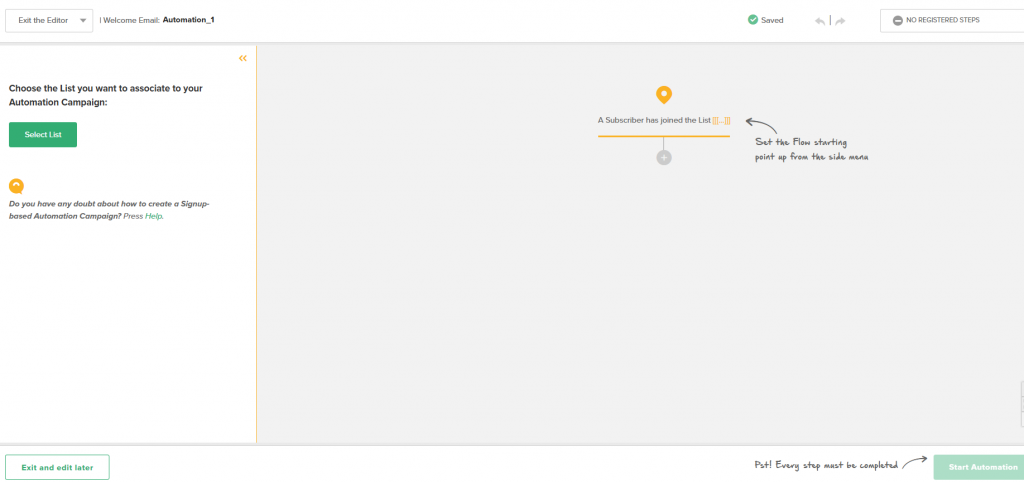
The next step is to choose the Subscribers List you want to associate your Welcome Campaign to by clicking on “Select List”. Remember that the List you select must be filled by a Subscription Form or via API. So, each new contact who sign up to your List will receive the Email Campaign you have created.
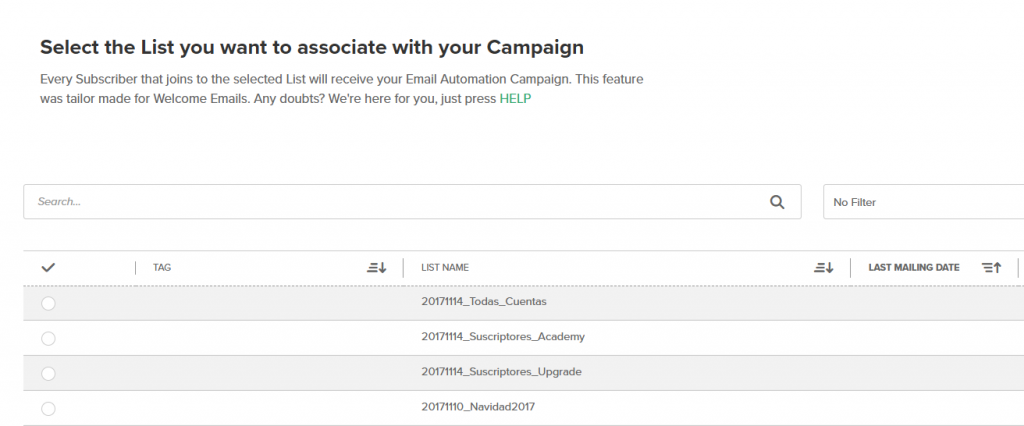
When you click the button you will see this screen. There you will have to select the List which you want to associate your Email Automation by clicking in the circle that appears in the image. In the example we have selected the List “Blog Subscribers”. Once that is done press the “Confirm selection” button.
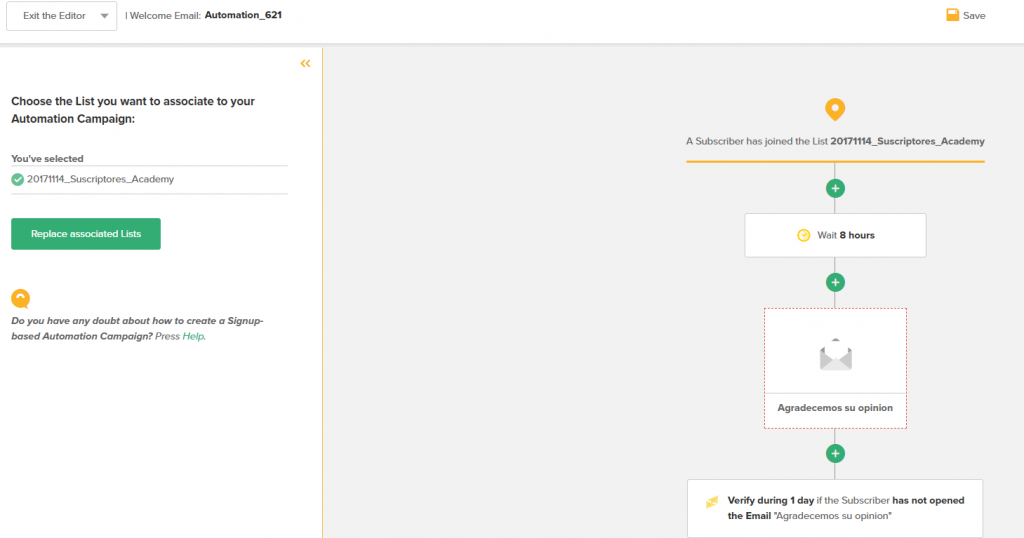
On the next screen you will see the name of the selected List. If you want to modify it, just click on the “Replace Associated Lists” button. Here you can start defining the first step of your Automation Flow. To do this, click on the + icon that appears on the canvas.
There you will see many different options.
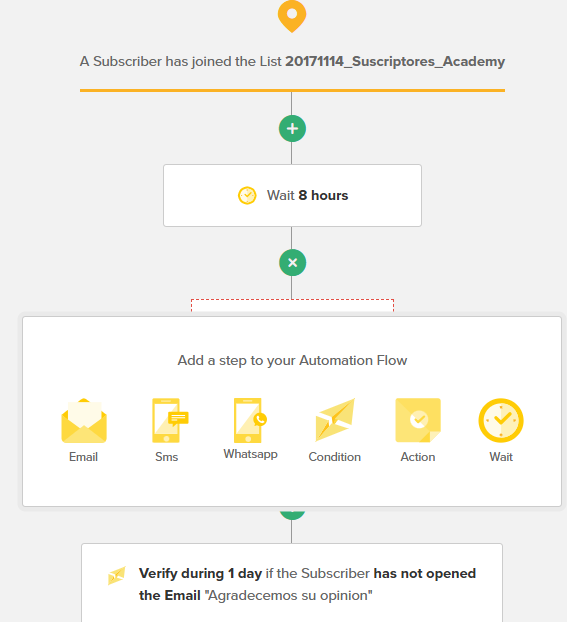
Several different options will be displayed. To set up a basic Welcome Automation, you’ll use the “Wait” and “Email” elements. But let’s look at what each one is about, in case you’d like to make the flow more complex.
- “Wait” refers to the amount of time after which your Campaign will be sent, which could range from minutes to several weeks. If you’d like your Welcome Email to be sent immediately after the Subscription is confirmed, you shouldn’t configure this element.
- “Email” allows you to create and configure everything related to your Welcome Email. We’ll go over each element in detail later.
- “Condition” allows you to define whether certain parameters are met or not, in case you want your Welcome Campaign to reach only some of your Contacts.
- “Action” gives you the possibility to run one based on your objectives: associate that Contact with another List, modify some Subscriber information, etc. Typically, actions are set up after a Condition or after an Email is sent.
- “SMS” allows you to trigger a flow of text messages. It is an interesting possibility for other objectives of your Store. Here you can learn more about sending automated SMS campaigns.
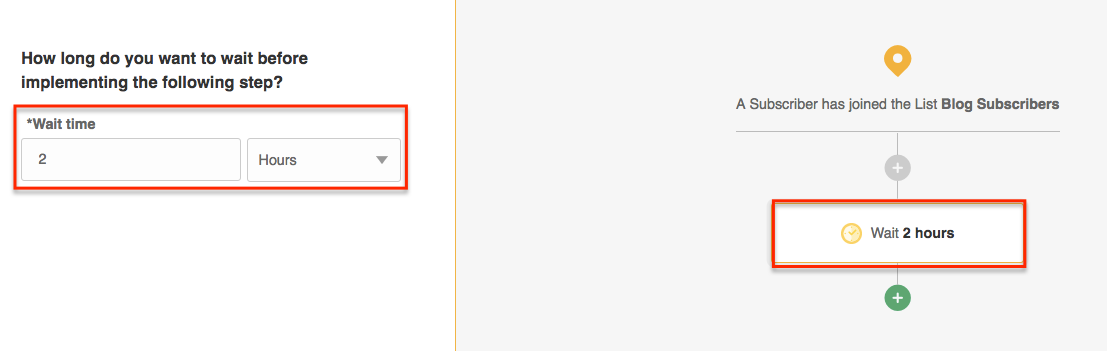
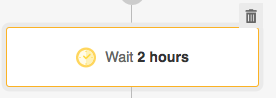
Let’s say you want your contacts (List that we have associated with our Sample Automation Campaign) receive a Welcome Email 2 hours after they subscribe to your Blog. To do this, type the number 2 in the field “Wait time” and choose the “Hours” option. You will see how the data is automatically updated on the canvas on the right.
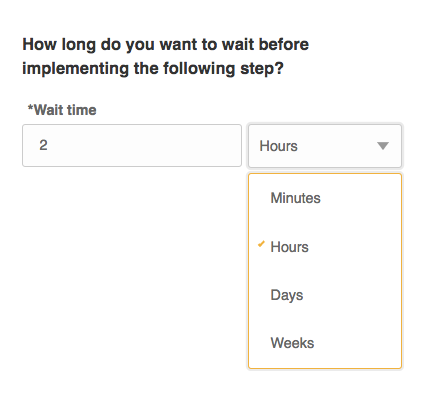
You can also choose to send your Welcome Email immediately by writing the number 0 in the “Wait time” field or you can also define a certain amount of minutes, days or weeks.
You can also create an Emails series. For example, set up an Email that your new Subscribers will receive at the exact moment they subscribe to your List and another one or two days later.
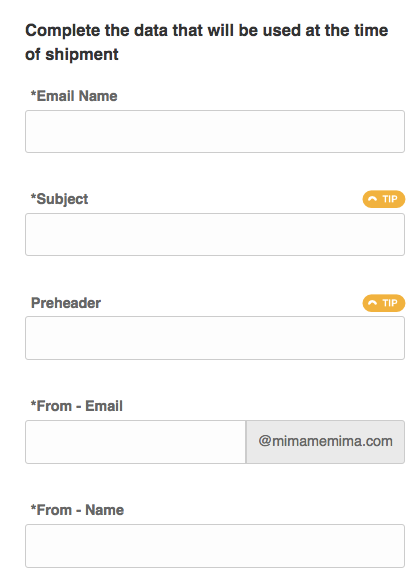
To create the Email that your contacts will receive, choose the “Email” option. In the left panel you will have to complete all the data of the shipment, as well as you do with the rest of the Email Campaigns.
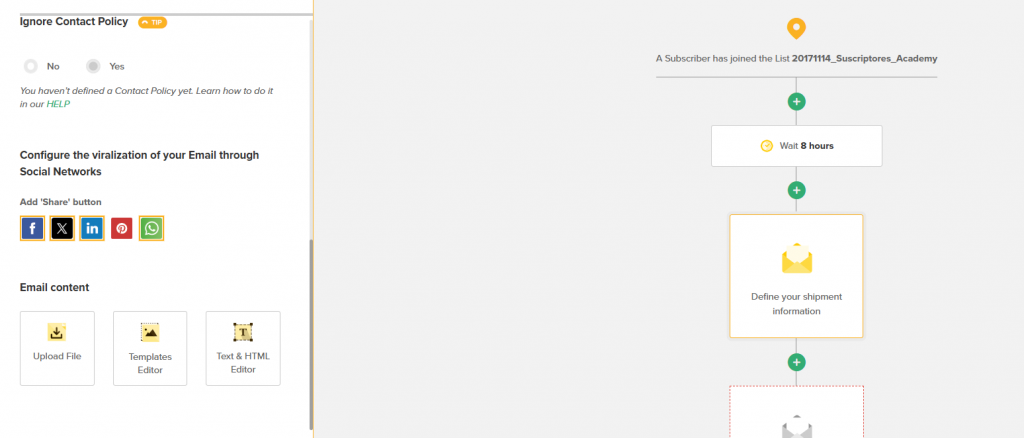
Once you’ve completed that, you’ll be ready to configure the viralization of your Campaign and create your Email Content. You may import a HTML file, edit one of our Templates or create a new Campaign from the Text Editor.
The Template Editor option is ideal for those who have no knowledge of HTML and want to create effective Email Campaigns in minutes. If you have your own Templates, you can choose one from the “My Templates” section, otherwise, you can select one of those available in the different categories.
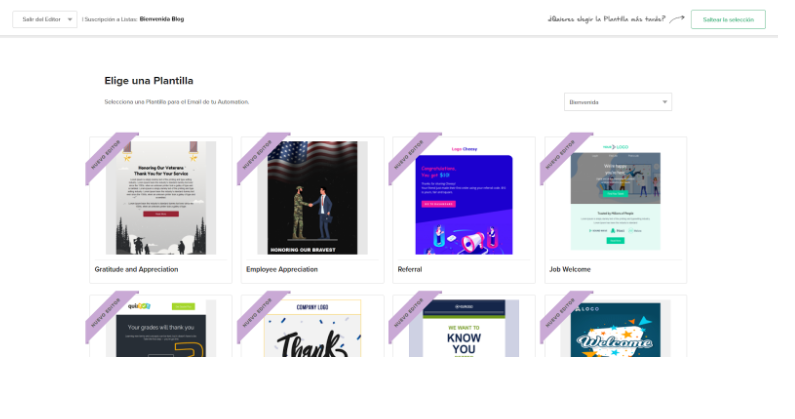
When you click on one, two options will appear: “Select without editing” if you want to leave it as is or “Select and edit” if you want to make any changes from our Editor. If you have chosen to edit a Template, you will be taken directly to our Editor. Remember that you can change everything you want: images, text, colors and add links by simply dragging and dropping elements. Once you have your piece ready, click “Next”.
You have now configured your List Subscription Automation Flow. On the canvas you will be able to see all the steps in detail. If you want to modify any of them, just click on it and on the left the panel will appear from where you can make the changes you want.
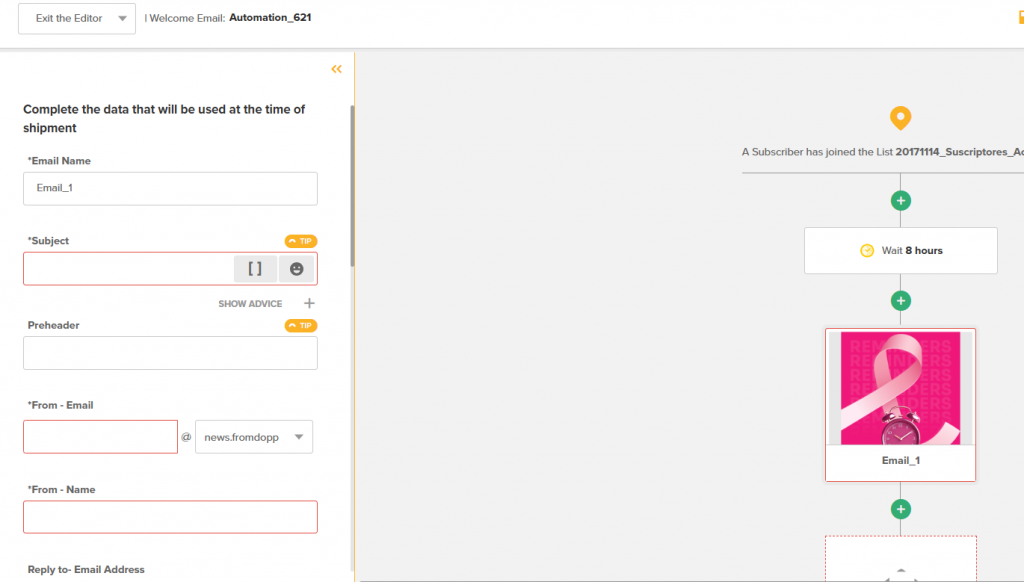
That’s it! You have already configured your Automation Flow. On the canvas you can see all the detailed steps. If you want to modify some of them, just click on it and make the changes you want on the left the panel.
If you want to delete any of the steps, just by placing the cursor on it you will see the “Delete” icon appear.
All the steps that you create and configure will be saved automatically, although you also have the option “Save” in the upper margin of the screen.
If you want to go back or go forward, you always have the buttons “Undo” and “Redo”.
Finally, you will see a rectangle that will indicate the steps that you are completing and if there is something to which you must pay attention.

Once you have finished defining all the steps of your Campaign, and after checking all the shipments that compose it, only remains to click the “Start Automation” button. This way, every new Subscriber that enters your “Subscribers List” will receive the Email you especially design for him.
Just in case you need, you can pause or stop any Automation Campaign you’ve created with Doppler.
Don’t forget that with Doppler you may also use Email Automation Campaigns on special dates. You may program your Campaigns by Day of the Week, Day of the Month or a Day of the Year.
Make the most out of Email Automation!


Hola, quiero saber como hacer un formulario para una lista, ya tengo la campaña de automation para esa lista pero no tengo el formulario.
Hola Juan, te sugiero que revises este artículo que te ayudará paso a paso a crear un Formulario vinculado a una Lista de Doppler, para que a su vez puedas seleccionarla en un flujo de Automation: https://help.fromdoppler.com/es/formulario-de-suscripcion/
Si tienes otras dudas, puedes escribirnos a [email protected]. Saludos, Julieta de Doppler.
Hola! Tengo el Automation activado y cuando lo pongo en pausa para agregarle otra lista, no me aparece habilitada la opción. Es posible agregar una lista? O copiar la lista de Automation para generar una nueva?
Hola Dani, la opción de pausado actualmente permite editar el o los Emails que componen un flujo de Automation, pero no modificar o sumar nuevas Listas. Te sugiero que revises el artículo que hablar acerca de las posibilidades y diferencias entre pausar y detener Automation: https://help.fromdoppler.com/es/diferencias-entre-pausar-y-detener-automation/
Saludos, Claudio de Doppler.
Hola! He creado la la automatización pero cuando realizo la prueba suscribiendome no me llega el E-mail de bienvenida. Revise y esta todo ok y esta activa la automatización.
Muchas gracias
¡Hola Vanina!
¿Has podido solucionarlo?
Saludos, Sole de Doppler.
Hola, se puede agregar a un mail de bienvenida un archivo pdf para enviar como adjunto a todos los suscriptores nuevos?
¡Hola Julieta! ¿Has podido resolver tu consulta?
Saludos, Car de Doppler.
Hola! Ya cree mis campañas de Automation, asociadas a sus corresponidentes listas. Los mails se enviaron en un principio, pero si decido agregar un suscriptor más a alguna lista, este no recibe ningún mail. Ahora Eliminé todas las campañas y volví a crearlas pero que en lugar de ser comportamiento en campaña, ahora lo hice con suscripcion a listas. Pero ahora ni si quiera ha enviado ningun mail desde que cree las nuevas campañas de automation….
¡Hola Ana!
Voy a derivar tu consulta al área de Atención al Cliente para que puedan ponerse en contacto contigo.
Saludos, Car de Doppler.