 ES
ES EN
ENHow to insert Doppler Forms in Tiendanube
Have you created a site on the Tiendanube platform? It’s time to start attracting Subscribers with Doppler Forms. You can create them, design them to your liking and place them directly on the pages of your Website.
Email Marketing is an excellent technique that helps you connect with your potential customers to make your brand known and thus increase your sales.
A good practice to grow your Database is to include a Subscription Form, to obtain the necessary data to send Campaigns with your products or services.
In this articles you will see:
- How to create classic Forms and embed them in your Tiendanube
- How to create Pop-up Form and insert them so that they appear in your Tiendanube
Before starting you need to log in to your Doppler account. Don’t you have one yet? It’s time to create it for free!
Now, let’s get to work!
How to create classic Forms in Doppler to include them in your Tiendanube
Step 1
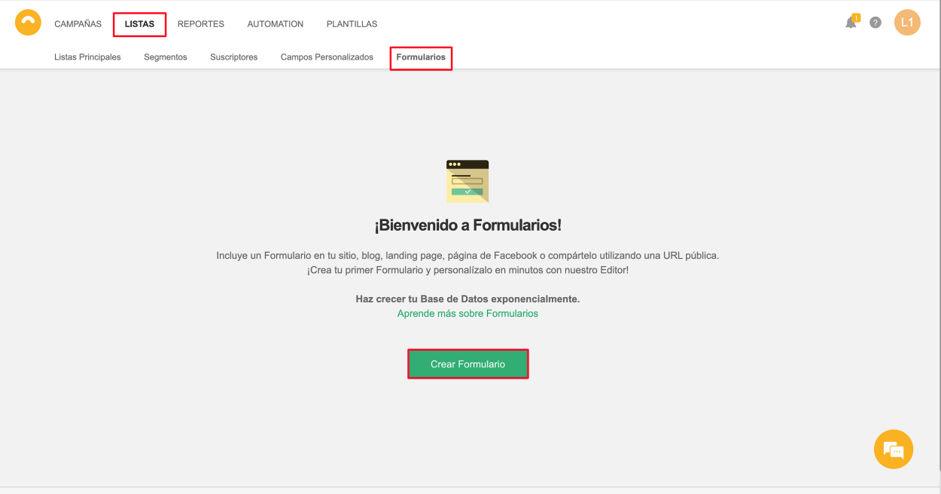
Once inside your Doppler account, select the “Lists” tab and then click on “Forms.” There you will see the “Create Form” button.
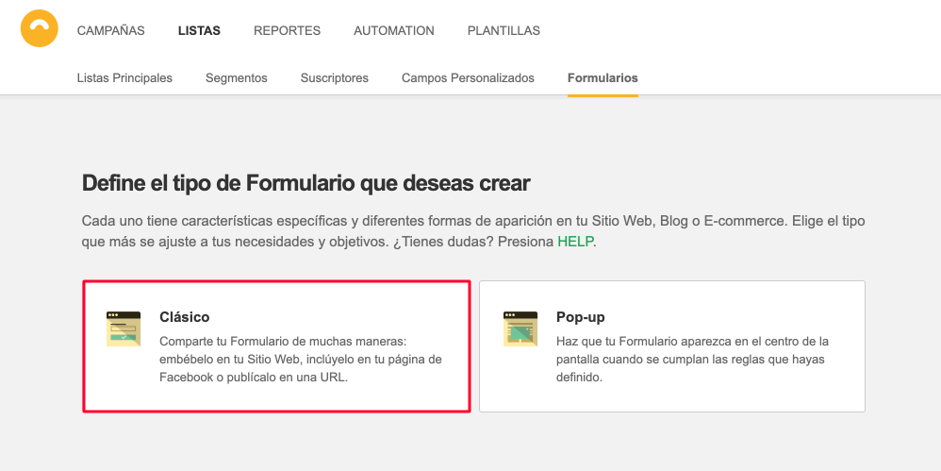
On the next screen you must choose the option to create a Classic Form.
Step 2
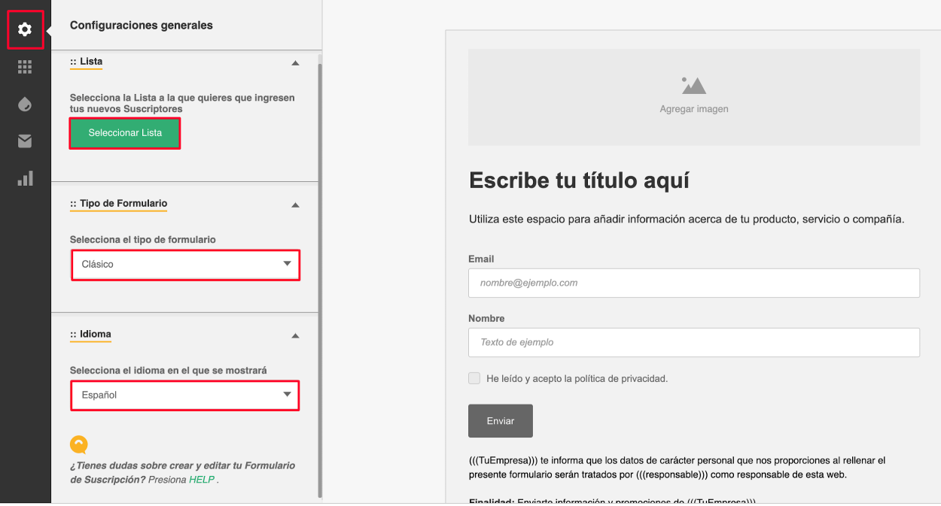
Click on “Settings” and select the List in which you want to register the Contacts who subscribe through the Form you are creating. If you already have your Doppler account integrated with your Tiendanube, you probably already have a Contact List created.
In this section you can also configure the language of your Form, choosing between Spanish or English.
Then click on “Elements” and configure all the components you want to include in your Form. We recommend that you only include the Fields most relevant to your business. Remember that less is more!

Step 3
To advance in the creation of your Classic Form, you will need to customize the “General Styles”, “Subscription Type” and “SEO and Analytics Settings” settings. If you need help making these adjustments, you can review the following tutorial.
Once you have completed all the required settings, click the “Distribute Form” button at the bottom of the screen.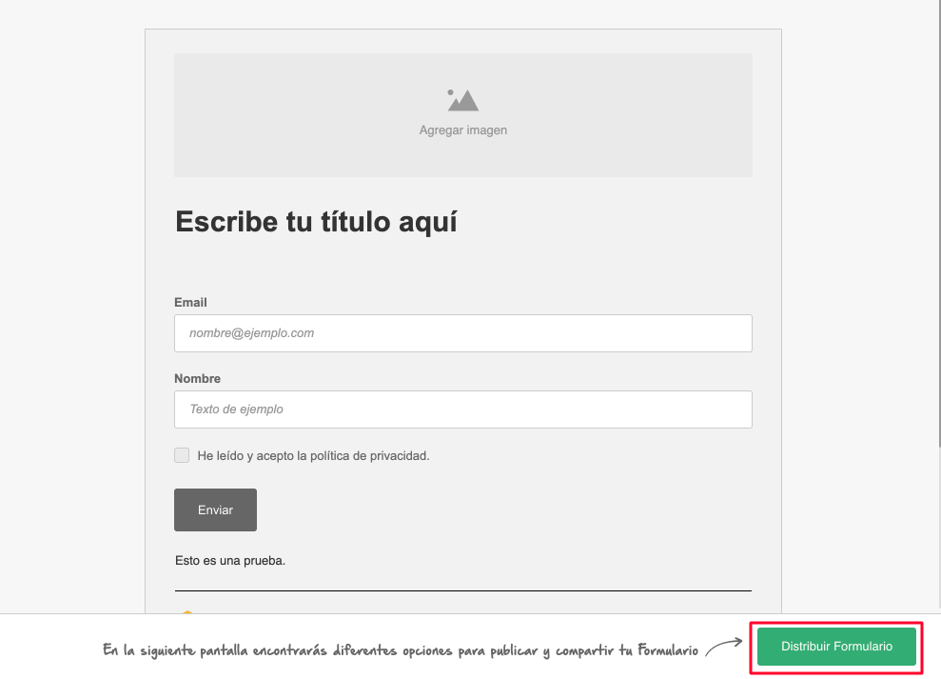
Step 4
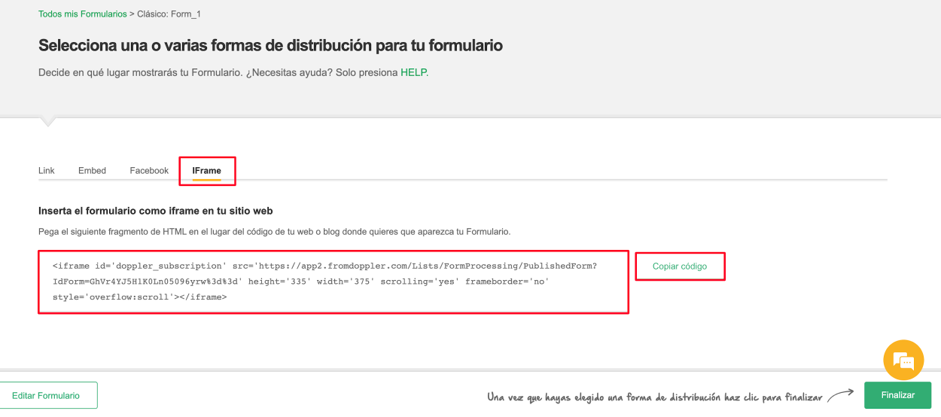
On the next screen you will see the publishing options for your Form. You must select iFrame and copy the HTML code.
Step 5 (from your Tiendanube account)
It is time to leave your Doppler account and access your Tiendanube Administrator. Once you enter, go to the menu: My Cloud Store > Pages. You can insert your Form into a page you have already created, or create a new one by clicking on the “Create a Page” button.

Now, click on the “HTML Source” button. Then, paste the iFrame code that you bring from your Doppler account. In the following video you can see it step by step.
You will be able to modify the “Height” and “Width” components of your Form to your liking, as shown in the video. This way your Form will be displayed in the size you want. Don’t forget to check that it also looks correct in the mobile version.
Ready!
You have already incorporated a classic Doppler Form in your Tiendanube. You can start attracting Subscribers from the moment you save the changes in your Tiendanube Administrator.
Now, let’s see how to create a Pop-up Form, that is, one that does not remain static but is displayed or “opens” on the page or pages that you define.
How to create Pop-up Forms in Doppler to include them in your Tiendanube
This type of Form appears suddenly when a user is browsing a website. They are really useful for attracting Subscribers since with the “surprise effect” they generate a high conversion rate.
If you want to configure a Pop-up Form and insert it into your Tiendanube, the first steps are the same as for a Classic Form.
Step 1
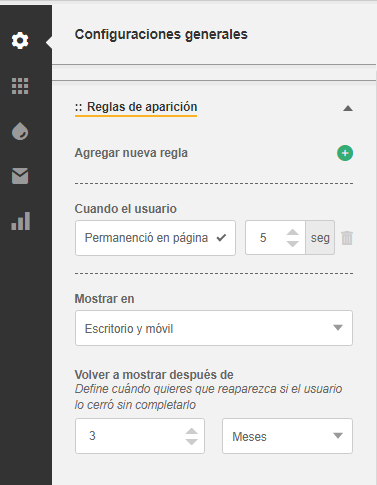
Go to Lists – Forms – Create Form and select the Pop-up option. Next you must define the rules for its appearance, that is:
- The time the user spends on the page after which the Pop-up will appear.
- What devices will it be displayed on: desktop, mobile or both.
- The reappearance time of the Form, in case the user has decided to close it the first time.
Step 2
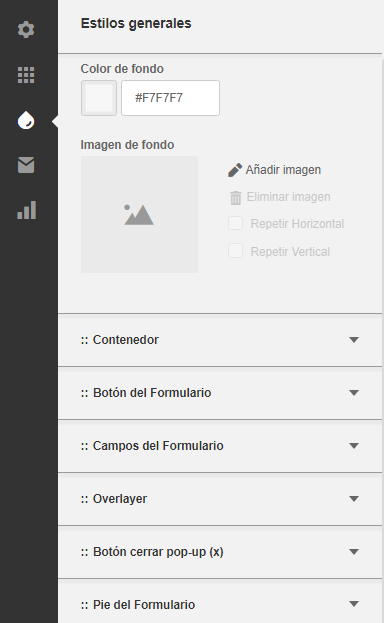
Once you have defined these issues, you will go on to determine the Elements that the Pop-up will have, as well as the Appearance it will have. This works the same as in the case of Classic Forms, with the only addition that in the “Styles” section you can also customize the Overlayer or layers of the Pop-up, and its close button.
Step 3
Define the Type of Subscription you will request and perform the SEO and analytics Configuration. Remember that if you need help to achieve this, in this tutorial you will find the sections corresponding to both actions.
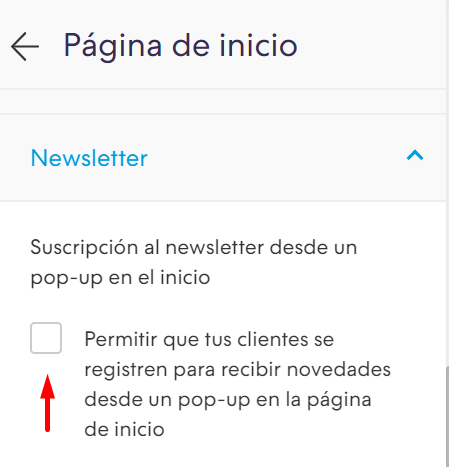
BEFORE CONTINUEING: If until now you have had a Pop-up Form created in Tiendanube active, be sure to disable it before inserting the one you created in Doppler.
You can do it easily from My Tiendanube > Customize your design > Home page > Newsletter. Once there, you must uncheck the option “Allow your customers to sign up to receive news from a pop-up on the home page.”
Step 4 (from your Doppler account)
Do you want your Doppler Pop-up to appear on all the pages of your Online Store? So, once you have configured the pop-up, perform the following steps:
- Once the pop up form is created, go to the publication section and copy the code.
- You must perform the following actions in Google Tag Manager (GTM) and Tiendanube (TN).
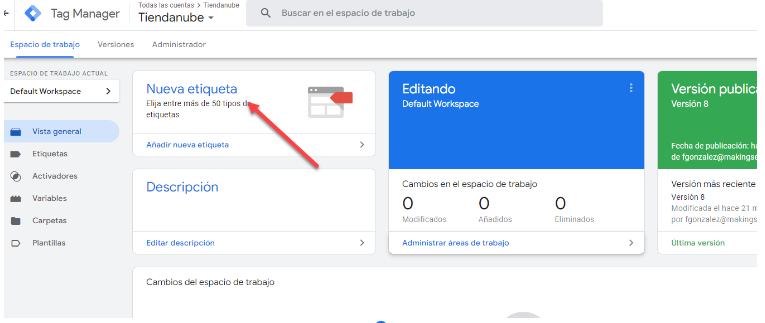
- The first step will be to create the GTM label with the form code. Go to https://tagmanager.google.com/ and create an account. (If you do not have one)

- Then, complete with your account information. The most important thing here is that the account is of type “Website”.

- Once you have entered your account, you will need to create a new label.
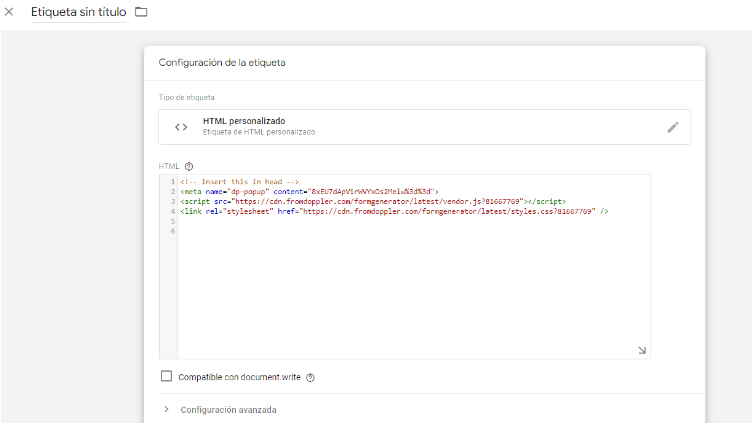
- The label configuration must be of type “custom HTML”
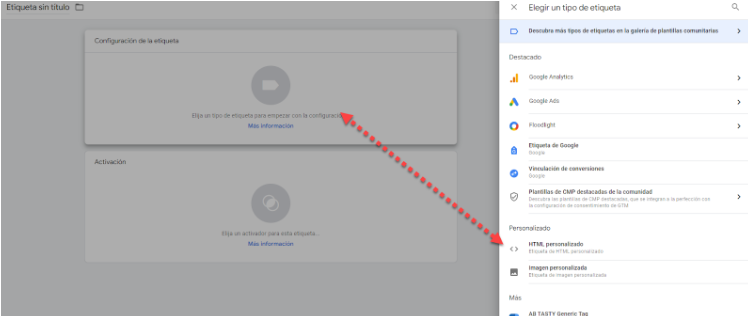
- In that option, paste the form code.
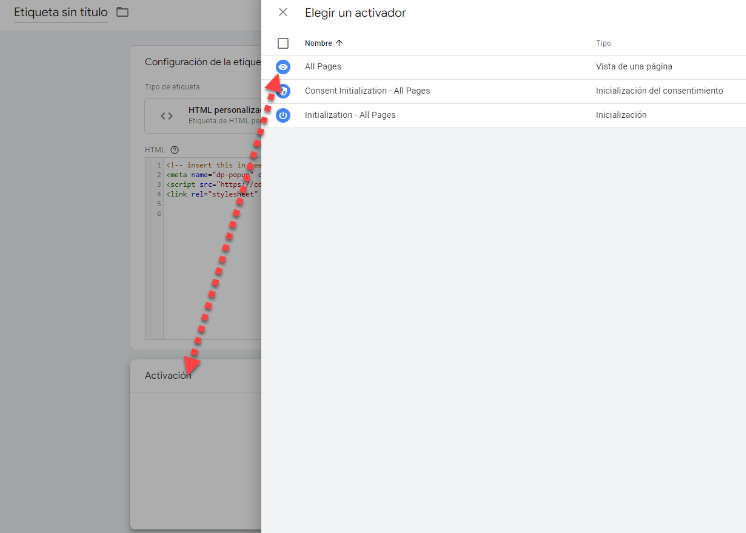
- You must activate the “All pages” label.
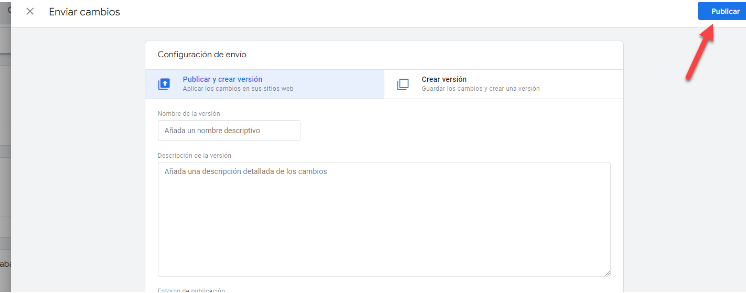
- Now it’s time to publish the changes. Select “Submit” and then “Publish.”

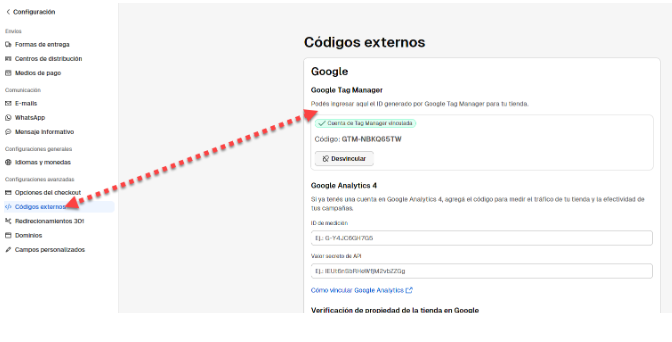
- Now, you must copy your GTM account ID.
- Next, go to the TN store administration and then to the settings option.
- Within the configuration go to “external codes” and once there, choose the GTM section in which we can paste the ID and then save the changes.
That was it! If you reached the end, we hope it is because you have managed to create your Classic or Pop-up Form in Doppler, and then you have successfully inserted it into one or more pages of your Tiendanube. Otherwise, write to us or leave us a comment on this post.
Good luck with your Doppler Forms for Tiendanube!


Doppler informs you that the personal data that you provide to us when completing this form will be treated by Doppler LLC as responsible for this web.
Purpose: To allow you to make comments in our help center.
Legitimation: Consent of the applicant.
Recipients: Your data will be saved by Doppler and Digital Ocean as hosting company.
Additional information: In the Doppler Privacy Policy you’ll find additional information about the collection and use of your personal information by Doppler, including information on access, conservation, rectification, deletion, security, cross-border data transfers and other issues.