 ES
ES EN
ENTechnical guide: How to insert the tracking script into your store
There are three ways to embed the tracking script on your website, which is required for Site Behavior Automations and Push Notifications. The easiest way is through certain integrations, as the script is automatically installed when you integrate. Another option is through the Google Tag Manager and we will see it step by step. Finally, we will also explain the option to install it manually.
Let’s see in detail the 3 alternatives to insert the tracking script on the site.
Option 1: Through integrations
If your Doppler account has an integration with Tiendanube, Shopify, Adobe Commerce, Easycommerce, PrestaShop or Mercado Shops and Woocommerce you should not worry about inserting the codes. You will have already completed this step when doing the integration.
Integrate with these platforms easily, we explain how to do it:
- How to integrate Doppler with Tiendanube
- How to integrate Doppler with your Shopify store
- How to integrate your Adobe Commerce store
- Easycommerce: this is how it integrates with Doppler
- How to integrate Doppler with Mercado Shops
- How to integrate Doppler with PrestaShop
- How to integrate Doppler with your WooCommerce store
Option 2: With Google Tag Manager
For anyone who is not an expert in html, using Google Tag Manager offers a simple and reliable way to embed tags without editing the code of the website. In this case, we will see how to use it to insert the tracking code on the site step by step in order to activate push notifications.
Important: The following instructions take into account that you have already set up Google Tag Manager on your site. Find out how to do it if you still need it.
1 – Go to Google Tag Manager and sign in with your account.
2 – First you must create a trigger to use it in the future tag. Go to “Workspace”, select “Triggers” and then you must click on “New”
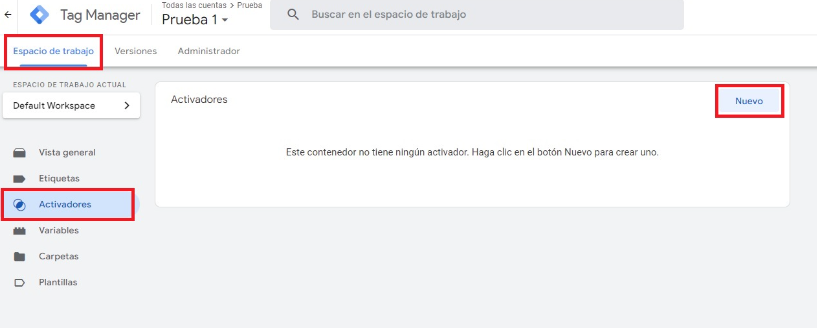
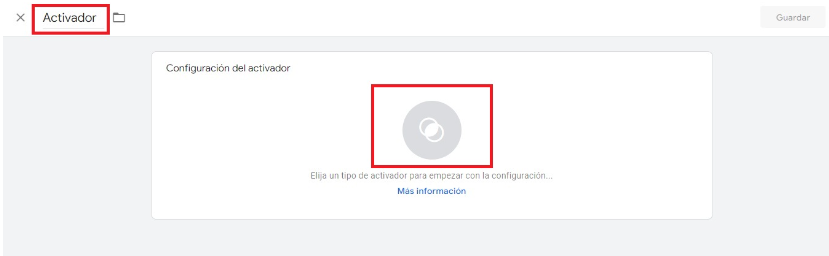
3 – A pop-up will open to configure the activator. Add a title and then select the gray circle by clicking on it to choose the trigger type.
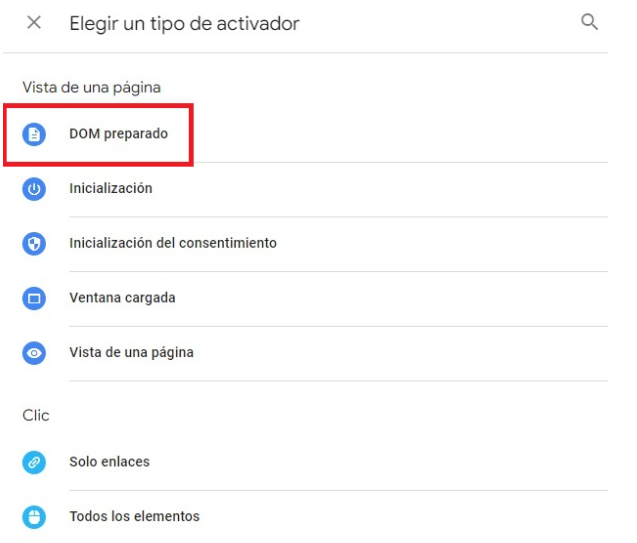
4 – A new pop-up will open. Choose the “DOM Prepared” trigger type.
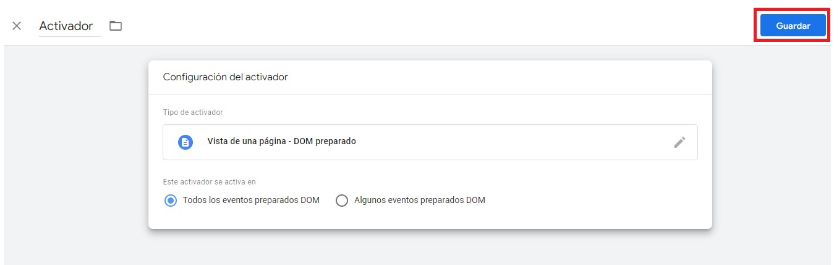
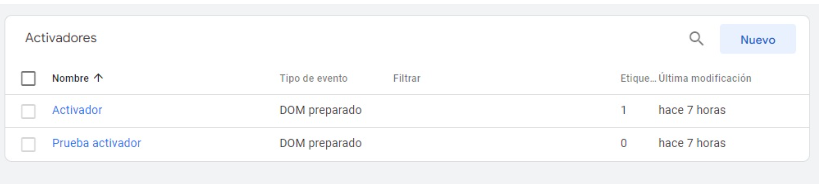
5 – Now select the “Save” button and the trigger will be created.
This is how you will see it in the activators section:
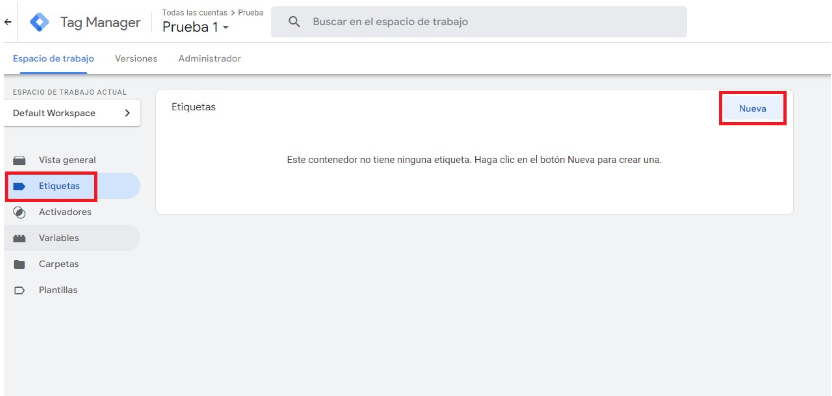
6 – Now it’s time to create a label. Select “Labels” in the menu on the left and continue by clicking the “New” button.
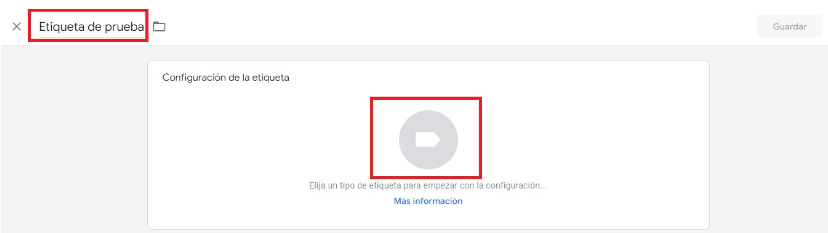
7 – Again, a pop-up will appear. Add a title to your label and then click on the gray circle to configure the label.
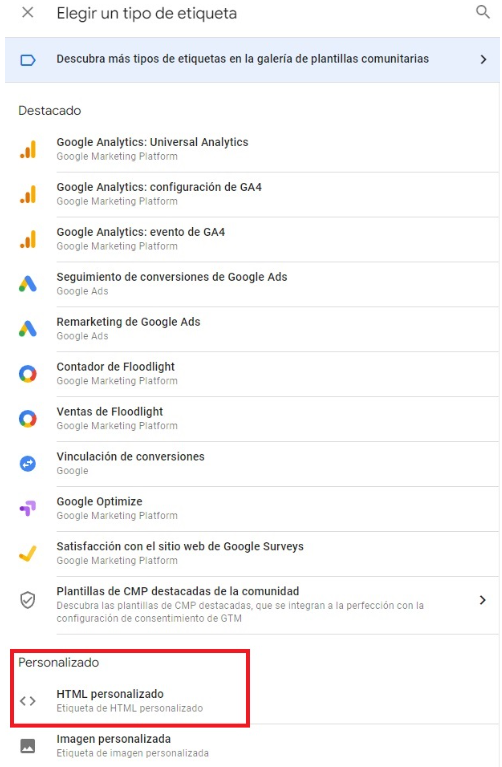
8 – A menu will open on the right. Select the “Custom HTML” option.
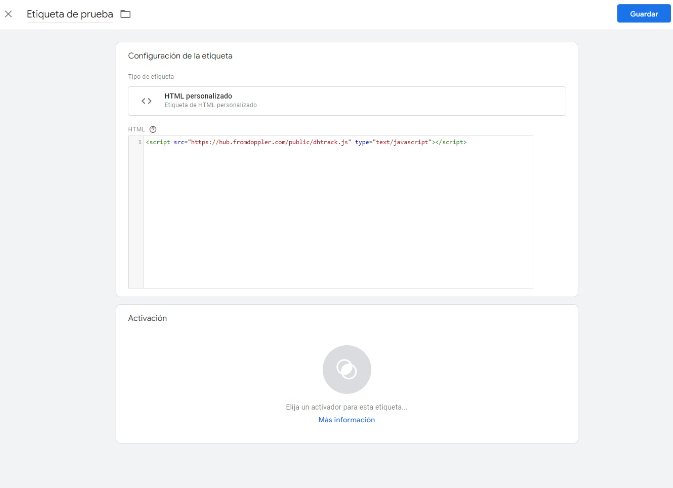
9 – Then you must insert the Doppler tracking code that you see below:
And then you need to add the Data Hub script.

When you have included it, it will look like this:
10 – On the same screen, configure the activation at the bottom. Again select the gray circle and choose the trigger you created previously. It will look like this:
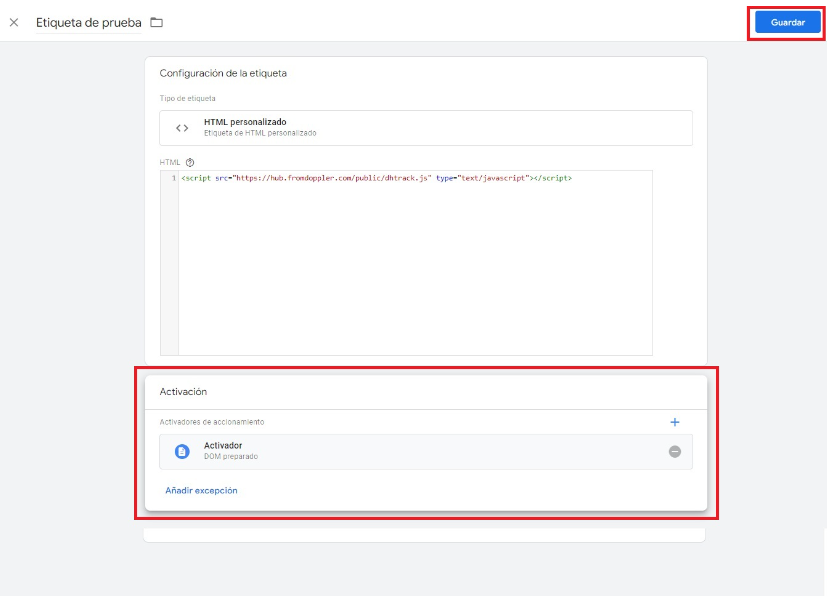
Go ahead by clicking “Save”.
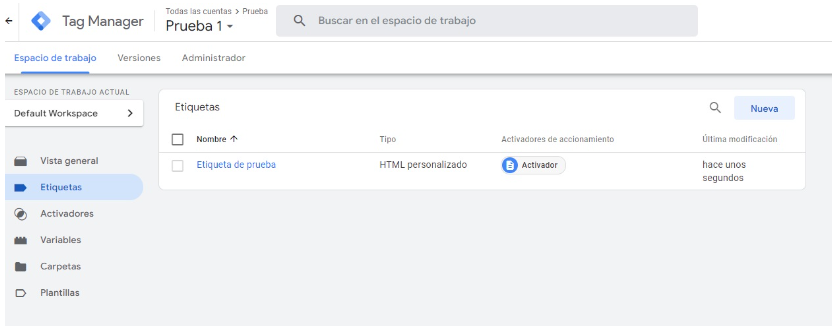
11 – You will see your label created and configured at the end of all the steps.
Option 3: Insert the script in the html code of your site
This option is recommended for those who have programming notions, since you have to edit the html code of your website.
Add this code in the <head> section:

2. Add this code in the <footer> section:

3. Este código también podría incluirse en un archivo js, por ejemplo en footer.js. En este caso, debería incluirse como sigue:
![]()
Important: Verify that by including these codes the DOM is ready to be used and include the code on each page where you want to track visitor activity. Make sure the library does not include any third party libraries (for example jquery) to avoid conflicts with libraries used by different clients.
Finally, learn in this help how to activate and use an automation by behavior on site. You now have all the tools to get the best out of the world of push notifications and Doppler automation for your email campaigns. 💌📣
Do you have any doubts about these functionalities? Contact us at [email protected] and we will help you.


Doppler informs you that the personal data that you provide to us when completing this form will be treated by Doppler LLC as responsible for this web.
Purpose: To allow you to make comments in our help center.
Legitimation: Consent of the applicant.
Recipients: Your data will be saved by Doppler and Digital Ocean as hosting company.
Additional information: In the Doppler Privacy Policy you’ll find additional information about the collection and use of your personal information by Doppler, including information on access, conservation, rectification, deletion, security, cross-border data transfers and other issues.