
 ES
 EN
How to integrate Doppler with Tiendanube to boost your sales
Take your e-commerce to the next level! When you integrate your store with Doppler, you don’t just sync data: you get tools designed to turn visits into repeat customers.
In this guide, we show you how to set up the integration and take your first steps. Once your store is connected, you can apply strategies to maximize your results:
- Capture more Subscribers: add custom Forms directly to your store.
- Recover lost sales: set up an Abandoned Cart Automation to win back people who didn’t finish their purchase.
- Personalize the experience: use dynamic Discount Coupons and recommend products based on your visitors’ real interests.
- Automate your growth: create Welcome Flows for new Contacts or Visited Product Flows to reconnect with potential buyers.
- Optimize with data: take advantage of RFM Segmentation and measure your results with Assisted Sales Reports.
- Interact in real time: add OnSite Marketing to engage your visitors while they browse.
How to integrate Doppler with Tiendanube
1. Log in to your Doppler account. Don’t have one yet? Create your free account.
2. Go to Integrations and click Tiendanube.

3. Select the List where you want to send your store’s Contacts and click Connect.

4. In the pop-up window, enter your store’s email or URL and your password. Then click Ingresar a tu Tienda.

That’s it, both platforms are now synced. You see a screen like this:
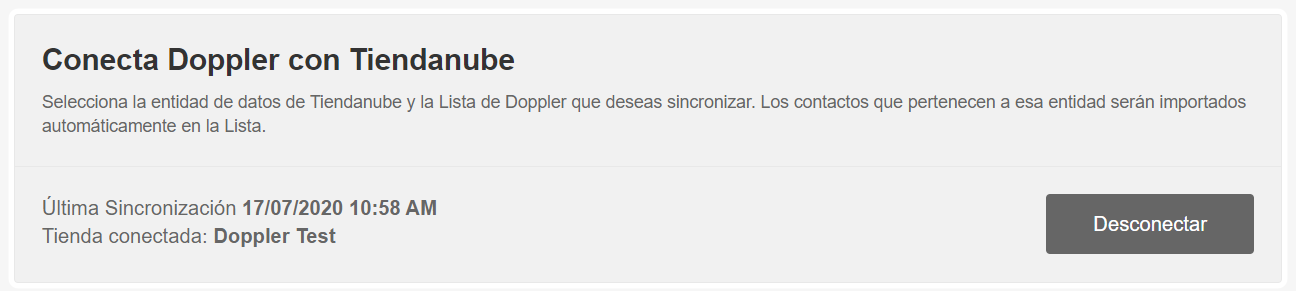
From now on, Doppler updates your Tiendanube Contacts automatically every five minutes. If you need to, click Sync on the right to see your store’s latest Contacts in your Lists right away.
Important: to use OnSite Marketing and On-Site Behavior Automations, you also need to install the tracking script with Google Tag Manager. Here’s how.
Field and List mapping
Besides importing your Contacts automatically, the integration lets you map Fields and Lists between both platforms. This way, you get more complete information about each Contact in Doppler.
Mapping syncs Tiendanube data entities with your Doppler Lists, along with all their information. That information is saved in your account’s Basic Fields and Custom Fields.
Tiendanube distinguishes three types of people:
- People who subscribed to your newsletter through a Form on your store but never logged in.
- People who made purchases with orders over $0.
- People who signed up on your store or started a purchase without finishing it (abandoned cart).
In Doppler, these three types are called Contacts, Buyers and Customers, respectively.
In Doppler, you can link each type to a different List, which you need to create beforehand. For example, you can create three Lists called “Tiendanube Contacts”, “Tiendanube Buyers” and “Tiendanube Customers”, and link each type to its List.

The same person can be in more than one List. For example, a Customer who is also subscribed to your newsletter appears in both Lists. And someone who started as a Contact, signed up as a Customer and then made a purchase appears in all three.
After linking each type to a List, click Next. A screen opens where you can map each Tiendanube Field to its Doppler equivalent. If you don’t want to save some data in Doppler, skip that Field. In the example, we mapped the Basic Fields [[[Email]]] and [[[Firstname]]], and the Custom Fields [[[TN_id]]] and [[[TN_Telefono]]], which were already created.
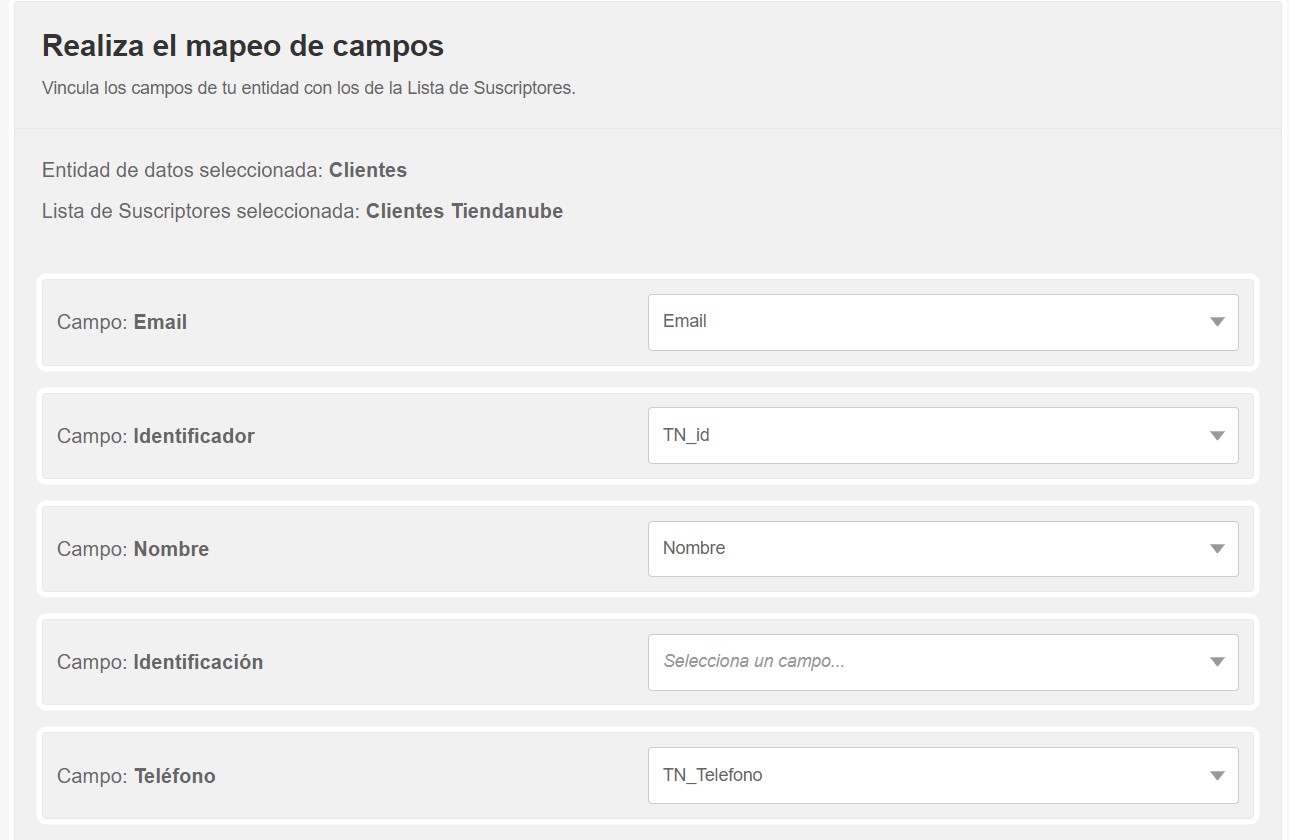
Important: before mapping, create the Custom Fields you need. Here’s how to create them.
When you’re done, click Sync at the bottom of the screen. That’s it, your Field and List mapping is complete.
If you map right after activating the integration, you can segment your Contacts from day one with their information: name, age, nationality, phone number, whether they’ve bought from you and how many times, and more.
How to keep your Lists clean
Your online store is a great source of new Contacts. That’s why it’s important to check that they’re real Subscribers interested in your business, not fake accounts. Fake accounts can damage your sender reputation and even prevent you from sending your Campaigns.
Doppler and Tiendanube recommend using Double Opt-in Forms. These Forms send a confirmation email to verify that the address exists. The person joins your Lists only after clicking the confirmation link.
This way, you keep your Lists clean and up to date, and build trust, because each person confirms their interest in receiving your communications.
With Doppler, you can customize every element of your Double Opt-in Forms and the confirmation email, and even add a welcome email. Plus, they’re very easy to add to Tiendanube! Here’s how.
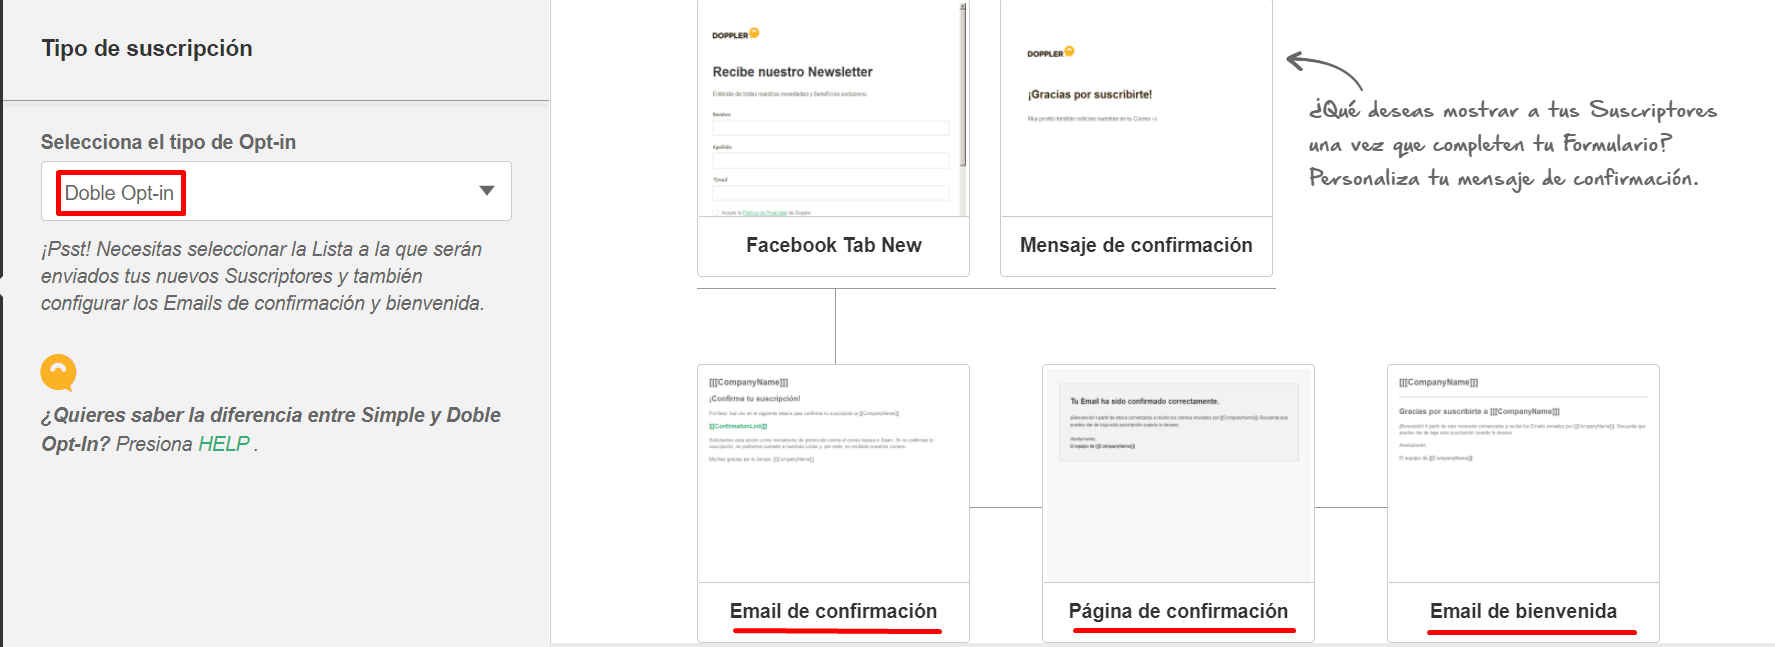
Important: if you use Tiendanube’s subscription forms, Doppler sends a standard email to each new Contact to confirm that the address exists. It works just like double opt-in: the person joins your Lists only if they confirm their subscription.
How to add your Tiendanube products to your Campaigns
1. In the Editor, find the Products element on the left. Choose a layout for your products: one column, two columns, three columns, or image and text. Drag the element and drop it into the body of your email.
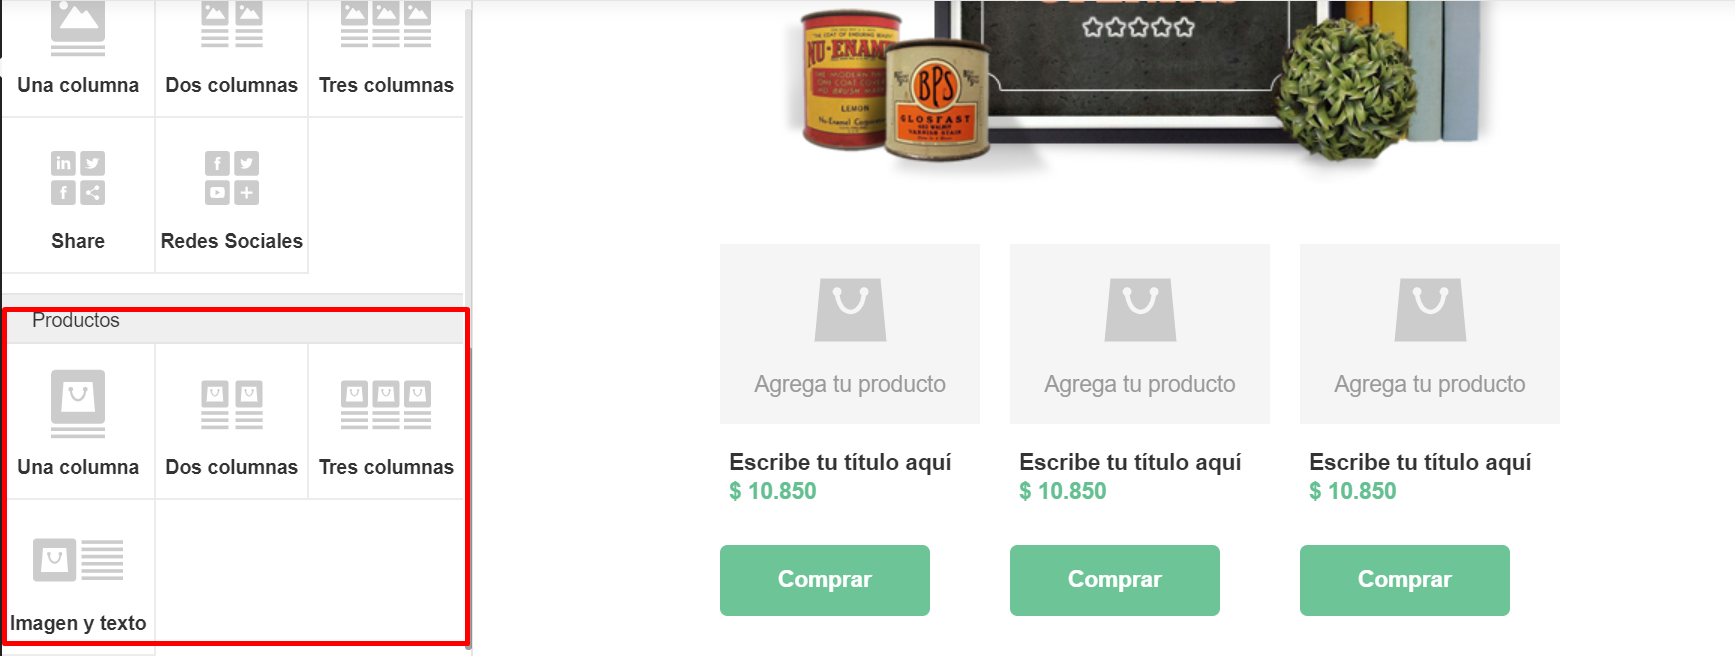
2. Click the Products element. In Element properties, customize its look: button and text colors, product photo, link to your store and more.
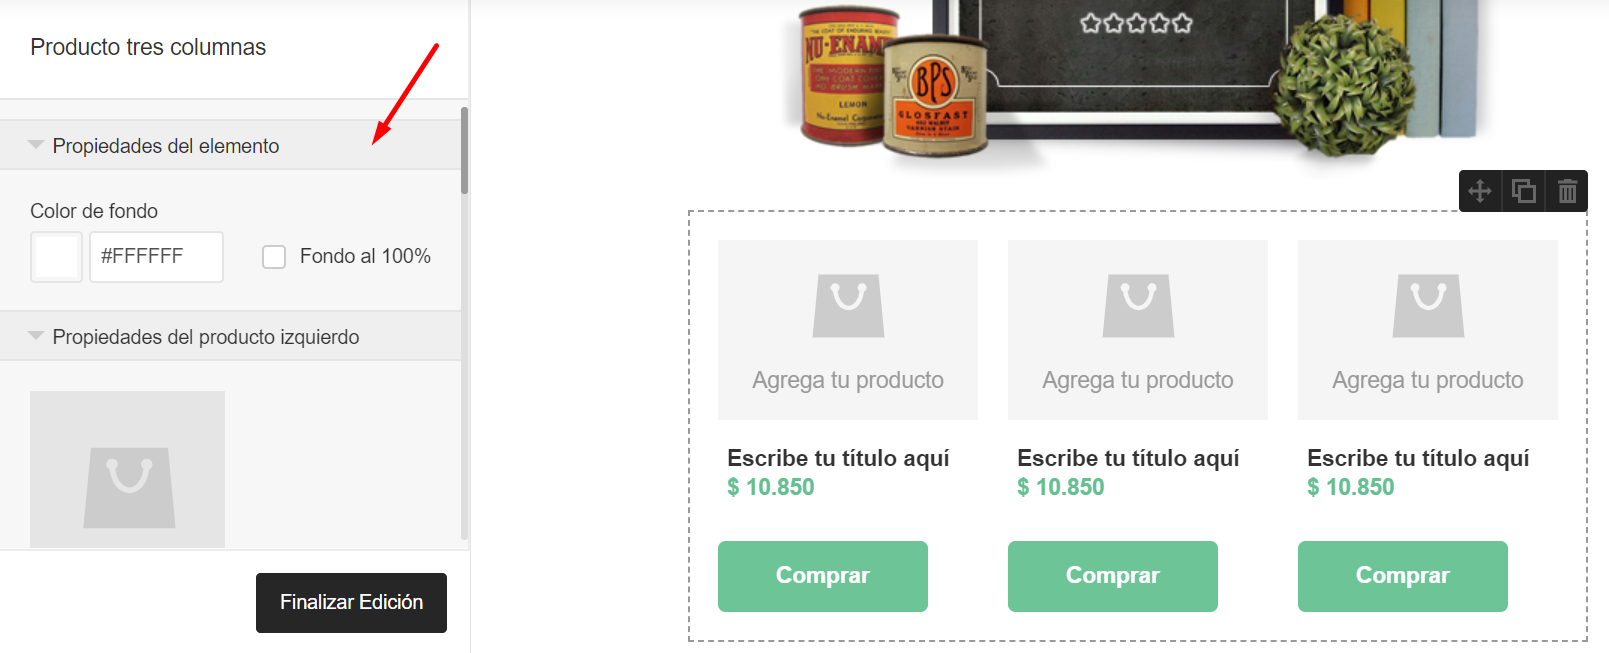
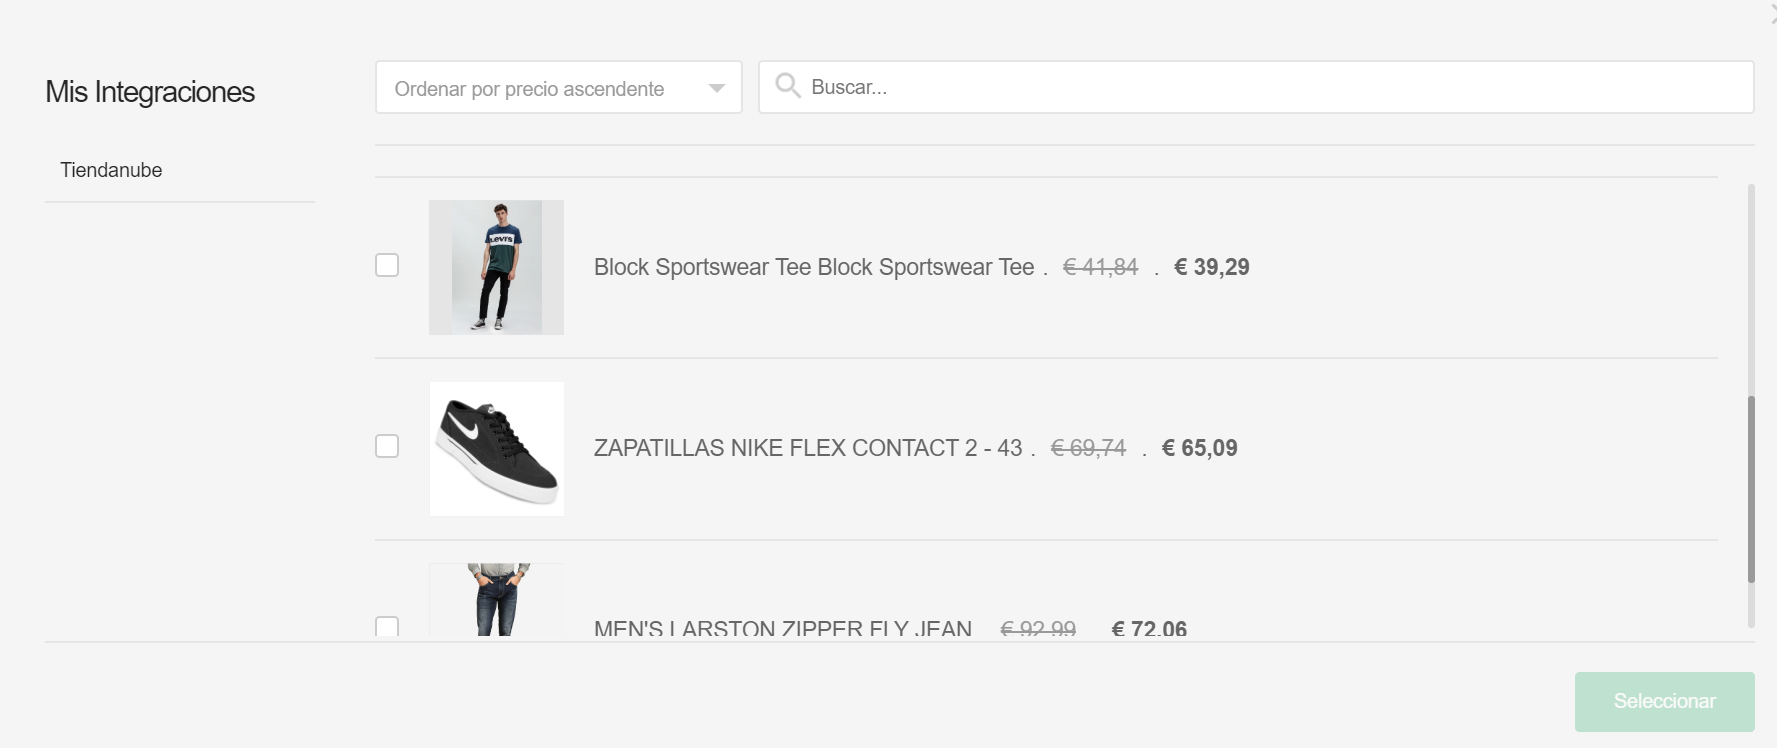
3. Choose the products you want to show. Click Add your product and then Edit.

A gallery opens with all the products in your store. Choose which ones to include in your Campaign.
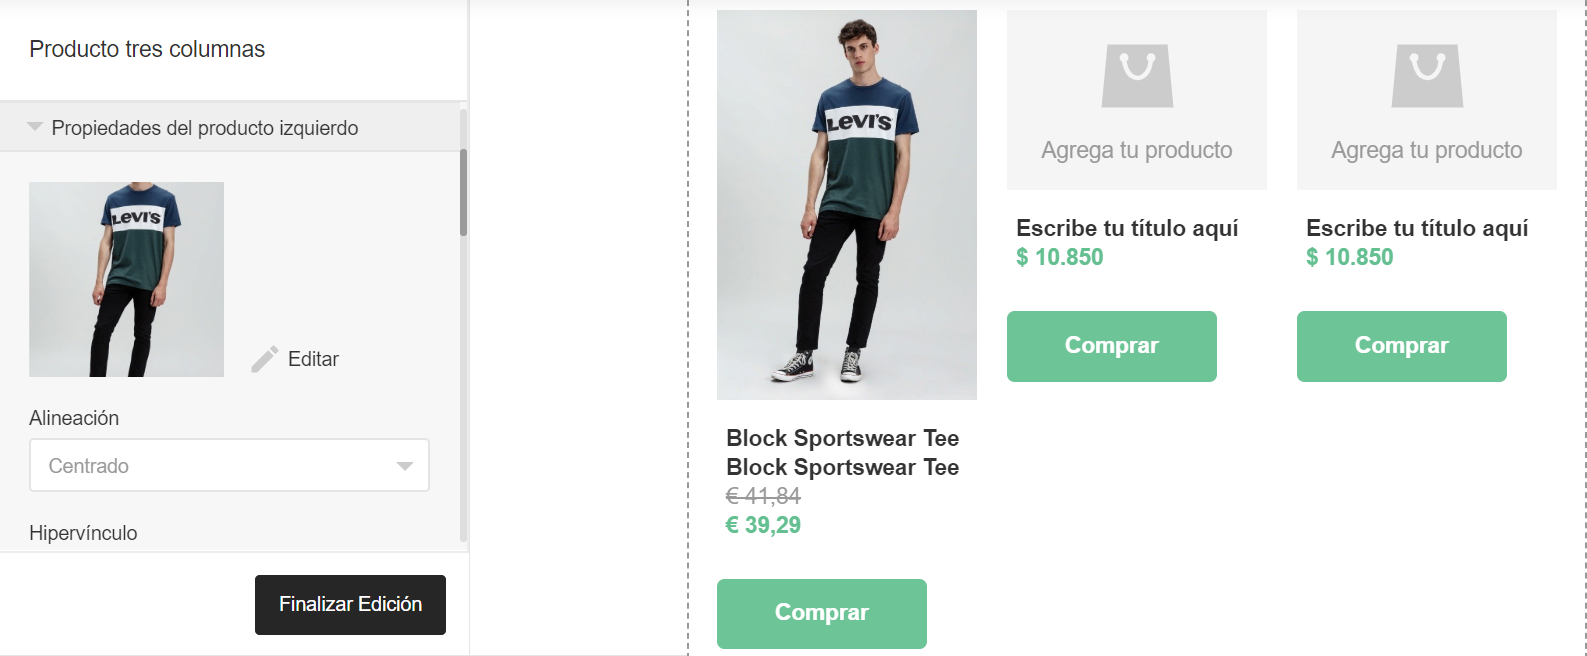
The Editor adds the product image, price, description and link to your store.
How to use the Abandoned Cart and Visited Product Automations
These two Automations help you win back people who abandoned their cart or viewed products without starting a purchase. Here’s how to activate them, step by step:
You now have everything you need to get the most out of Doppler and your Tiendanube store. Best of luck with your Campaigns! 💛
-
Apply what you've learned!
-
Create a free account in Doppler and boost your business strategy with Email, Automation & Data Marketing. No monthly sends limits!
SIGN UP FREE No contracts
or credit cards needed
Hola!
A la hira de mapear los campos hay formar de separar nombre y apellido?
Por lo general siempre aparecen Nombre y Apellido juntos y no es muy atractivo a la hora de mandar un mail personalizado donde solo queremos mencionar el nombre del cliente.
Gracias!
¡Hola Kevin!
Los campos los puedes personalizar a tu gusto, aquí te dejamos un artículo que puede servirte para armar, por ejemplo, nombre y apellido por separado: https://help.fromdoppler.com/es/como-agregar-un-campo-personalizado/.
Cualquier otra consulta puedes volver a escribirnos.
Saludos, Sole de Doppler.